Have you ever stitched the pieces of your block together, looked at it, and wondered why it doesn’t look right?
When assembling blocks, the small units are assembled into rows first, and the rows are then joined together. You have probably turned one of the small units around while doing this without realising it – something we have all done from time to time!
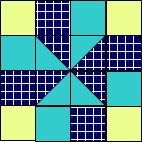
This Friendship Star block should be arranged like the photo on the left before the rows are stitched together.
What happened to the Star?
Can you see what has happened in the photo on the right?
The bottom row has been turned round by mistake! The block doesn’t look right at all.
A good way to keep the order correct (instead of the usual method of stitching all of the first row together, and then all of the second row etc) is to stitch the row seams a column at a time “string piecing” the rows together as you go. You may find this confusing at first, but it’s worth persevering, as it avoids mistakes in the long run. There is a video at the end of this page if you want to see it being done.
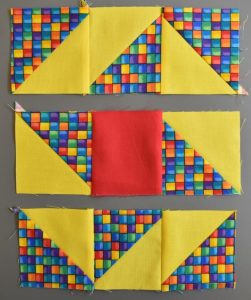
This close-up shows how the rows become attached together with twisted threads at the half way stage:
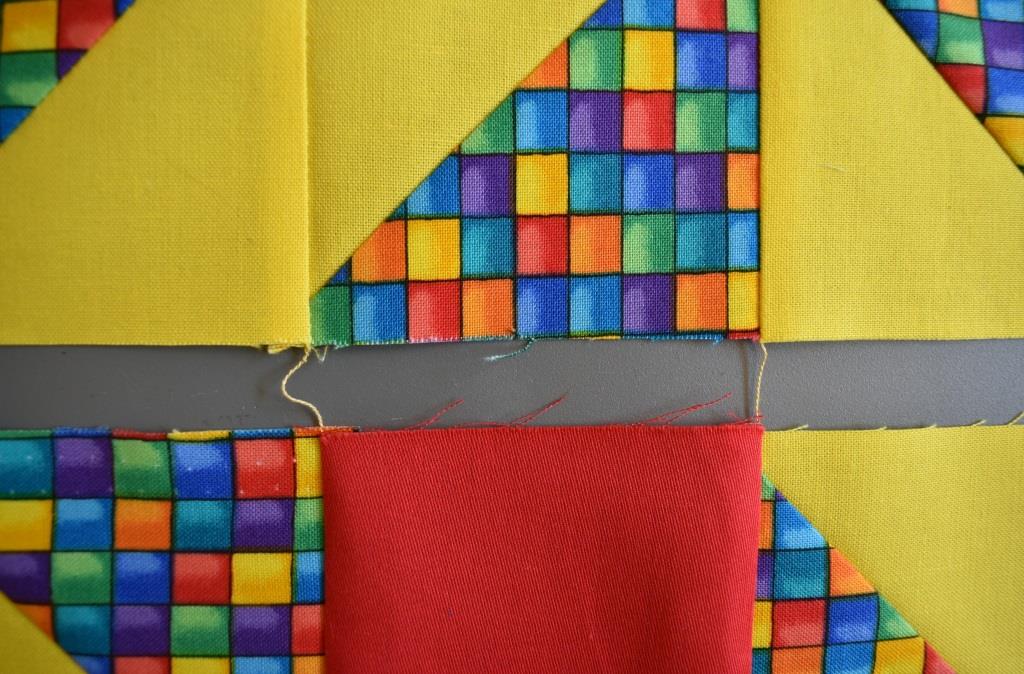
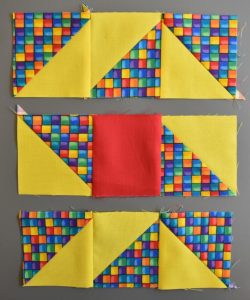
Can you see below how the whole block is held together like this?
It’s not possible to turn the row round by mistake now, is it?
How to string piece a block

- First arrange all the pieces into the block design.
- Make sure that all the half square triangle units are the right way round – it is easy to turn them round without realising.
- If you are using one of my patterns, check carefully that you have placed any half square triangle units with the pressing direction of all of the diagonal seams as shown in my diagrams, as this will help you obtain perfect points when the pieces are stitched together. (You can read more about this in the Pressing for Perfect Points pages in the Techniques section of the website)
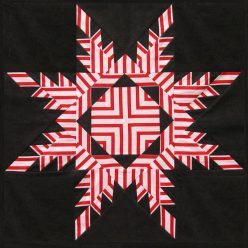
This example shows Nelson’s Victory. It’s one of the blocks from the Provencal Sampler Quilt, which is a good beginner’s or improver’s project. These string piecing instructions are included if you buy this pattern.
-
Flip over right hand column Take the first piece on the right hand edge, and turn it over on top of the piece next to it, which you want to stitch it to. Pin the seam (at the right hand side).
- Do the same for each piece in this column. Flip them out to check that the pattern is still correct. Flip them back, and stack the pinned units in order, with the top piece at the top of the pile.
- Being careful not to turn any round, stitch the pinned seams in stacked order with an exact ¼” seam; not stopping to fasten off or cut the threads between units, but feeding the next one under the machine foot just as you finish the previous one. Allow the machine to make a few stitches on nothing in between, so that a short twisted thread is left between the pieces – you shouldn’t need to lift the presser foot up. This will give you a string of little flags. Don’t cut them apart, as this keeps them in the correct order.
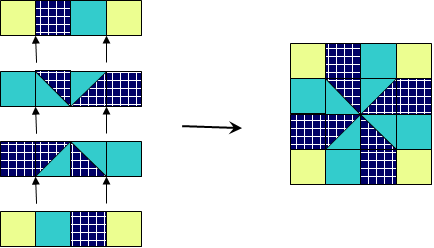
- Look at the original block diagram – you have not stitched all of one row across, you have stitched the last seam in each row. Identify which seams these are on the block diagram (they are shown with a different style arrow in the diagram at the top of this page), press seams in the direction shown and return them to the arrangement. Check that you haven’t turned the whole column round!
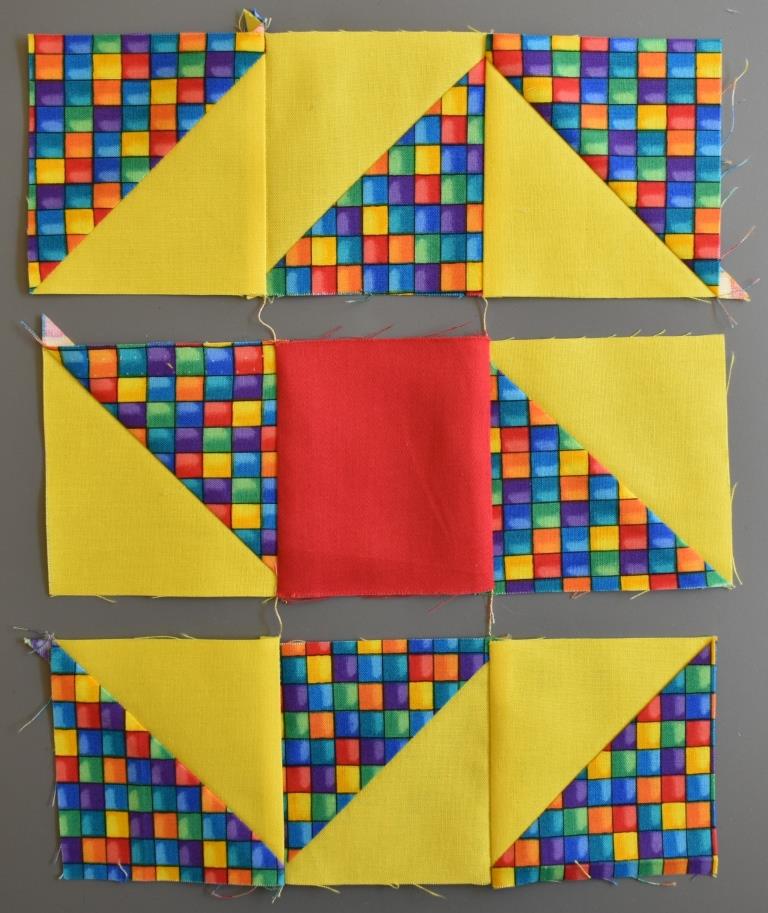
 Stitch and press the other columns similarly, and you will end up with the complete block held together – the vertical row seams stitched properly, and the complete rows held together with short threads. Don’t worry that the triangle points look “chopped off” – the part beyond the new point is the remaining seam allowance, and will disappear when the row seams are stitched as well.
 Once the entire block is linked, the rows can be stitched together with a ¼” seam to complete the block.
If you want to see how it’s done. watch this video to see me “string piecing” a block. This one is called “Flying Dutchman”, but the principle is the same for any block.
Try this on a block – it really does make a difference, and should allow you to succeed without some of the frustration you may have found when trying blocks that are a little beyond the basic.
For other useful techniques and tips, have a look at the Techniques page
Have a look at some of the projects that I have made using this string-piecing technique on the Wall hangings page