
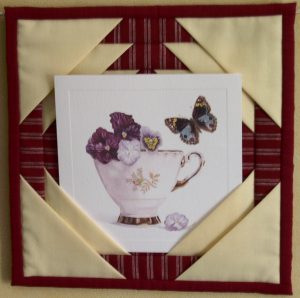
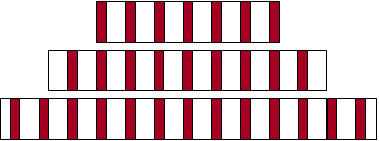
Big cards, little cards – this Multisize Bunting can take any of them.
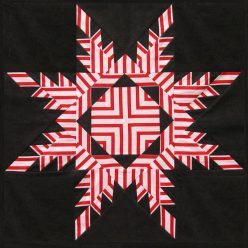
Based on the Pineapple Log Cabin design, the corner triangles are made from folded squares, which create pockets into which cards can be tucked.
Because this Multisize version includes pockets on each round of the “pineapple”, each unit can take small cards or larger ones – just tuck them into the pockets of the correct size.
I have chosen colours that would be suitable for any occasion- but you could choose fabrics to fit with your room décor or to suit a particular occasion such as a child’s birthday, Christmas or a Silver Wedding celebration.
Displaying the Bunting
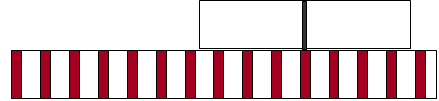
The units can be stitched onto a cord, and strung across a wall, where they look decorative, whether empty or with cards tucked into the pockets.

Alternatively, the units could be joined in a different way, and hung vertically down a door.
How is it made?
Because there are full triangles (mostly hidden behind the layers) creating the pockets in every place where you can see the plain cream fabric, a new method was developed to construct the pineapple log cabin.
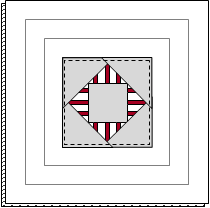
A special grid is traced onto a fabric foundation, and used to line up strips and triangles, to make sure that all of them are at the correct angle to give this stunning pineapple effect – you don’t need a special ruler or anything.
On the next round, larger triangles overlap the first ones, leaving only part of them visible – this gives the “pineapple” pattern.
The method layers the backing fabric and fusible wadding with the foundation first, so that as the block is assembled, it is also quilted, reducing the time needed to complete the project at the end.
Using striped fabric
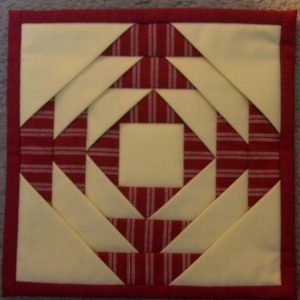
I have used a striped fabric to give extra focus to the design.
I think it looks particularly effective if the stripes all line up on the different rounds.
Instructions for cutting the striped fabric to achieve this effect are included in the pattern if you would like to do this too – it’s not difficult.
You need to cut a paper strip for each correct size to use as a template.
Fold each one in half, open out and mark the centre fold with a pencil.
Place this template onto your fabric strip so that the mark is at the centre of your chosen stripe colour (my diagrams show the red stripe as the centre), and then cut the fabric at the ends.
Remember, the ends of the different sized strips may not have the same part of the stripe design; it is keeping the centre the same that is important.
Size options
The blocks can all be made the same size, or as shown above in graded sizes.
The size of each unit is determined by how many rounds of strips and corner triangles surround the central square.
The basic instructions give a graded string of nine units, ranging in size from 1 round to 5 rounds. The “1 round” unit is too small really to put cards in, but they look quite sweet to finish off the row, if you have enough fabric.
However, a string of bunting can be made with any number of units to suit your home, so information is given at the end of the pattern if you would like to adapt the size given.
If you would like to make this lovely and unusual project for yourself, the download pattern is available for £8 in my Shop
As with all my patterns, there are plenty of detailed instructions, diagrams and tips to help you get a really good result.
Other card hanger patterns are available too – to see these, click here