How can you get a cable border which is exactly the right size for your quilt? The first step is to know how to measure your quilt top:
Width
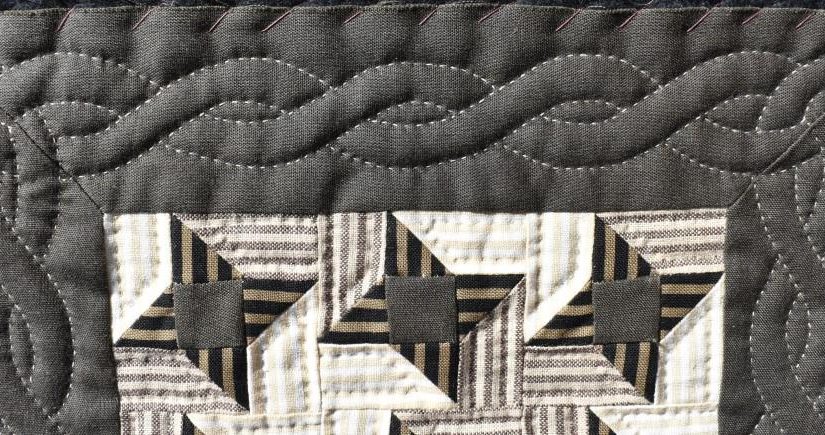
First measure the border width.
Your quilting design will need to be a little narrower than this, so to calculate a suitable width for the cable:
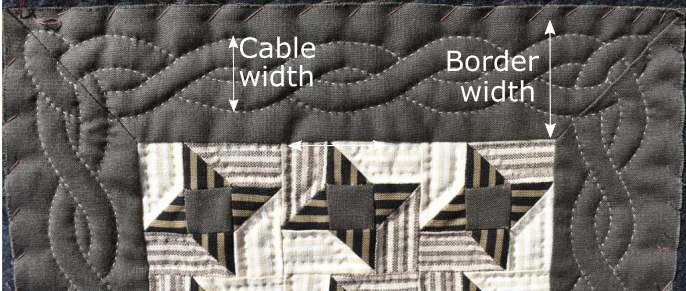
- If you haven’t already stitched anything else next to it, subtract ¼” from your measurement for the outer edge seam allowance. This is now your finished border width.
- Subtract at least another ½”. This will give a little “breathing space” around your quilting design on the inner and outer edge, and will avoid the need to quilt an area which has a seam allowance under it.
- The remaining measurement is your cable width
Length
Now measure the length of the border without the border corner square (this is the Inner border length). (Note that if your quilt is rectangular rather than square, you will have two different inner border lengths). Corners are worked out separately.

You now need to find a suitable length for your cable so that a whole number fits into your Inner Border Length. This can either be done by maths, or by pleating a long strip of paper – more details are in the Drafting Cables pack available in my Shop.
Cable style
Cable quilting designs can look very different, depending on your choice of shape and style. Look at the two cables below – both are the same length, and have the same number of strands, but because the first one is fatter compared to the length, it looks much more rounded.


If you have a big quilt, you may have a choice between two or three options for your cable length – in a particular length and width of border, you could have a lot of short cables, which would look rounded, or a smaller number of more stretched out cables.
Any ratio of cable width : cable length between 1 : 1 and 1 : 1.8 looks OK, but I think that about 1 : 1.4 gives the most pleasing proportions.
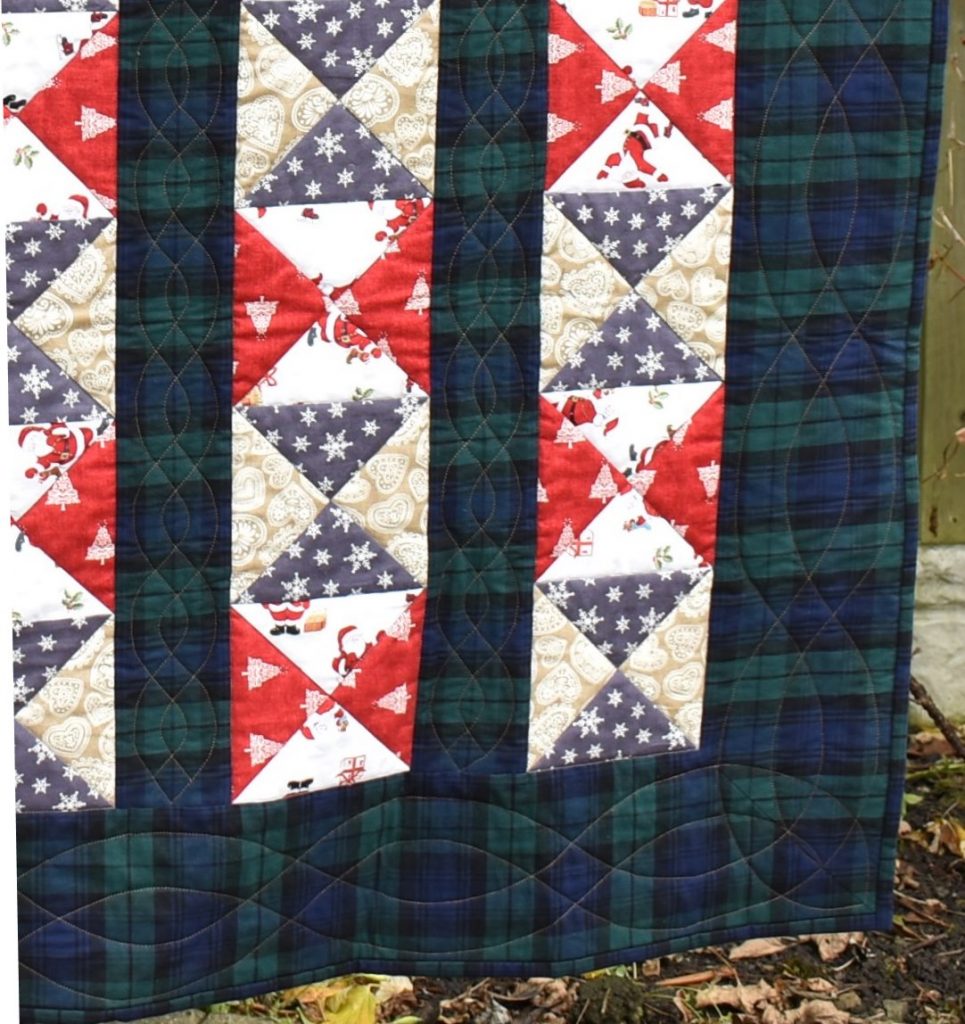
I decided that this Cotton Reel Strips quilt would have two sizes of simple two strand cables; a smaller one for the sashing strips, and a larger one for the border.
Can you see that the larger one is proportionately thinner (ratio 1: 1.8) than the smaller one (ratio 1:1.5)?
The number of strands that you include can also change the appearance: These two cables are exactly the same shape and size, but the second one has more strands.


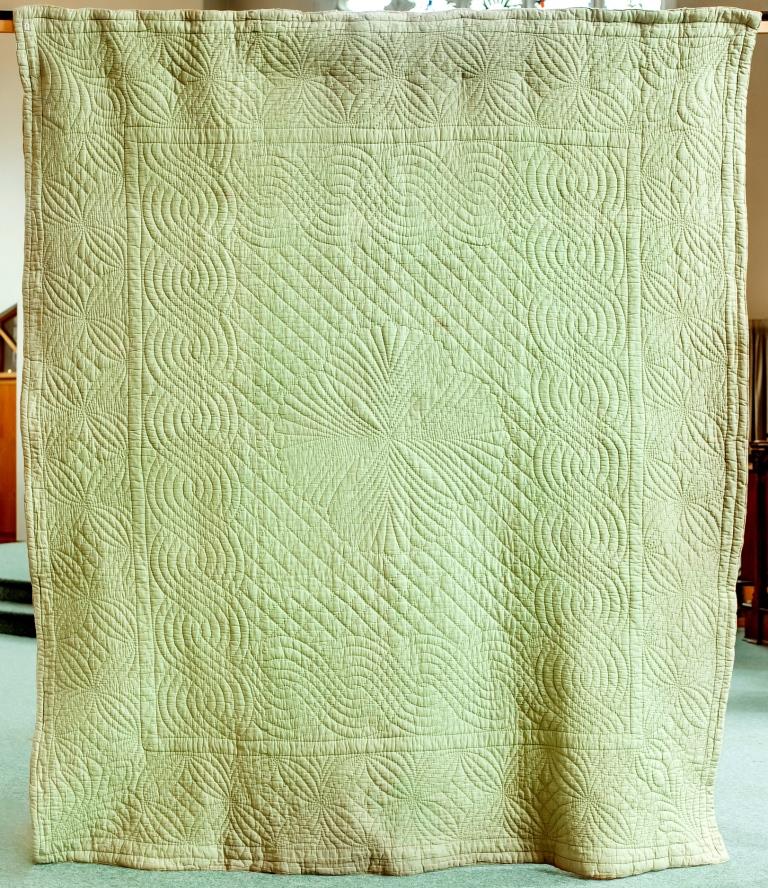
Several of my antique quilts have cable designs.
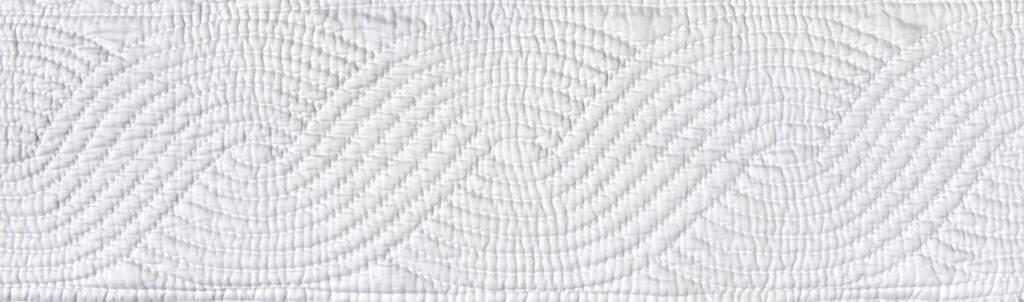
Have a look at the Green & Gold Welsh wholecloth for an example of a very fat six-strand cable.
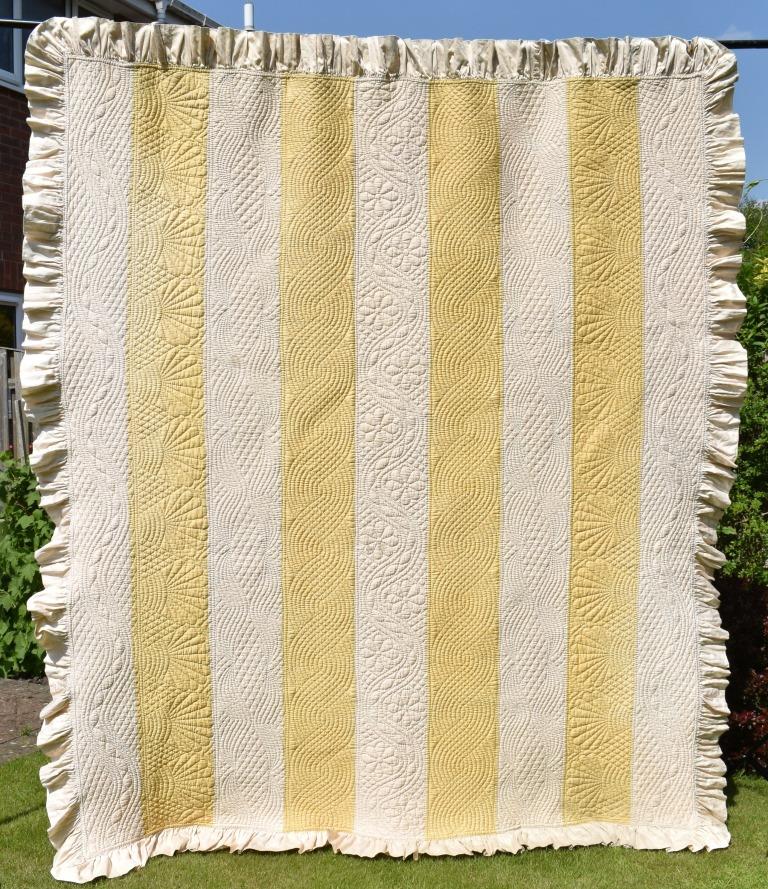
Or at the Double-sided North Country Strippy Quilt for an eight-stranded fat cable
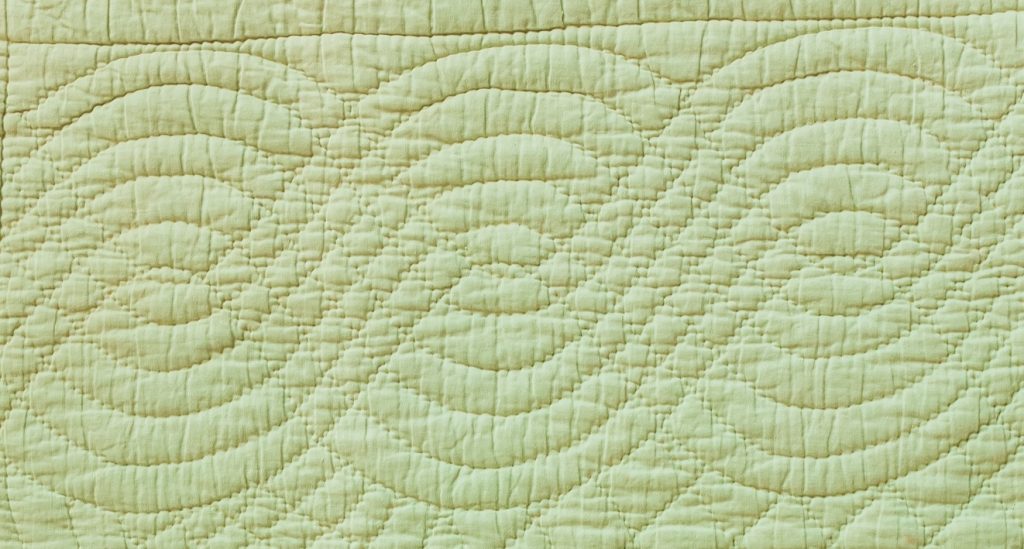
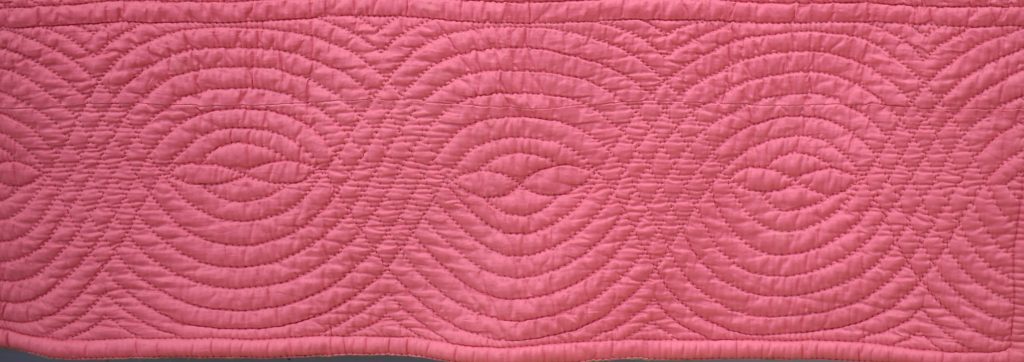
Here is another example of an fat cable border:
Drafting Cable designs
Once you
have chosen the length and width of cable that will fit your borders, you need
to draw it out.
If you have a logical mind, you may be able to work it out from the diagram
below.
As with any new skill, there are of course a few hidden pitfalls which can make it tricky to get the cable design right. However, even if you don’t have a particularly mathematical brain, if the cable structure is broken down into a sequence of step-by-step instructions, drawing one section of a curve at a time, it makes the process much easier.
If you would like to try this out by yourself, I have developed a set of written instructions which explain how to draw the cable onto a background grid, using reference marks to get the cable symmetrical and even.

Each step is shown separately with detailed diagrams, and there are various options to explore which can change the style of the cable. For example, in this cable, the lines don’t cross over, but twist like a rope.

But how can you reliably get the size of cable you need for your quilt? My special grid has been designed on the computer so that it can be stretched or squashed to whatever shape and size is needed. To get a fat cable or a thin cable, only the grid proportions are changed – the instructions are exactly the same.
Look back at the fat and thin cable diagrams nearer the top of the page – can you see that the cable structure crosses the reference marks at the same places on the grid, but that sometimes the grid “squares” are not square?
The complete technique pack for Drafting Cable Designs is available in my online Shop for £10.
As well as step-by-step instructions for both styles of cable, and a variety of sizes of grids to practice with, this pack includes access to a Microsoft Word file of the Mastergrid, so that you can then print out a grid of whatever size you need (ask me for an .svg file if you dont have a PC).
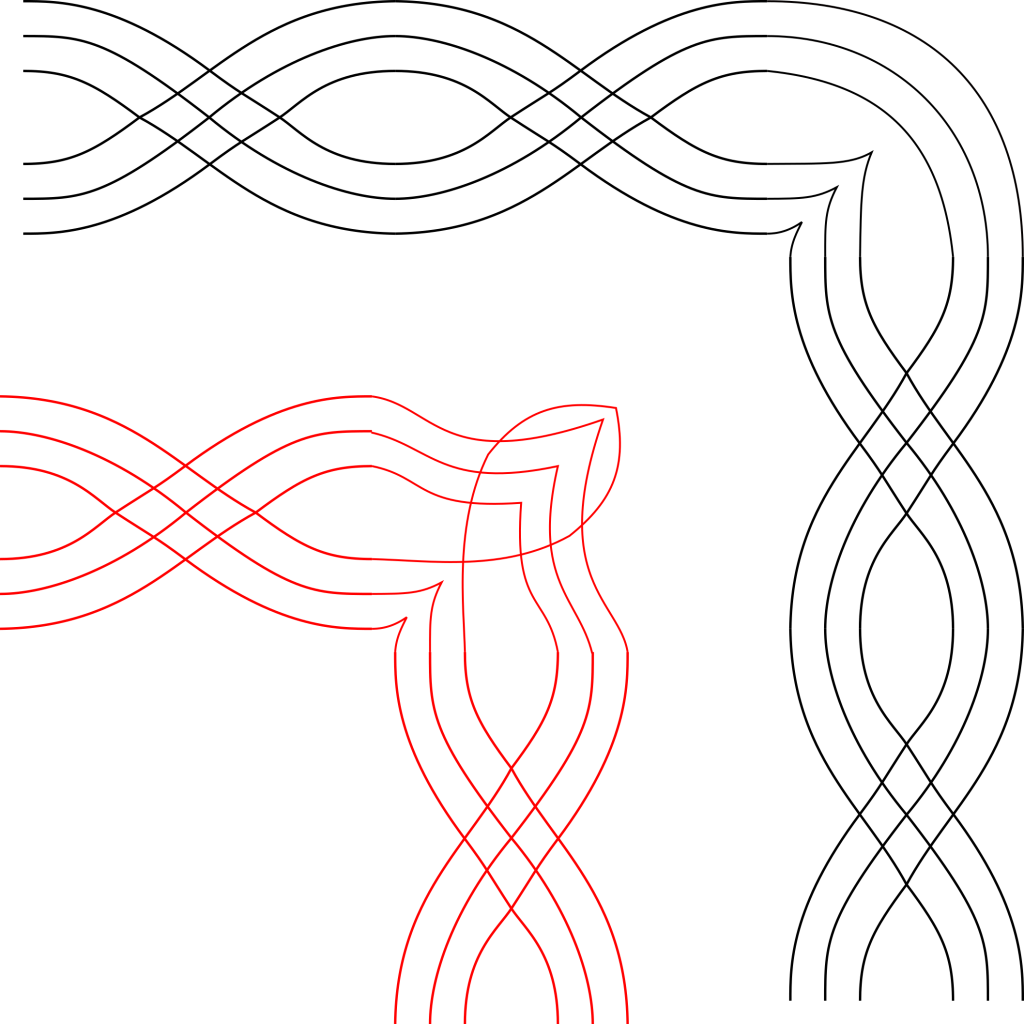
Corners
Many quilters worry how to make their cable turn the corner – there are actually a couple of ways to avoid this completely, but if you decide to design an integrated corner, it does look really classy. The technique pack includes several design suggestions, and shows you how to draft corners that flow from your cables as well.
Here are two possibilities for a three strand cable:
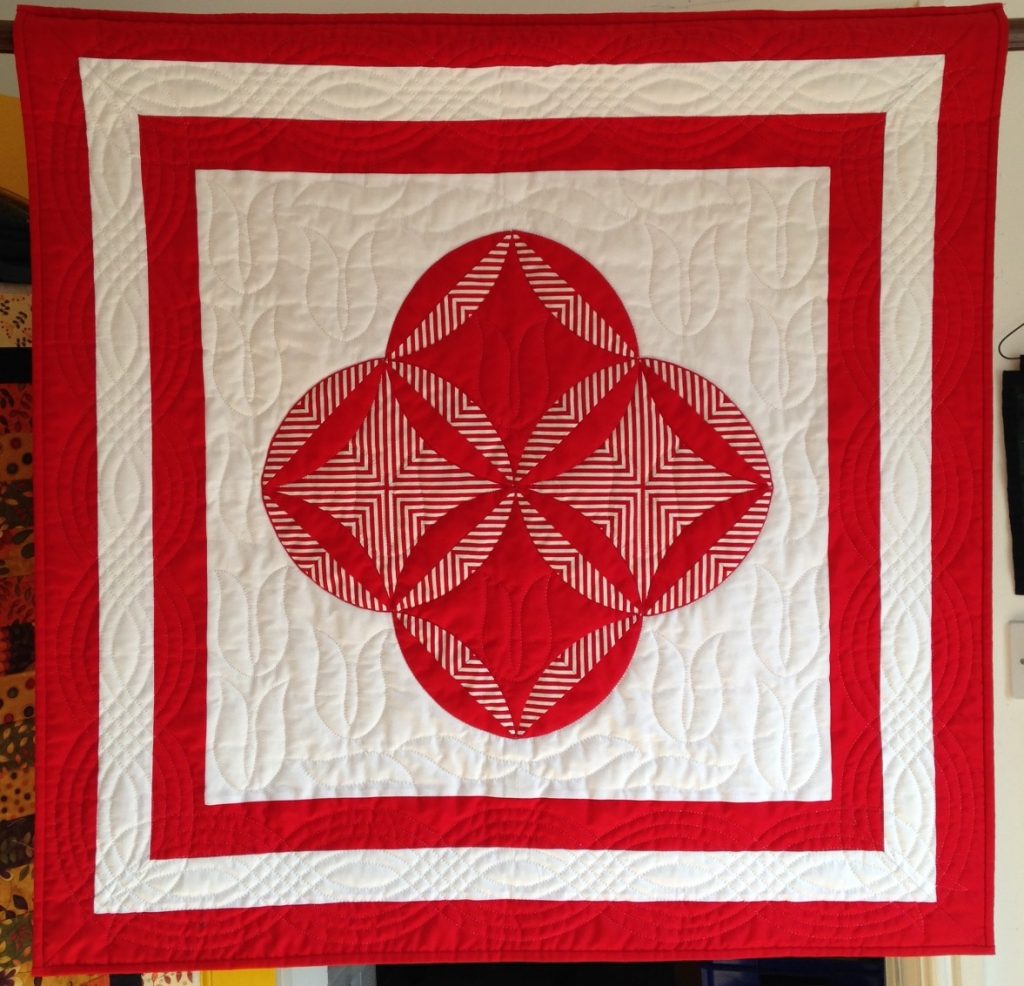
This quilt of mine, inspired by an antique Rob Peter to Pay Paul quilt, has quilted tulips in the centre panel, so I designed a special tulip corner for the five-strand cable border.
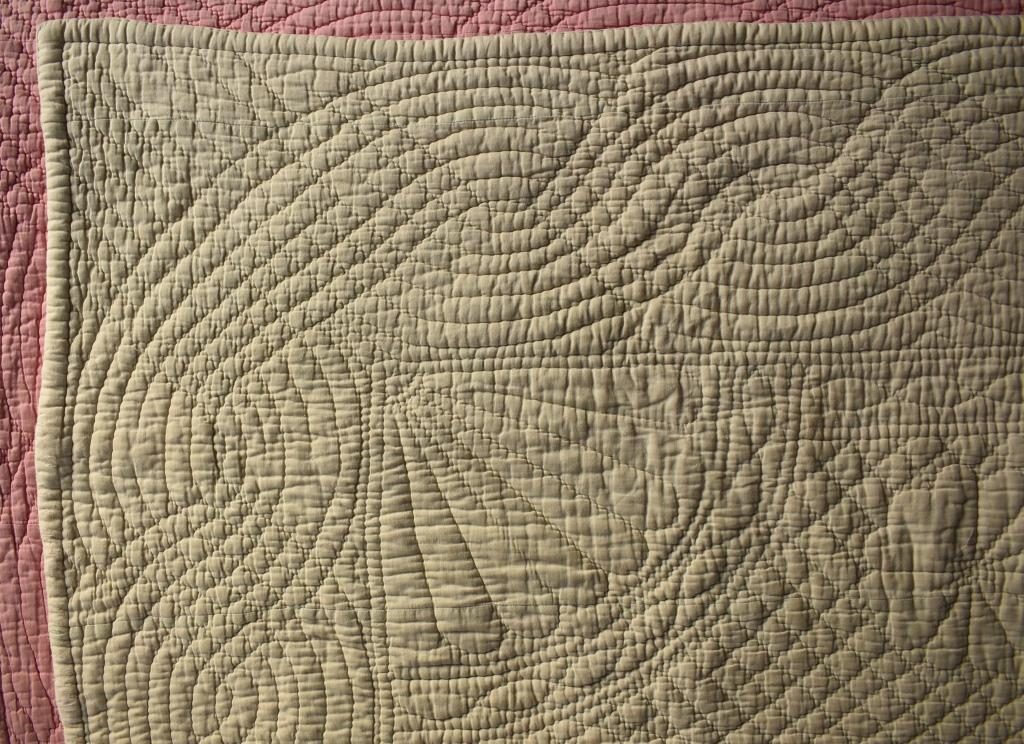
I have just bought this Cream & Pink Welsh wholecloth antique quilt simply because it has an unusual way of treating the cable at the corners. If you look closely, you will notice that her cables don’t reach the end of the inner border evenly – but this corner design allows a “fudge” to make it look fine!
I have a particular interest in how quilting designs work at the corners – you can read more about it on the page about Border corners.
If you have never tried to design any quilting pattern yourself, why not give cables a try?
The Drafting Cable Borders pack could give you all the help that you need.