After learning how to make and use half-square triangles in the first instalment of this series, on this page, we will move onwards, discovering how to make quarter square triangles.
This will be illustrated by two traditional blocks: Ohio Star (an easy one well known to many of you already) and Silent Star, which has far more points, so is quite a bit trickier. But don’t worry – as usual, I will show you how to avoid problems, and share my tips so that you can achieve perfect points!
A quarter square triangle unit is, of course, a square divided down both diagonals.
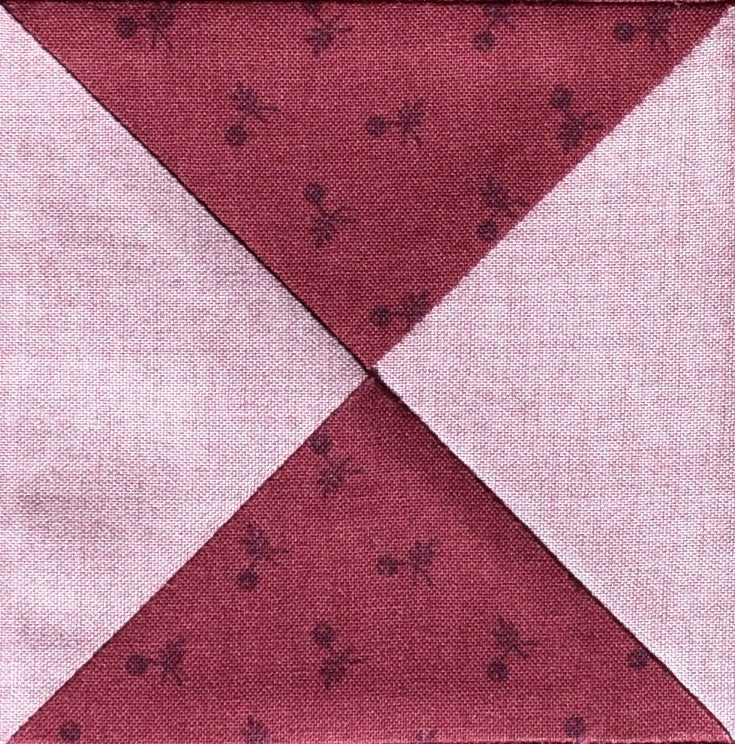
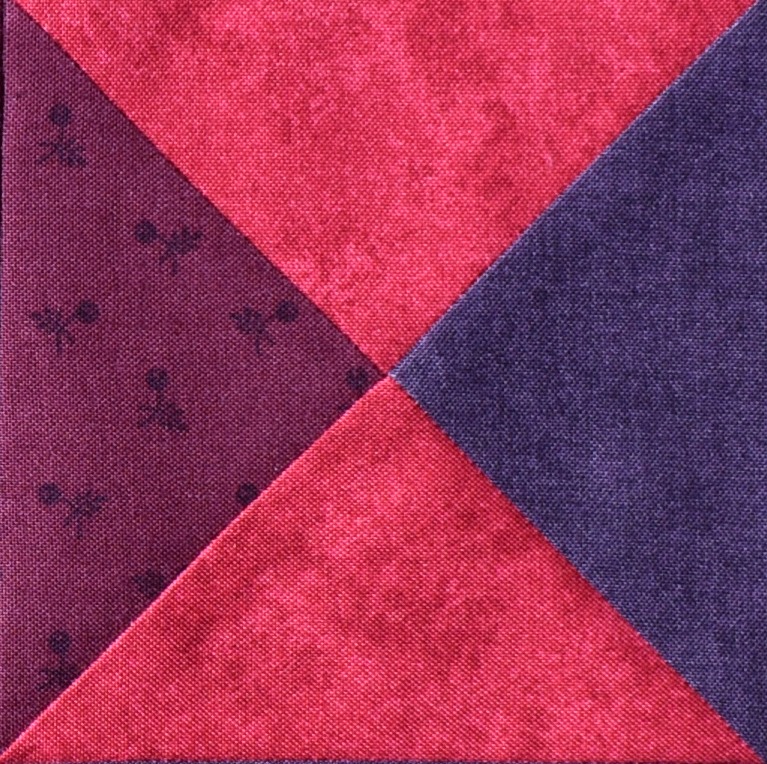
They are often found made with two fabrics; with alternating dark and light triangles. But they can also be made using three, or even four different fabrics.
They are usually made with a quick piecing technique, in which squares are stitched together, and then cut apart again. This needs to be done in two steps to obtain quarter square triangles.
What size squares do you need to start with? You just need to add 1 ¼” to the desired finished size of the unit. (remember that the “finished size” refers to the size when everything is stitched into a block; i.e. after all the seam allowances have been used up.)
So, for example:
- to obtain a two-colour 3″ finished quarter-square triangle unit, you need to start with a Dark Square and a Light square which both start 4 ¼” square.
- to obtain a two-colour 5″ finished quarter-square triangle unit, you need to start with a Dark Square and a Light square which both start 6 ¼” square.
- to obtain a four-colour 6″ finished quarter-square triangle unit, you need to start with four 7 ¼” squares of different fabrics. This will actually make four finished units of course, as you only need a quarter square of each colour. But you may need several of these units – or you could keep the spares to use in another block.
Making quarter-square triangle units
These units can also be quick-pieced – a useful technique in which squares are stitched together and cut apart to make multiple units at once. The first step in making quarter square triangles is the same as half square triangles, but (as you have seen above) the squares used are slightly bigger. (More information about making half-square triangles, including a video, can be found in the first instalment of Skilful Skyful).
Place two of these half-square triangles face to face, with the Dark triangle over the Light triangle.
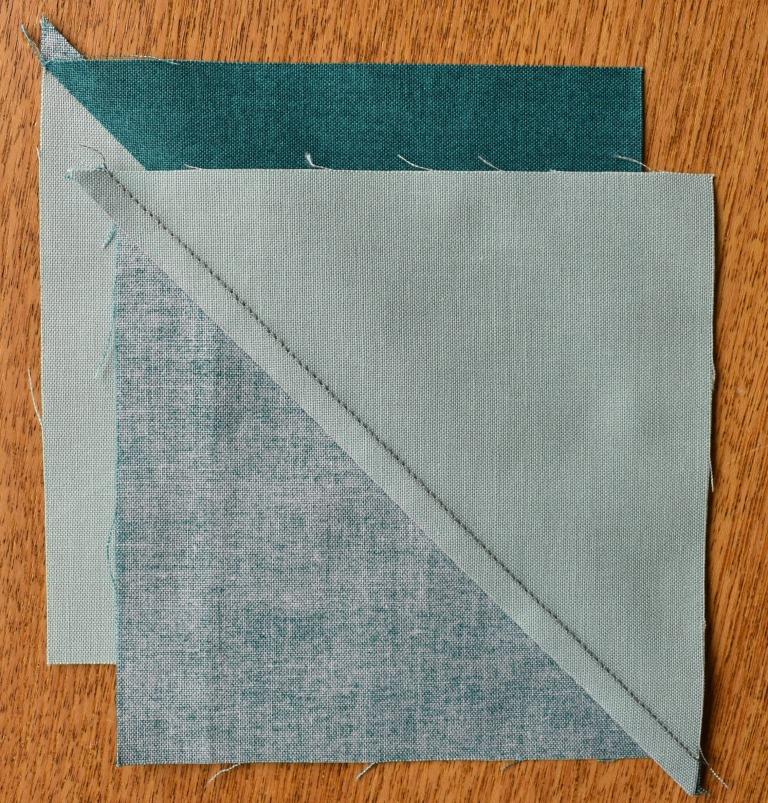
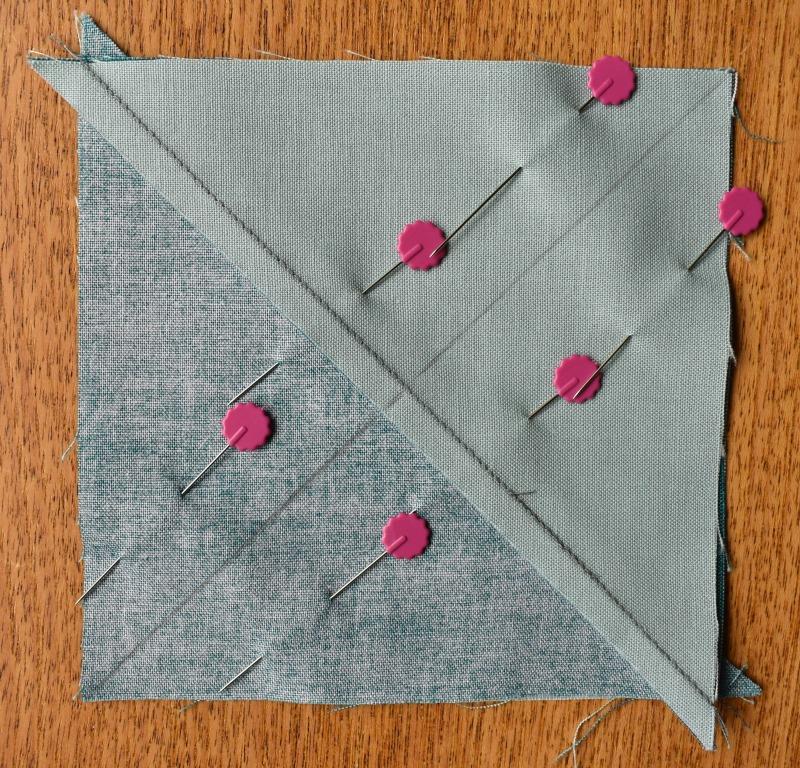
Shuffle the diagonal seams so that they nestle together snugly.
Draw a line across the other diagonal, pin, and stitch ¼” away from each side of the line.
Remember that if you are doing more than one unit, you can save time and hassle by chain-piecing them.
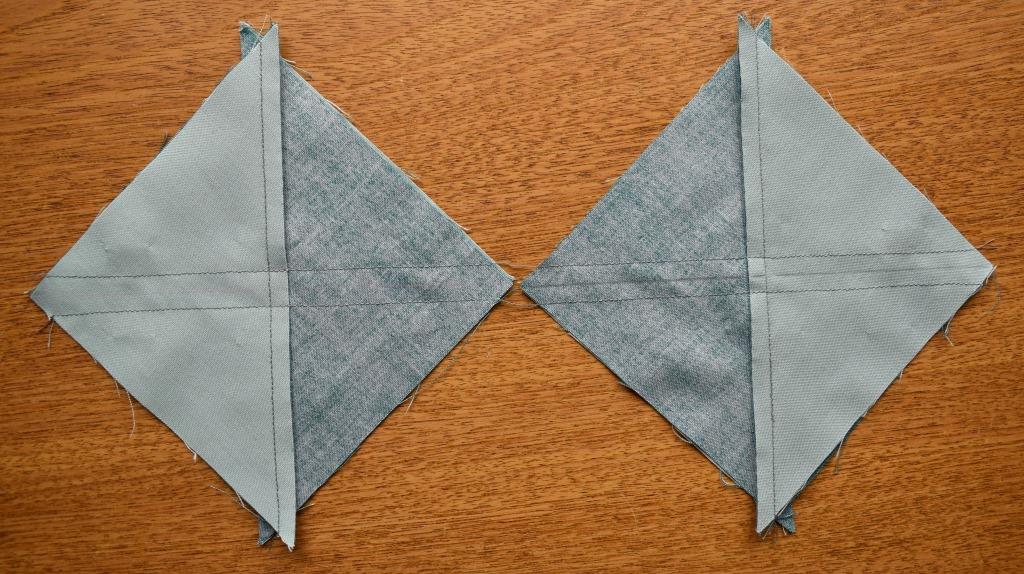
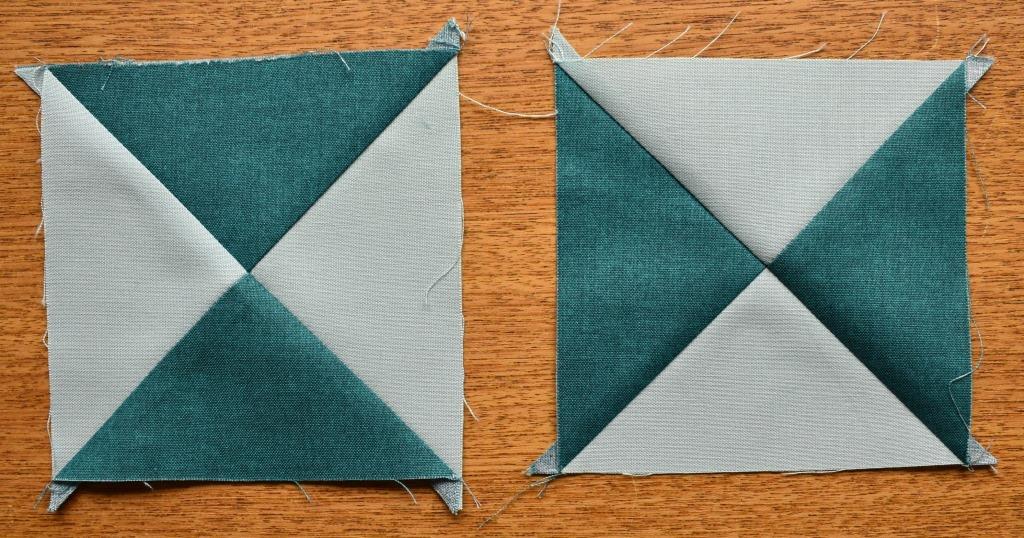
Cut apart along the line. When you open up, you will discover that you have made two quarter-square triangle units.
You can see me demonstrating this in this video:
Assembling blocks using quarter-square triangle units
If you would like to try out this useful little unit, two patterns for blocks using quarter-square triangles are available in my online shop; these are free. I have used some lovely plain and semi-plain Makower fabrics that I was given – more details about these can be found in the webpage about Planning a Sampler Quilt.
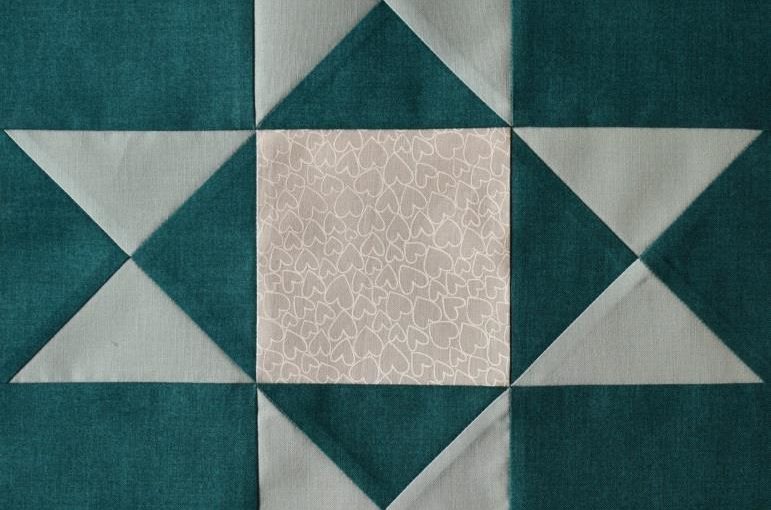
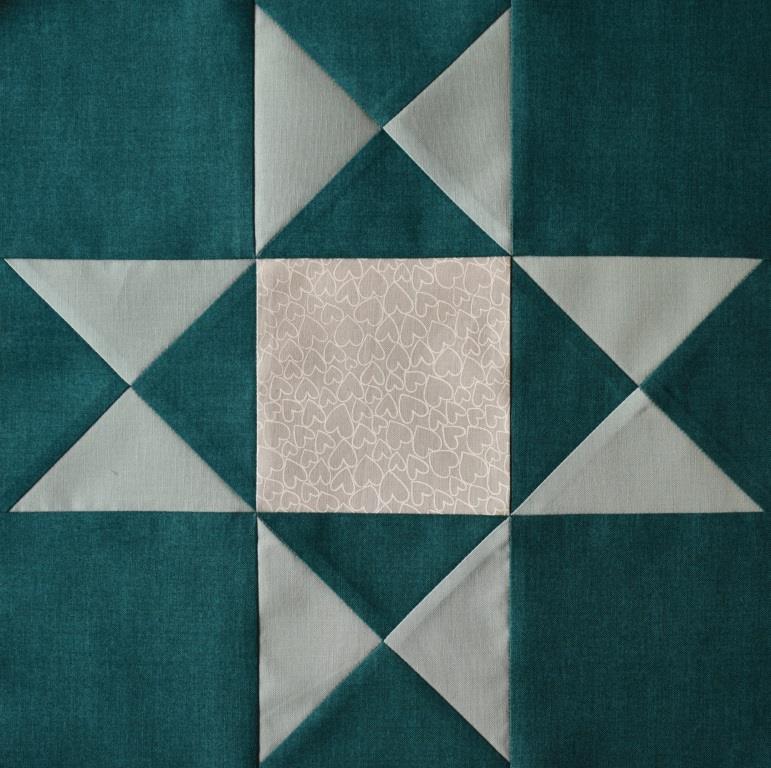
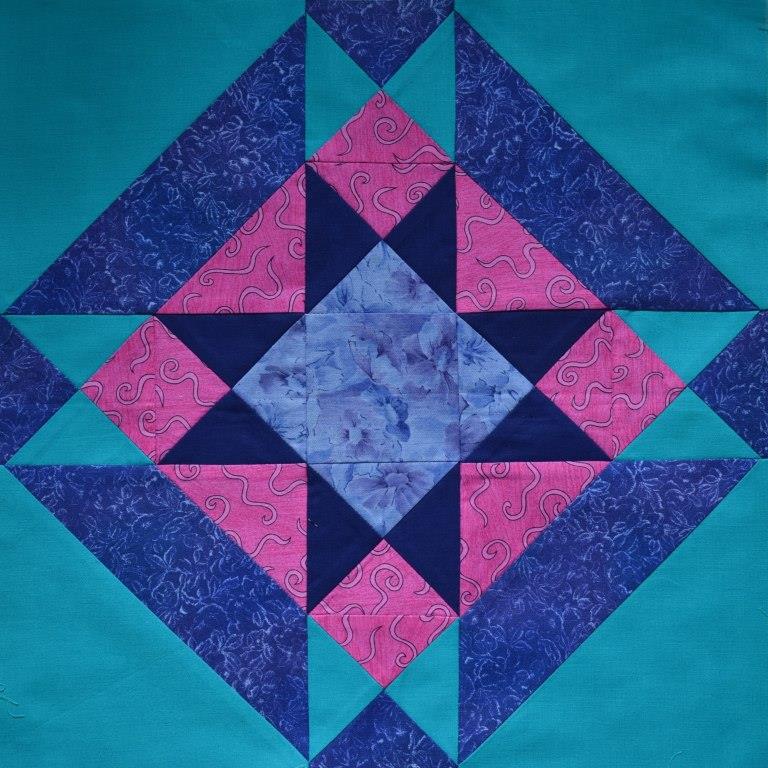
Making the Ohio Star block
One of these blocks is easier, and one is a little more difficult. Ohio Star is relatively easy because:
- There are only three colours of fabric (and you could easily do it with just two fabrics)
- The quarter-square triangle units are made only with two colours, so can easily be quick-pieced
However, it does have some tricky places:
- It has sharp points to the stars – you don’t want to chop these off
- There are four tricky places where diagonal seams from one quarter square triangle unit need to continue in a straight line to those in another unit.
But don’t worry – I’m going to show you some tips which should help you succeed.
First of all, cut out all the pieces as listed in the pattern. Quick-piece the quarter-square triangles.
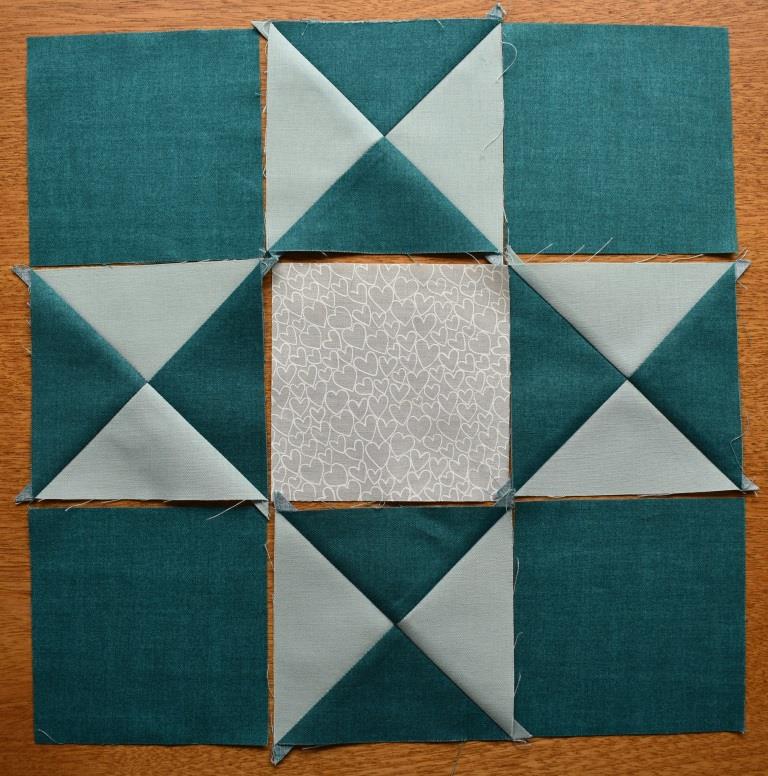
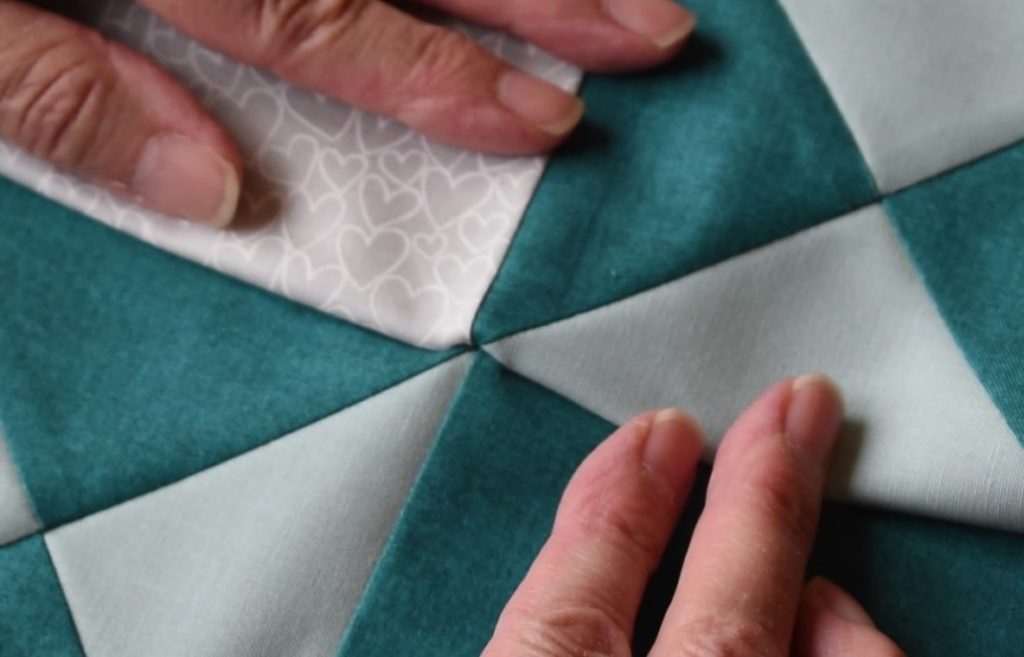
Now lay out all the pieces, checking carefully that you have all the units the right way round – there should be a dark triangle touching each side of the centre square.
String-piece the block together (remember that this helps avoid turning a unit round by mistake), stitching the row seams first.
Pressing Column seams
In the pattern, it tells you to press the column seams “out; in; out” as shown here on the back of the partly-completed block:
Why did I recommend doing it like this?
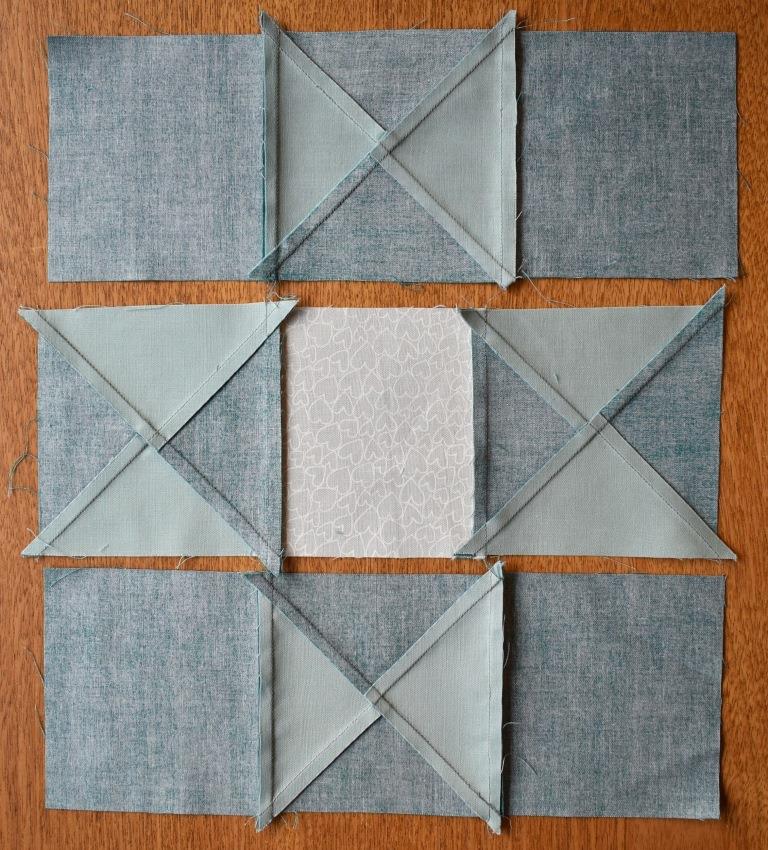
- It is best to press seam allowances towards the plain squares, and away from the pieced quarter square triangle units – if you turned this back, it would make a bulkier area.
- The column seams need to meet pressed in opposite directions when you do the row seams next. Conveniently this fits in with the decision above to press towards the less bulky squares.
- These decisions also expose the crossover stitching of previous seams, making it easier to aim for and stitch through these points again when joining the rows.
The row seams can now be stitched to complete the block. Before you do this though, look at these diagrams, which explain how to get a good result at the tricky places where two diagonal seams meet to form a longer diagonal – there is a video below too.
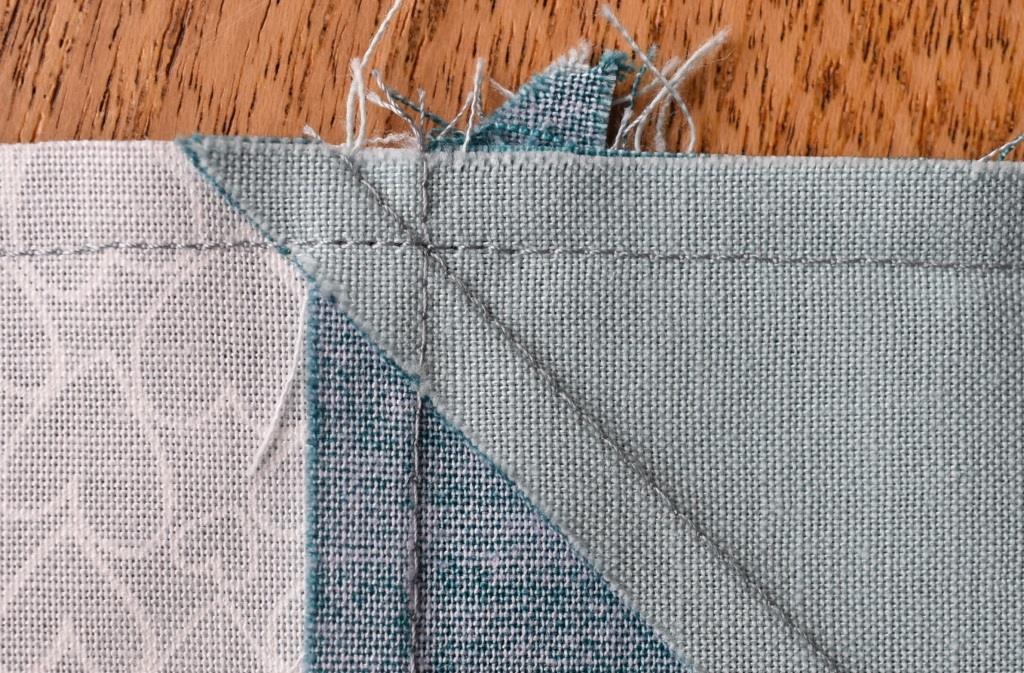
Achieving diagonal line-up
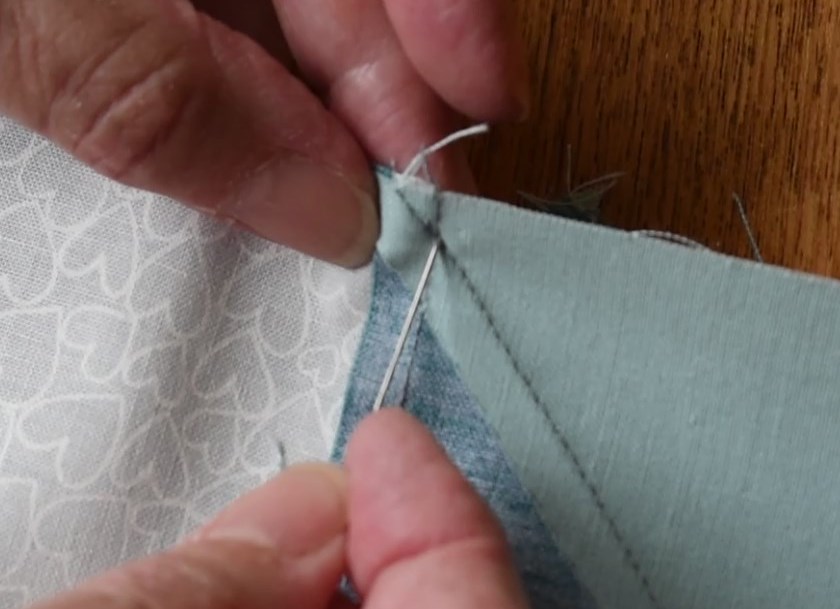
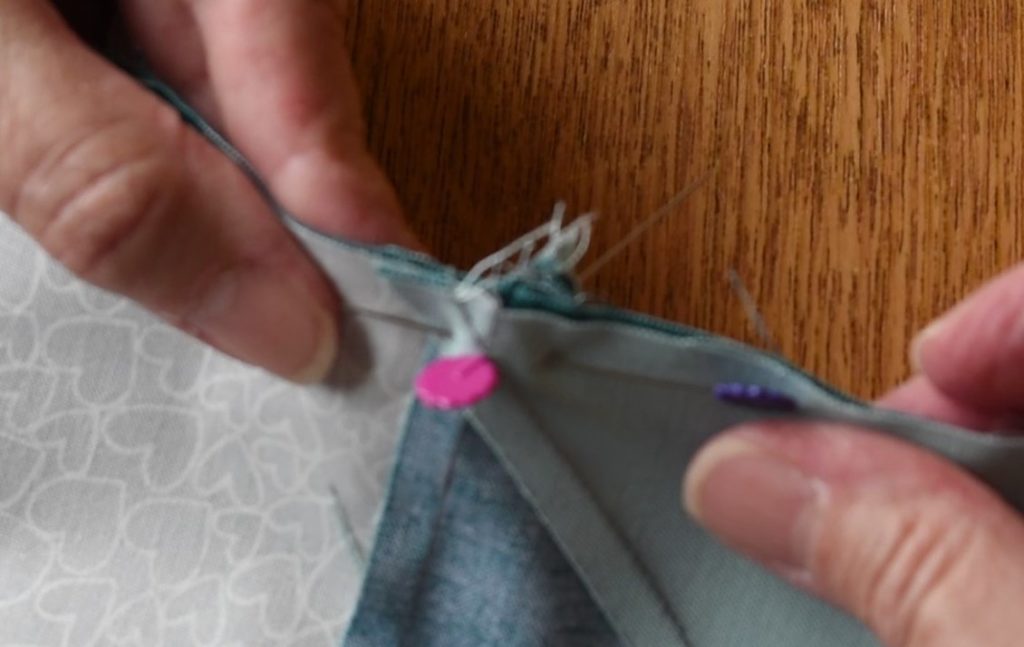
Poke a pin through the place where the seamlines cross over on the front side.
Then through the crossover point on the back side.
Now, using another pin, pin along the seamline, going through the crossover points. This should be ¼” in from the edge, but if it isn’t, don’t worry – making sharp points is more important.
Don’t rush this – it may require a bit of trial and error to get right!
Part of the reason for this is that the crossover of the seam stitching should be visible on the top side, but the similar one on the bottom will be hidden while you stitch.
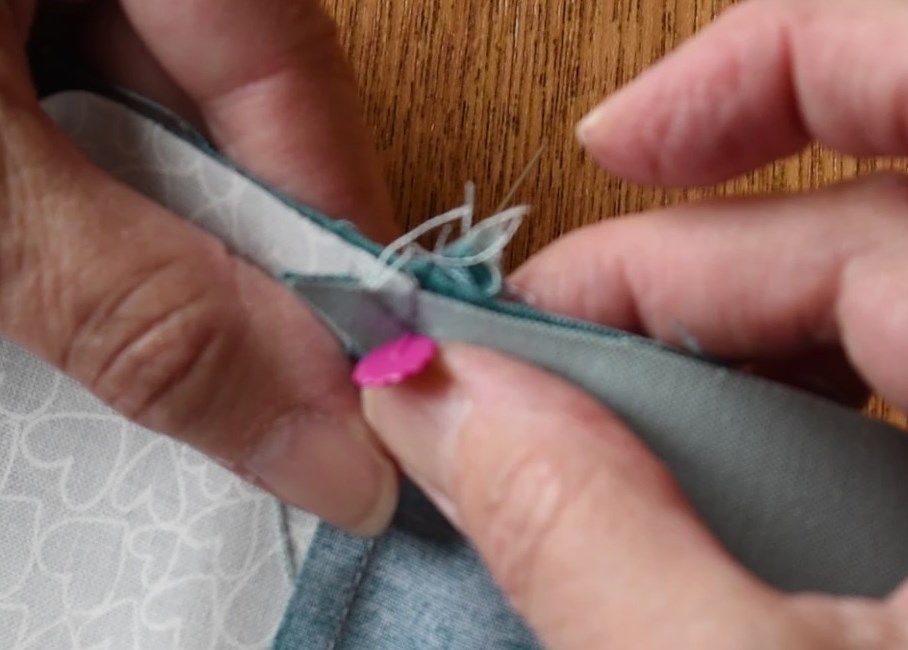
Push the pin right through both units, but don’t bend it round to go through the fabric again – just leave it sticking straight out for a moment. Now shuffle the vertical seams until they nestle (remember that they were pressed in opposite directions) – this will make sure that these line up well.
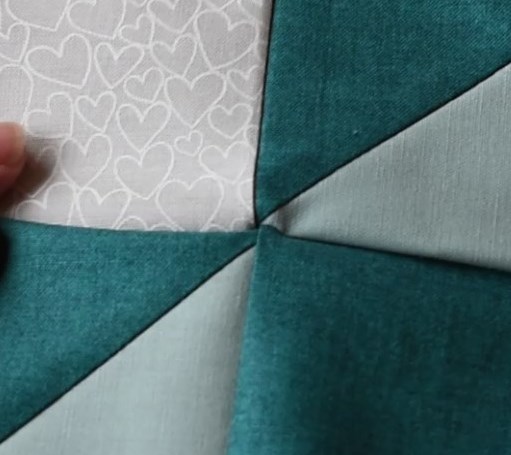
Open it up to see whether the diagonals look right.
Correcting mistakes
Maybe the diagonal line-up doesn’t look right. What causes this, and how can you correct it?
First of all, don’t expect everything to work perfectly just because you have stitched an exact ¼” seam. Fabric is not a rigid material; it can stretch, shrink and twist out of shape, even if you are careful when cutting, stitching and pressing (and of course if you are not very experienced yet, you will inevitably be making a few errors). Particularly when you have pieced units alongside plain squares, the bulk of the seams already stitched can affect how flat it lies – and hence the size.
The skill lies in identifying why there is a problem, and either going back to correct it, or knowing how you can fiddle it now to get round the issue.
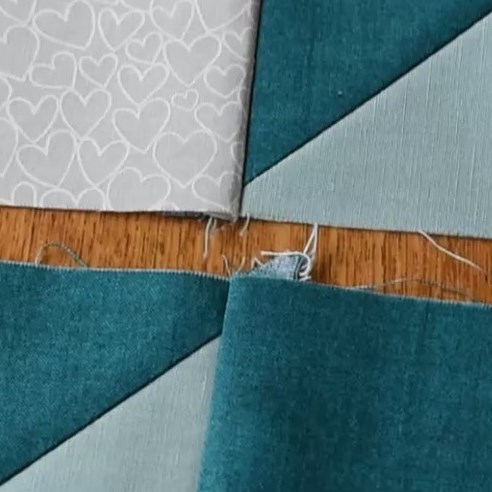
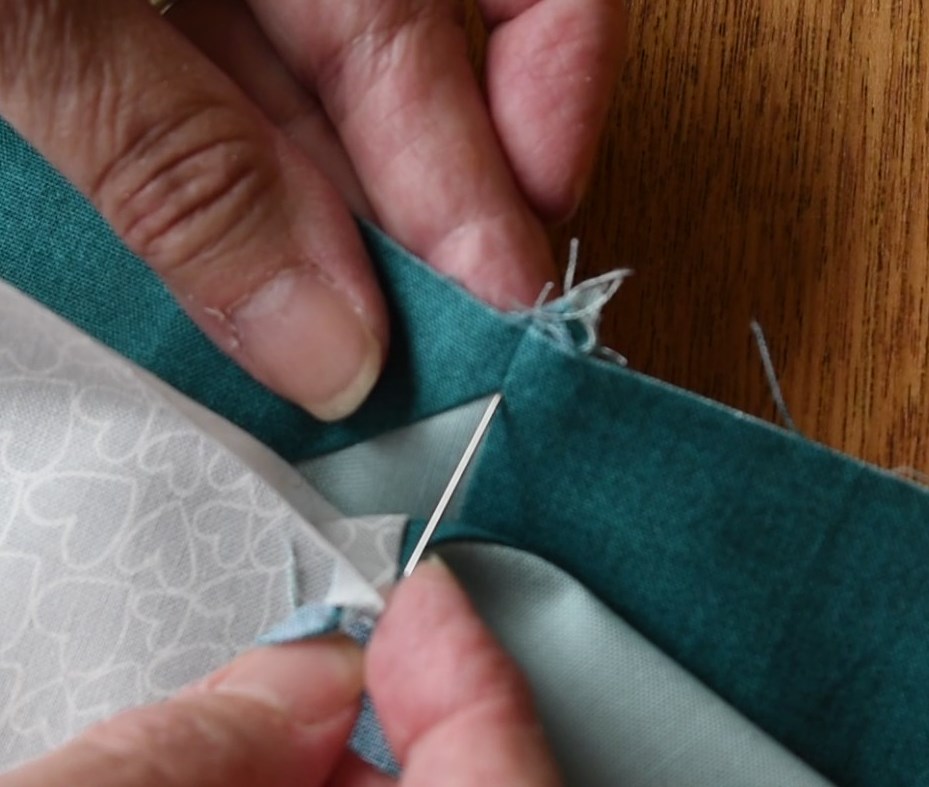
The point of the two triangles here should both be ¼” in from the edge, so that they lie exactly on the seam line when the rows are stitched together.
But the bottom one is further away, isn’t it? This is because the column seam is too wide, hiding the place where the triangle point should be.
Ideally you should unpick the column seam and restitch it with the seam allowance just a fraction smaller. This will move the triangle point up to the correct place.
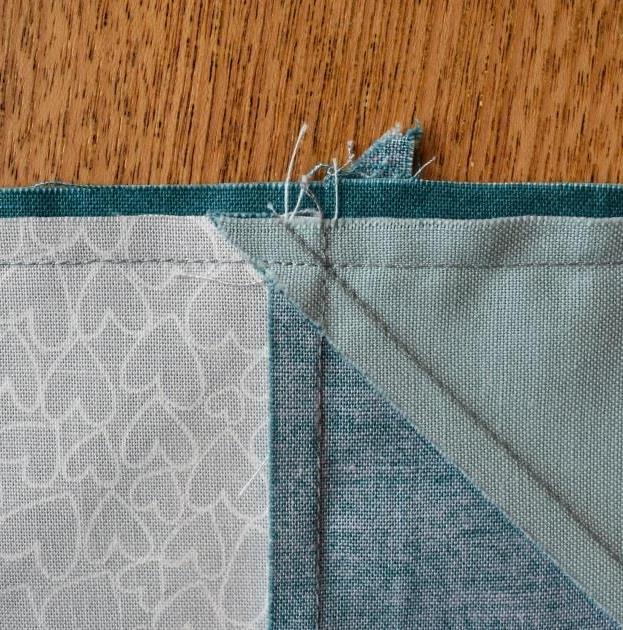
If one triangle point is very close to the edge, that means that the column seam is too narrow – so you can correct that by stitching it again with a slightly wider seam allowance. That should move the point away from the edge a little.
But, if its too late to do this, then you can adjust the size and position of the row seam instead, so that the points look right on the front (which is what everyone will see!)
You need to make one seam allowance a little bigger than the other, so that the points of the triangles meet.
If you use a pin to line-up the triangle points as shown above, it should look right from the front – even if it looks like this on the back!
You can probably correct for this by making a neighbouring seam (one without critical points) a little smaller to compensate. Only you will ever know….
Watch me demonstrate this on this short video:
You can download the free instructions for the Ohio Star from my online shop.
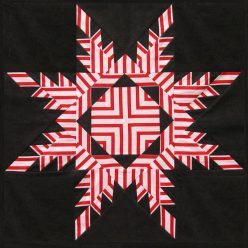
Making the Silent Star block
This block (also known by the less attractive name of Swamp Patch) contains an extra quarter square triangle unit at the centre, and also uses four fabrics, so there is more to keep track of.
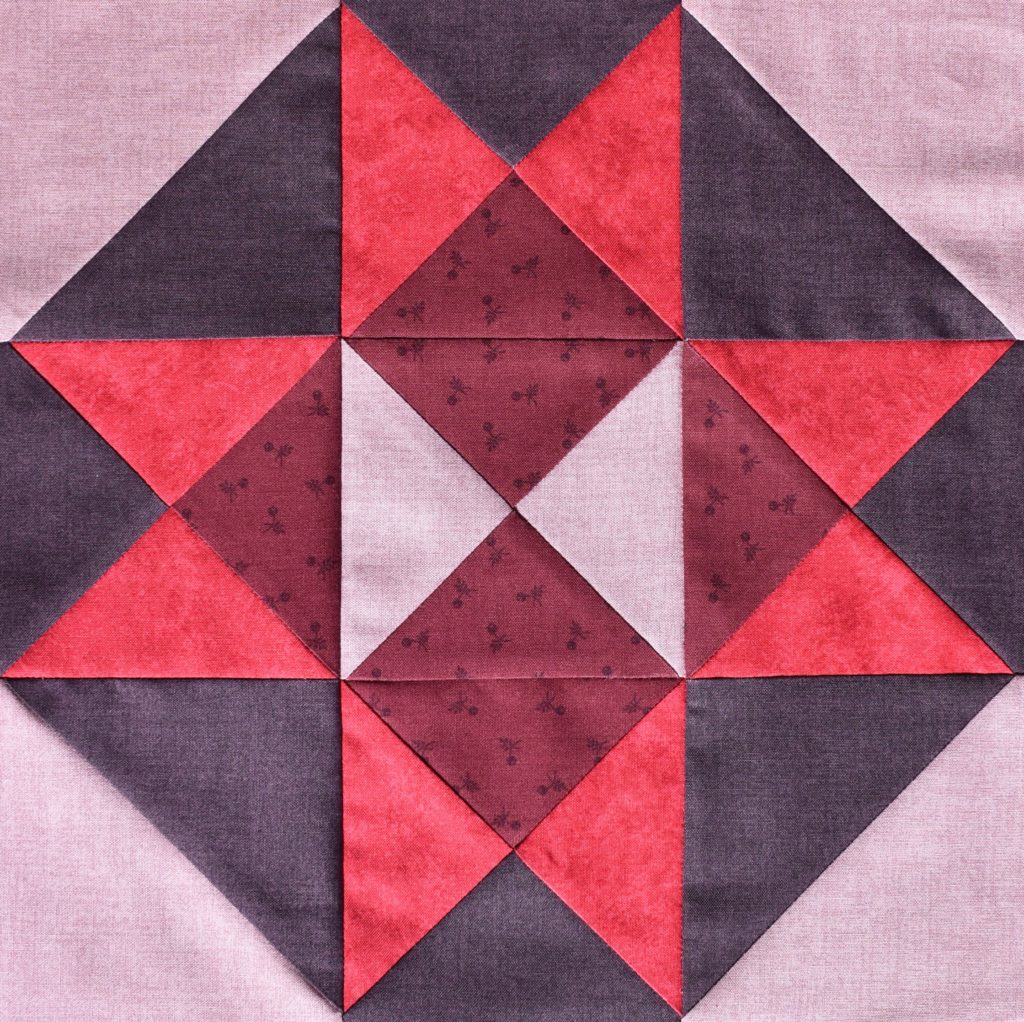
The quarter-square triangle unit at the centre only has two colours, so can be made in exactly the same way as those in Ohio Star.
However, the others need to be made in a different way. This is partly because they contain three different colours, but mainly to get the required pressing directions so that every seam will meet the ones from the central unit pressed in opposite directions. There are several junctions where three diagonal seams meet – and getting every single one correct made this block deceptively difficult to work out. The principles that control these decisions can be seen on this page about Pressing for Perfect Points.
You don’t need to work this out though – I have done all this for you, and is included in the full instructions for this Silent Star block, which you can download free from my online shop.
Both of these blocks look good in a Sampler Quilt separated from others by sashing. However, they can also be set ‘flush’ against each other. Ohio Star looks rather rigid set like this, but as Silent Star has the additional half-square triangle units in the corners, this softens the appearance. Working out the pressing directions for this was even more of a nightmare though, so I wouldn’t recommend it!
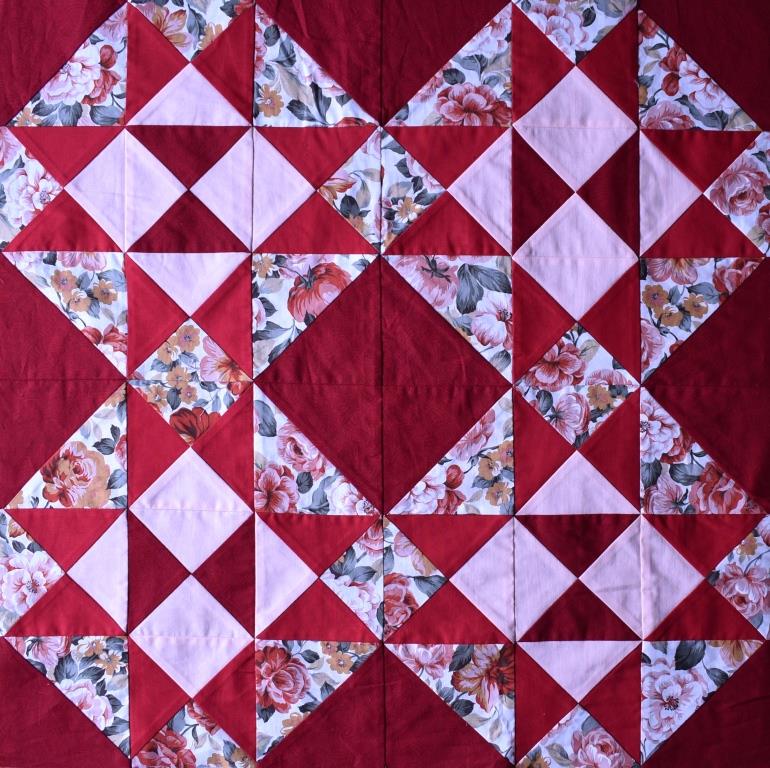
A 15″ block which uses quarter-square triangle units is this Solitaire block.
Can you see the quarter-square triangle units? There are two different colourways, both of which use three colours.
You also need to be very careful about the pressing directions if you want to achieve these perfect points on this lovely block, so follow the instructions carefully.
I hope that you are enjoying this Skilful Skyful series. The other instalments are:
- Half-square triangles
- Quarter Square triangles
- Flying Geese
- Square-in-a-Square
- Four-Square
- Half/Quarter Square triangle
- True Eight Point Star
- Half-Rectangle Triangles.
More advice about how to get better results in your patchwork and quilting can be found in the Techniques section.