Using a rotary cutter is a great way of accurately cutting fabric pieces of the shape and size required. It doesn’t take long to learn how to use it – a few tips and a little practice will soon have you cutting with confidence. Everything on this page is available as a free download: Basic Rotary Cutting (full version)
I’ll start with how to use it for cutting the most commonly needed basic shapes – strips and squares up to 6” wide. – but if you haven’t got as far as buying equipment yet, there is some advice about that at the end, as is advice for left-handers.
Beware – the rotary cutter is very sharp, and could cut you (or someone else) badly. Get in the habit of using it carefully from the beginning, and you should be fine. There is more Health & Safety advice at the end – please read it carefully!
Cutting Strips
This method can be used to cut accurate, straight strips for log cabin, strip patchwork or borders (of a size up to the width of the fabric). Strips are also needed as a precursor to squares.
First, you need to cut a straight edge on your fabric, along the straight grain.
- Iron the fabric, and as it will be too big to fit on the board if it has been cut from the full width of the fabric, fold it double, with the selvedges together.
- Smooth it flat, and lay it on your cutting board, with some space to the right of the fabric. Don’t worry if the cut end doesn’t meet – it may not have been cut straight in the shop.
- Lay the ruler down over the fabric very close to the right hand edge, and twist if necessary until it lies along the straight grain. Now look at the top of the ruler. One of the cross ways lines should be lying along the fold of the fabric – if it isn’t, adjust the position of the ruler, otherwise the strip that you cut will not be straight when the double layer is opened out.
- If the edge of your fabric is uneven, make sure that there is a double layer of fabric underneath the full length of the ruler; otherwise your strip may end up with a bit missing in places
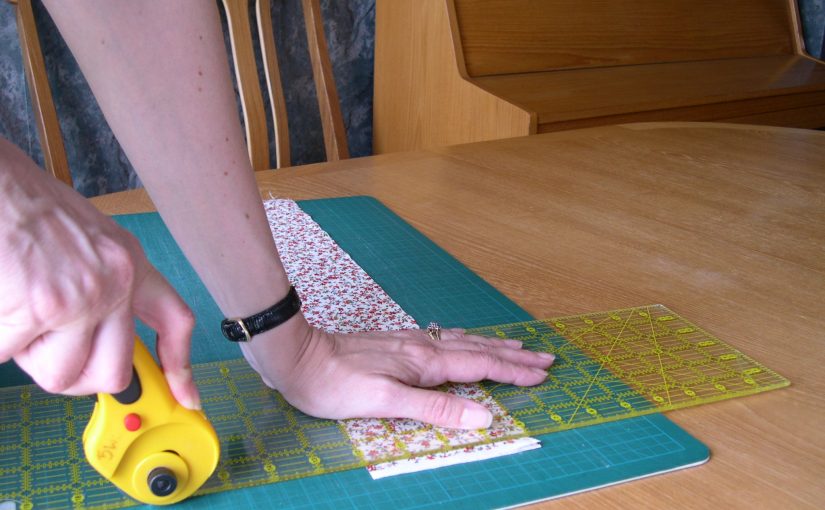
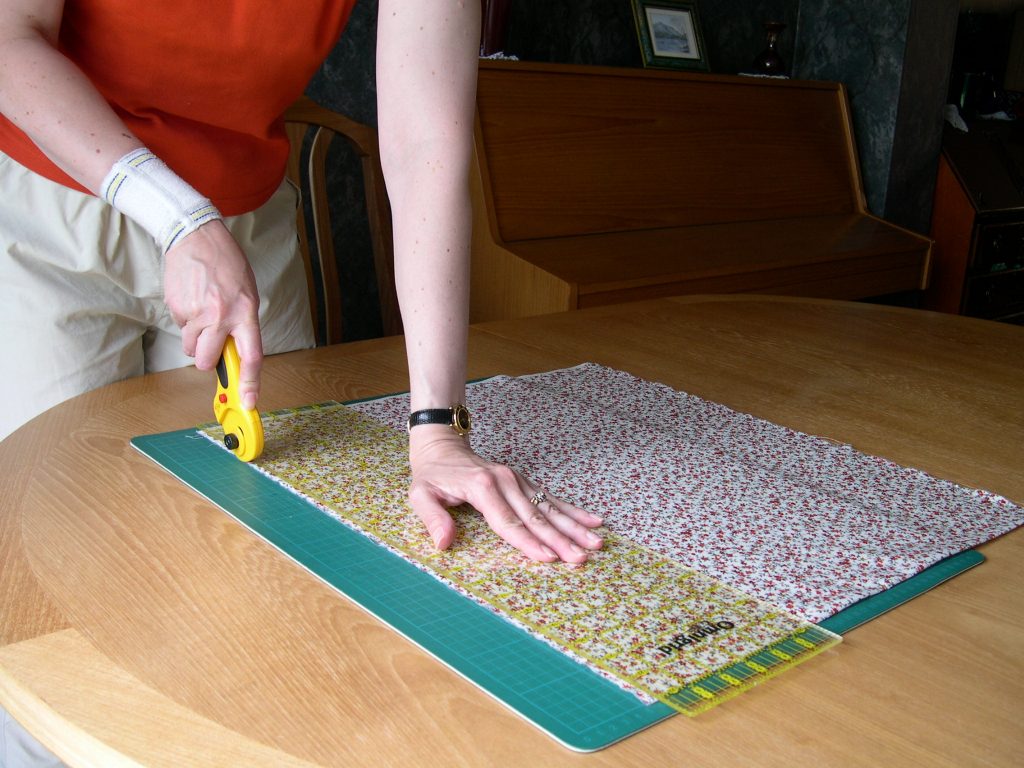
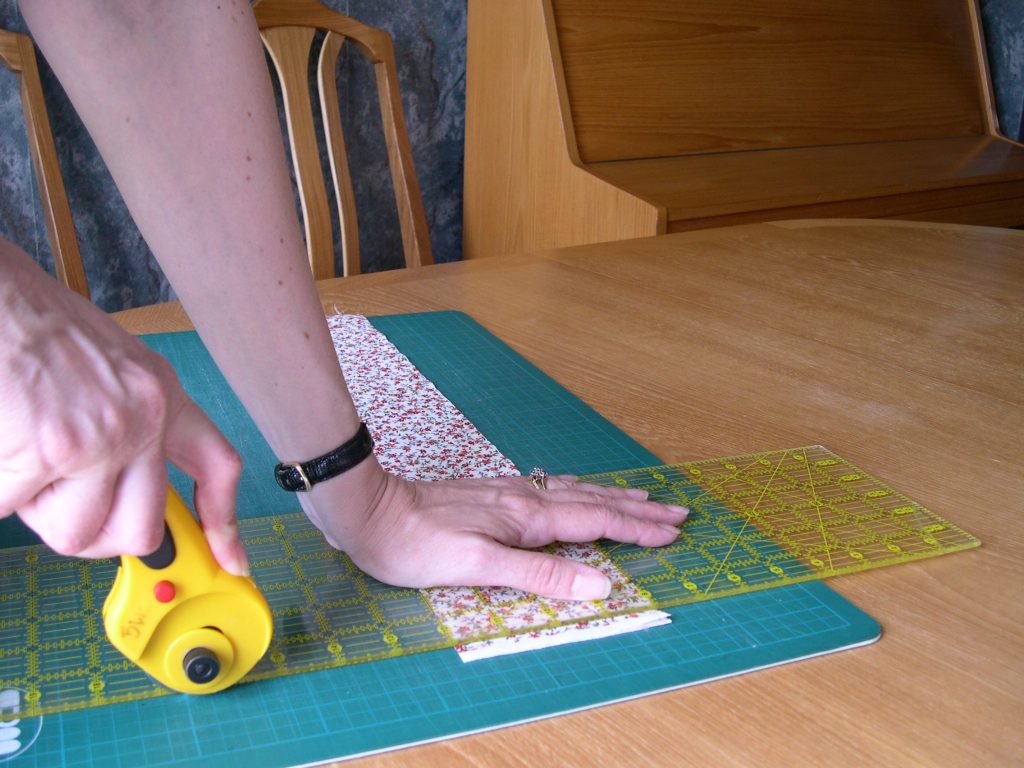
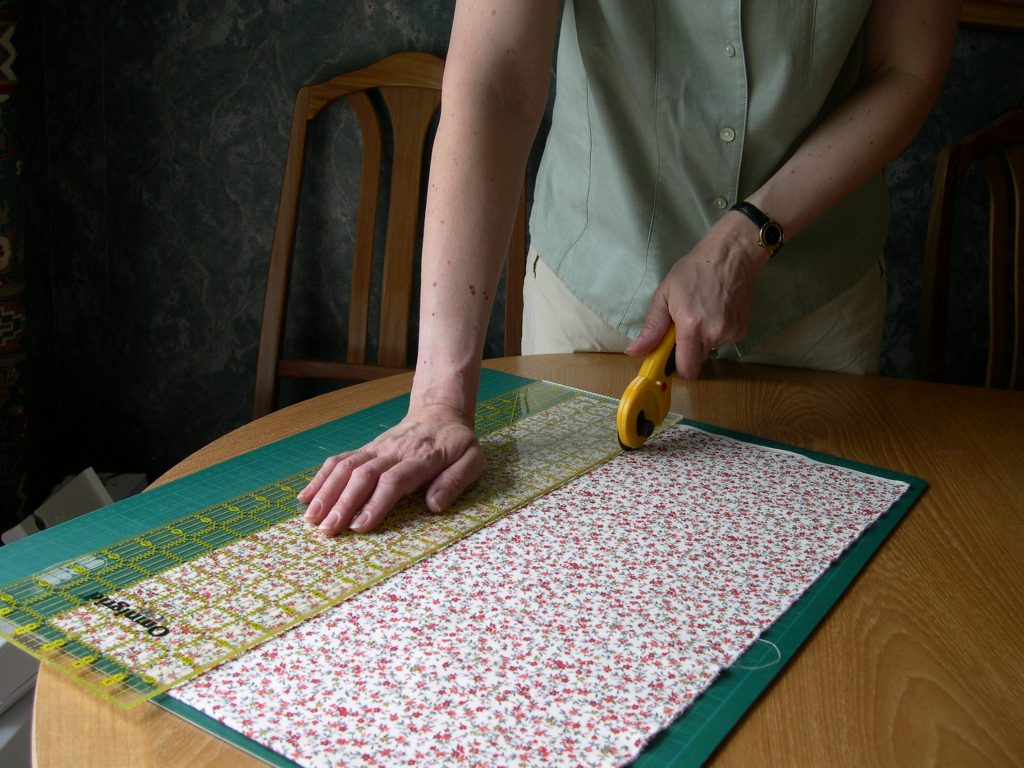
- Place your left hand flat on the middle of the ruler to keep it from moving, and, holding the rotary cutter in your right hand, release the blade. (If you are using a push start rotary cutter, simply push down on it onto the mat, and this will release the blade)
- Place the blade against the right hand edge of the ruler near to you, about an inch before the fabric begins. Keep the ruler steady by pushing down with your left hand, and push the rotary cutter away from you, pressing it against the edge of the ruler but keeping the blade upright. Try to keep your arm and wrist in a straight line over the rotary cutter as much as possible, so that all your strength is pushing down onto the blade. If you are pressing hard enough, you will hear a crunching sound as the fabric is cut. Retract the blade, and put the cutter down.
- Without disturbing the ruler or fabric, pull at the thin strip of fabric on the right hand side of the ruler. It should just lift away, leaving a clean straight edge. If it didn’t, cut along the edge again (this is why you mustn’t move anything until you are sure it has cut cleanly, as it is almost impossible to reposition the ruler in exactly the same place).
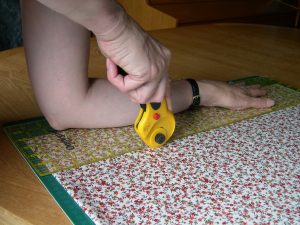
- If you found that the ruler moved while you were cutting, and want to hold it more firmly next time, try putting the whole of your left forearm along the ruler, pressing down firmly.
- Please note that if you put your whole arm on the ruler, you must be very careful to bring the blade in sideways to the flat side edge of the ruler, brushing against the cutting mat, rather than down from above.
- Do make sure that the rotary cutter is firmly against the edge of the ruler, and not on top – if it slips on top of the ruler and cuts your arm, you could cause serious damage to your tendons.
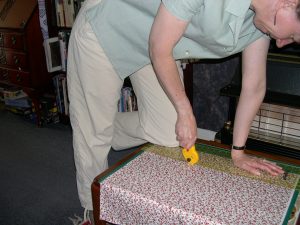
- If you still have problems, and are able to get up and down easily, put the board on the floor or a low table and kneel on one end of the ruler while holding the other. You will get to know how much pressure is needed as you get used to it
- Now, without disturbing the ruler or fabric, TURN THE WHOLE BOARD ROUND, or go around to the other side of the table.
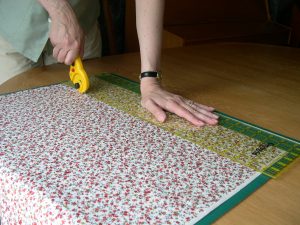
- Move the ruler to the left, until the amount left underneath the ruler is the desired width of strip.
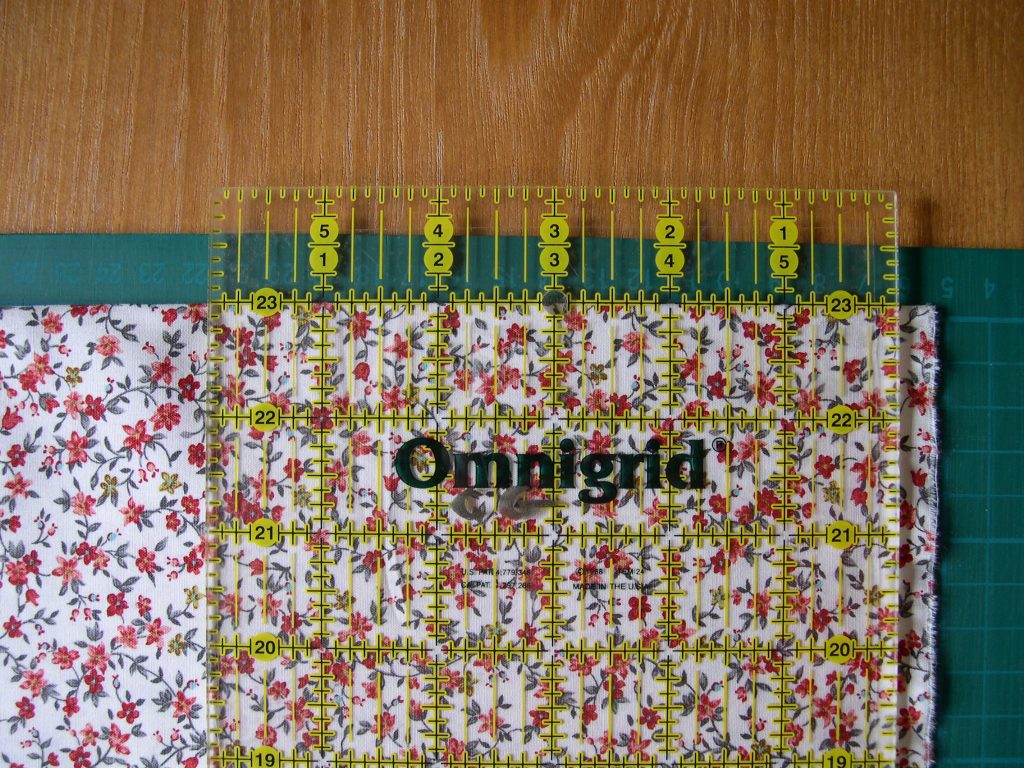
- e.g. if you want strips 4” wide, line up the ruler so that your freshly cut straight edge lies exactly underneath the line on the ruler 4” in from the right hand edge, all along its length, as on this photo.
- This is where it is easy to get confused at first – don’t worry about the lines on the board, or about ruler measurements which have no fabric underneath them.
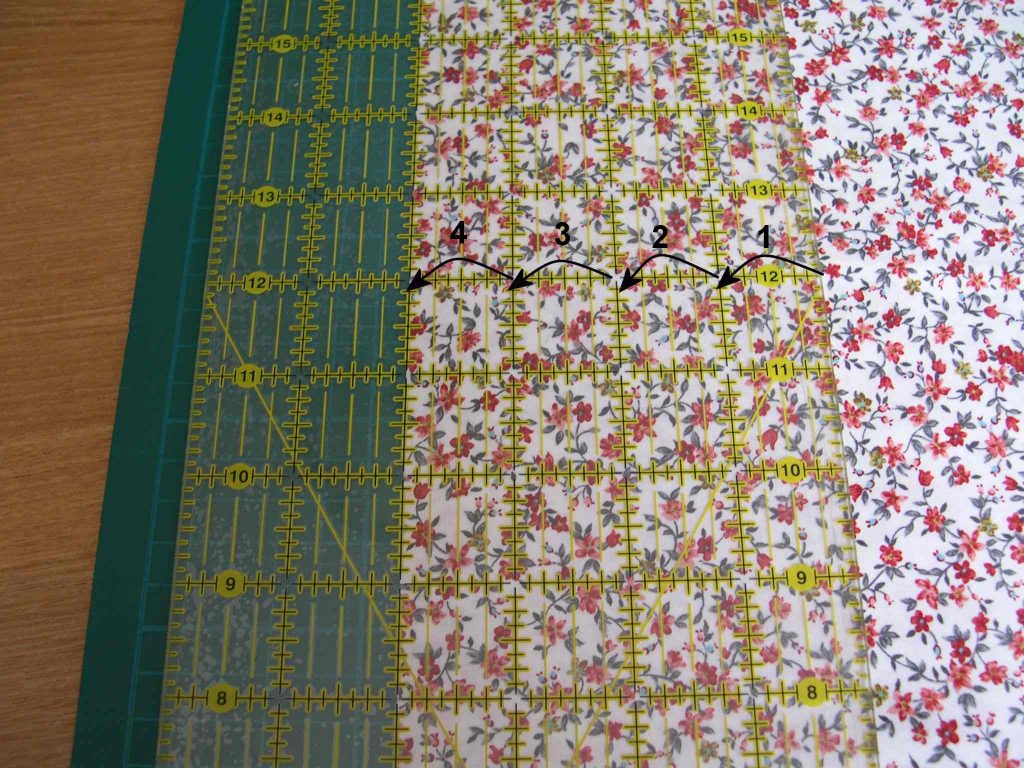
- To check that the ruler is positioned correctly, count in from the side which you will cut in a moment, to the previously cut edge. Make sure that you don’t count “1” at the edge of the ruler – this is “0”; and “1” is the first bold line an inch in!
- Can you see the black curly arrows on the picture? Count like this as you move
- Cut up the right hand edge of the ruler as before.

- Congratulations – you have cut your first strip!
Cutting Squares
Patchwork often requires squares to be cut to a particular size – whether for use as they are, or as a precursor to right-angled triangles, which can be made by dividing the squares again along the diagonal.
- Cut strips of the required width (e.g. 3 ⅞” wide for 3 ⅞” squares), as previously described.
- Lay the strips (still double folded) along your cutting mat, with the selvedge end a little way from the right hand edge. Lay your ruler across the fabric, at right angles to the strip.
- Push it away from you if necessary, so you can stand comfortably at the table – there is no need to lean over a long section of ruler hanging over the front edge!
- Making sure that a crossways line on the ruler is lined up with the edge of the strip, cut a fresh edge at the right hand side, making sure that you cut the entire selvedge off.
- Now, without disturbing the ruler or fabric, TURN THE WHOLE BOARD ROUND, or go around to the other side of the table.
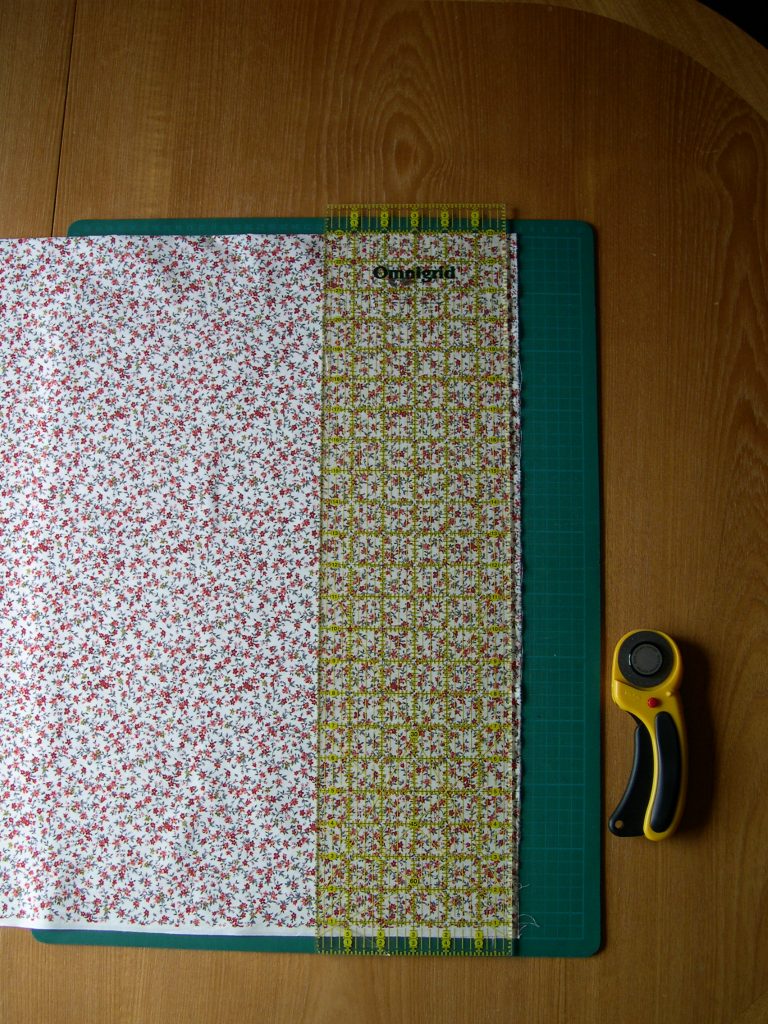
- Move the ruler to the left, until the amount left underneath the ruler is the desired size of square e.g. if you want 3 ⅞” squares, line up the ruler so that your freshly cut straight edge lies exactly underneath the marks on the ruler which are 3 ⅞” in from the right hand edge
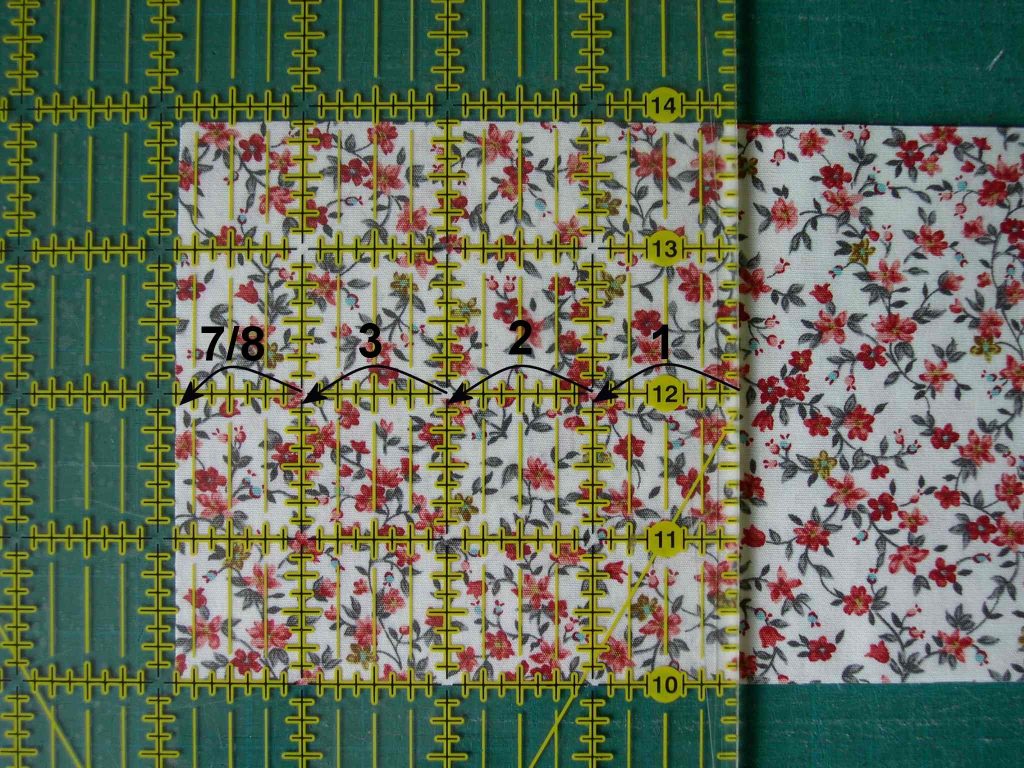
- Count in from the edge that will be cut, as before, to check. Touch the whole inch lines each time you say a number – don’t count at the middle of an inch, as this is likely to lead to mistakes.
- By the way, don’t be afraid of measurements with fractions – they are no more difficult to cut than whole or half inches – you don’t need a special ruler.
The main lines are on the inches; there are thin lines on ¼”, ½” and ¾”, and little tick marks in between these on the main lines for anything with eighths. The ⅞” line is the last one before the next inch – in the photo above, 3 ⅞” is the last little black and yellow tick mark before the 4″ line. - To make sure that the square is properly square, check that one of the crossways lines of the ruler is lined up with the top cut edge of the strip again.
- Cut carefully but firmly as before.
- You should now have two perfect squares (because you had a double layer).
- To cut another two squares, simply move the ruler along to the right until again the correct amount of fabric is under the ruler. Check it is square, and cut again.
- It is in fact possible, once you are confident with using the cutter, to cut up to six layers at once – a great timesaver.
Don’t expect your cutting to be perfect the first time that you try it! Try first on some unimportant fabric, and then a few wobbly cuts won’t matter.
All of this guidance, including all the colour photographs, is available as a free download: Basic Rotary Cutting (full version)
Or, if you would like a short 2 page black and white version with diagrams that would be cheaper to print out, click to download the Rotary cutting – summary version
Keep these tips by you for the first few sessions, and your rotary cutter will soon be an invaluable friend.
Another page (and a second download) is available, which gives suggestions for slightly more advanced cutting, using other rulers.
Left Handers
- If you are left handed, first of all check that you have adjusted the rotary cutter so that the blade is on the right hand side of the cutter when you hold it in your left hand.
- Follow the instructions for Cutting Strips and Cutting Squares as above, except for the following points:
- Line up the fabric for the initial cut with some space at the left side of the fabric.
- Lay the ruler down over the fabric very close to the left hand edge.
- Place your right hand flat on the middle of the ruler to keep it from moving, and, holding the rotary cutter in your left hand, release the blade.
- Place the blade against the left hand edge of the ruler near to you, about an inch before the fabric begins. Cut along the length.
- Turn the board round
- Then move the ruler to the right, until the amount left underneath the ruler is the desired width of strip.
- Check it is in the correct place by counting in from the left side of the ruler (where you are about to cut) to the freshly cut edge underneath the ruler. Cut the strip.
- To cut squares, place the folded strip across the board with the selvedges near the left hand edge, and place the ruler over it near this left edge. Cut away the selvedges to leave a fresh cut edge.
- Turn the board round, and move the ruler to the left, until the amount left underneath the ruler is the desired size of square. Check it is in the correct place by counting in from the left side of the ruler (where you are about to cut) to the freshly cut edge underneath the ruler. Cut the square.
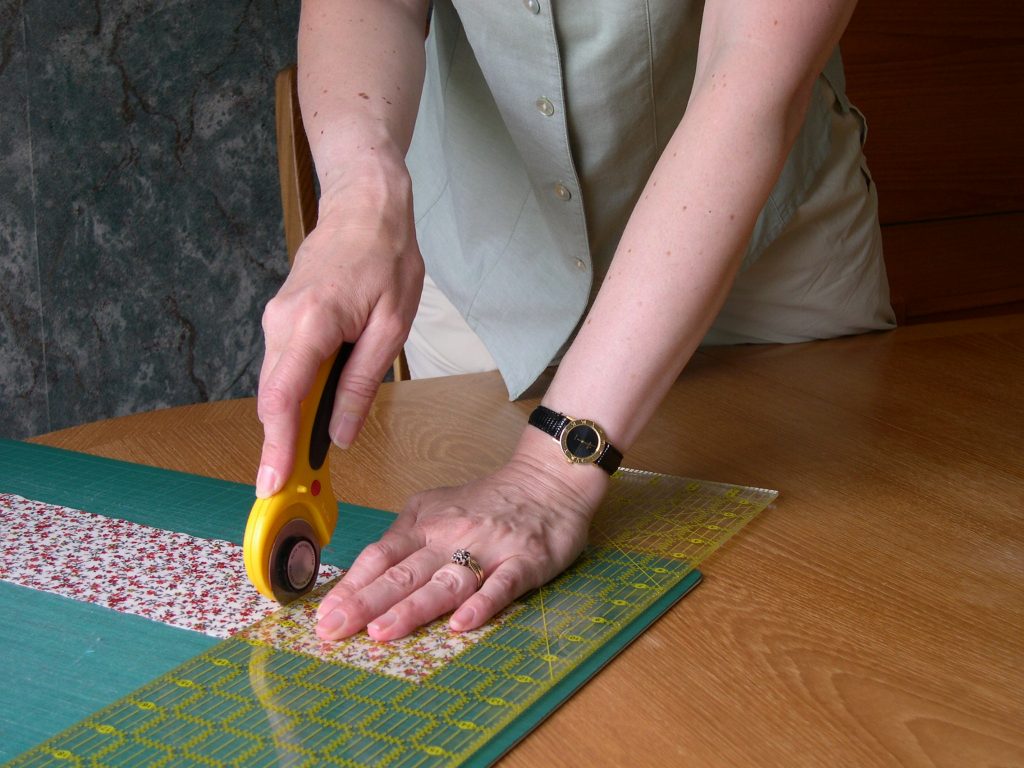
Remember; have the fresh edge on your right hand side, and place the ruler as shown in the photo below:
Choosing equipment
- The initial outlay on equipment may seem expensive, but don’t be tempted to skimp on size or quality of mats and rulers as these items will last for years.
- I would advise that you start with
- an A2 cutting mat,
- a rotary cutter with a 45mm blade
- a 6 x 24” Quilter’s ruler.
Mats
- The self healing cutting mat protects your table from damage by the sharp rotary cutter – an A2 mat is big enough to cut the full width of fabric if it is folded once. The method I will show you for measuring does not use the lines on the board unless you are cutting very big pieces.
Rotary Cutters
- Rotary cutters have very sharp blades, and all have some sort of blade guard to protect you when it is not in use. Try out several types to see how the mechanism operates to release and retract the blade. Some have a squeezy handle, which releases the blade automatically when you pick it up, or a spring loaded blade that comes out only when you press it down on the board.
Which do you find has a comfortable handle when cutting, and is easy to operate with one hand? - If you are left handed, it is usually possible to turn the cutter over, or to reposition the blade on the other side of the cutter, so that it is always right next to the ruler when you are cutting.
The same rulers can be used by anyone, as they number in from both sides.
Quilter’s Rulers
- When choosing rulers, make sure that you can read the numbers easily, and that the lines can be seen clearly over both dark and light fabrics.
It should have angled lines indicating 60˚and 45˚, as these will be useful later. - As the Americans (from whom we get a lot of ideas) only use inches, quilters here usually do too, but metric rulers are available if you or your children prefer.
- Be sure to choose one which has marks every ⅛”, as ⅞” is a commonly required measurement.
- Some rulers have an extra ½” width on one side, which is designed if you intend to cut a lot of simple squares and strips, as these often need to be cut e.g. 4 ½” wide.
If you are cutting other sizes however, measuring mistakes can be made unless you are very careful to use the correct edge of the ruler, so I prefer the plain 6” width. - Unless the ruler already has a non-slip surface on the back, you may find it helpful to buy some non-slip “Invisigrip” film or sandpaper stickers to apply.
Don’t use anything that raises the height of the ruler, or which obscures important lines. - It’s a good idea to label your equipment clearly with your name or a coloured ribbon, so that it doesn’t get muddled up with someone else’s!
Health and Safety
- Beware – the rotary cutter is very sharp, and could cut you (or someone else) badly. Get in the habit of using it carefully from the beginning, and you should be fine.
- Only release the blade at the instant you need it, after the fabric and ruler have been lined up.
- Bring the blade in sideways to the flat side edge of the ruler, brushing against the cutting mat, rather than down from above. If, by mistake, you run along the top, rather than against the edge of the ruler, the cutter can slide across the surface of the ruler towards your hand or arm, and cause serious damage.
- Retract the blade immediately after cutting, before putting it down on the table – you may know that it is still dangerous, but someone else could put their hand on it by accident.
- Make sure that your thumb is not sticking out over the edge of the ruler.
- Always cut away from you, not towards the body.
- Rest your index finger on the top of the rotary cutter (as you hold a knife), rather than holding the whole handle in your fist – it’s better for your hands, and gives finer control.
- Blades do get blunt – replace or sharpen when they don’t cut cleanly any more.