There are three main ways to copy a design onto your fabric:
- Tracing the design onto the fabric from a paper copy. This must be done before layering.
- Drawing the design through the gaps in a stencil (purchased or home-made). Can be done before or after layering.
- Drawing around a solid template (purchased, home-made from card or using an object such as plates or cups). Usually done after layering.
Tracing
Tracing is the best method if you have a complex design.
Tape the paper design down securely onto a firm surface, and then tape the fabric in the correct position over it. Magic tape is good for this, as it peels off easily without leaving a sticky mark. Trace the design carefully – when you think that you have finished, it’s a good idea to lift a corner to check that you haven’t missed anything before removing all the tape!
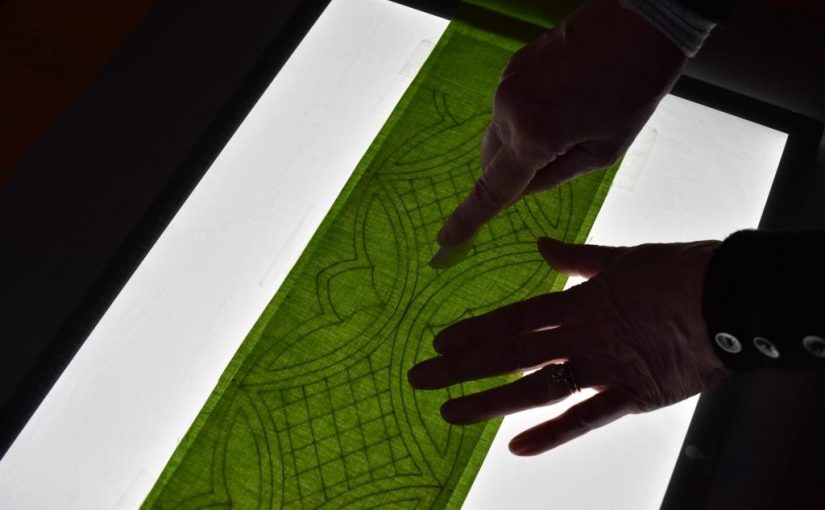
If you have a light box, this makes it much easier to see the design lines, particularly through darker fabric.

There are a variety of pencils and tools which can be used to mark the lines. See the Quilting Markers page.
If you don’t have a light box, a cheaper alternative is to tape your paper design and the fabric onto a window pane on a bright day with masking tape. You can then trace the design through onto the fabric.
Stencils
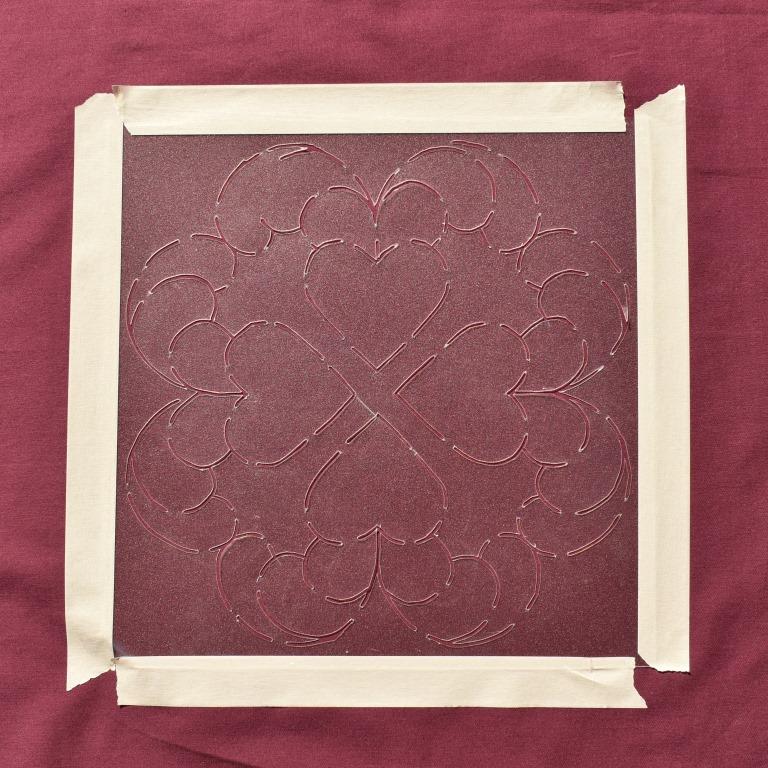
Quilting stencils are the best method if you need to mark the same design a number of times. They can be bought for a wide variety of motif and border designs. (Note that these are line designs; stencil designs sold for home decorating are not suitable, as these give solid areas)
The underneath side of the stencil is often slightly rough, to prevent it slipping.
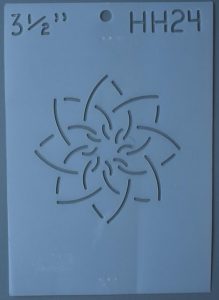
This purchased stencil tells you that the motif measures 3½” – but this means that it is designed to fit in a 4″ square, as you need at least ¼” free space around each side. This avoids having to stitch through any bulky seam allowances.
Many templates have no sizes written on them, so measure the design area yourself, and allow some breathing room.
The stencil has to be made with plastic replacing some of the continuous line design (otherwise bits would fall out!).
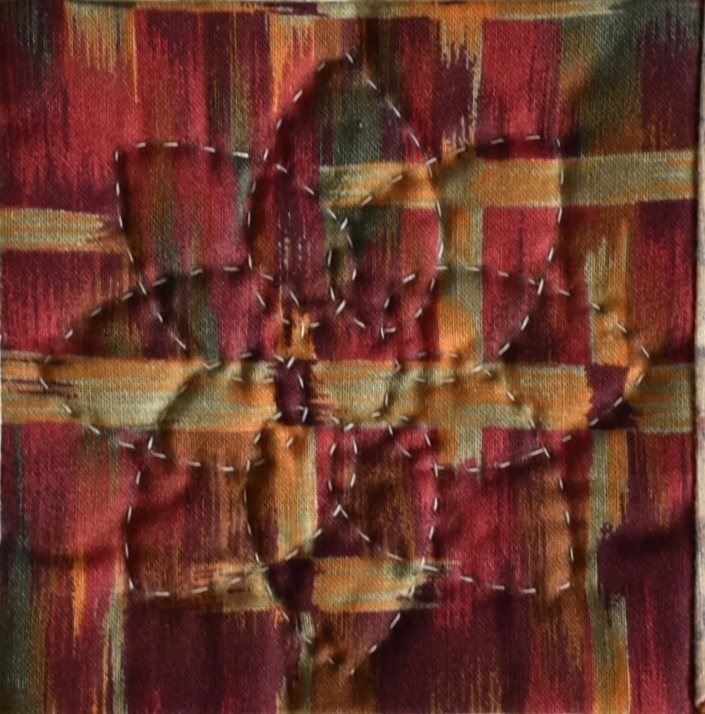
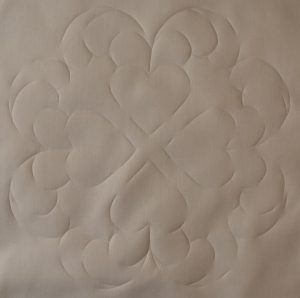
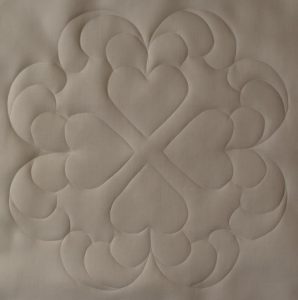
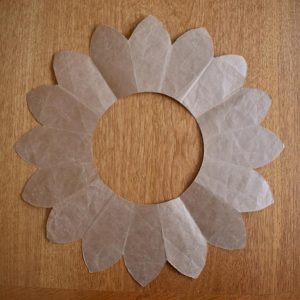
After you have marked through the gaps, don’t forget to draw in the missing portions – can you see that the stencil above will give this continuous line flower motif?
Making stencils
Purchased stencils are excellent, and save time, but they are often frustratingly not the correct size – particularly border templates, which may not be the correct size either width-ways or lengthways, for your particular quilt.
If you can’t find the shape or size of stencil that you like, it’s not actually that difficult to make a stencil yourself, although cutting it manually is a bit tedious. If you have a Cricut machine, that can be used to cut stencils.
As before, “bridges” must be left in the stencil. I like to plan their placement so that they are not at key places where a change of direction happens – can you see that all of the “T junctions” in the stencil above have a clear cut line? The gaps left by the bridges need to be filled in after the initial marking:
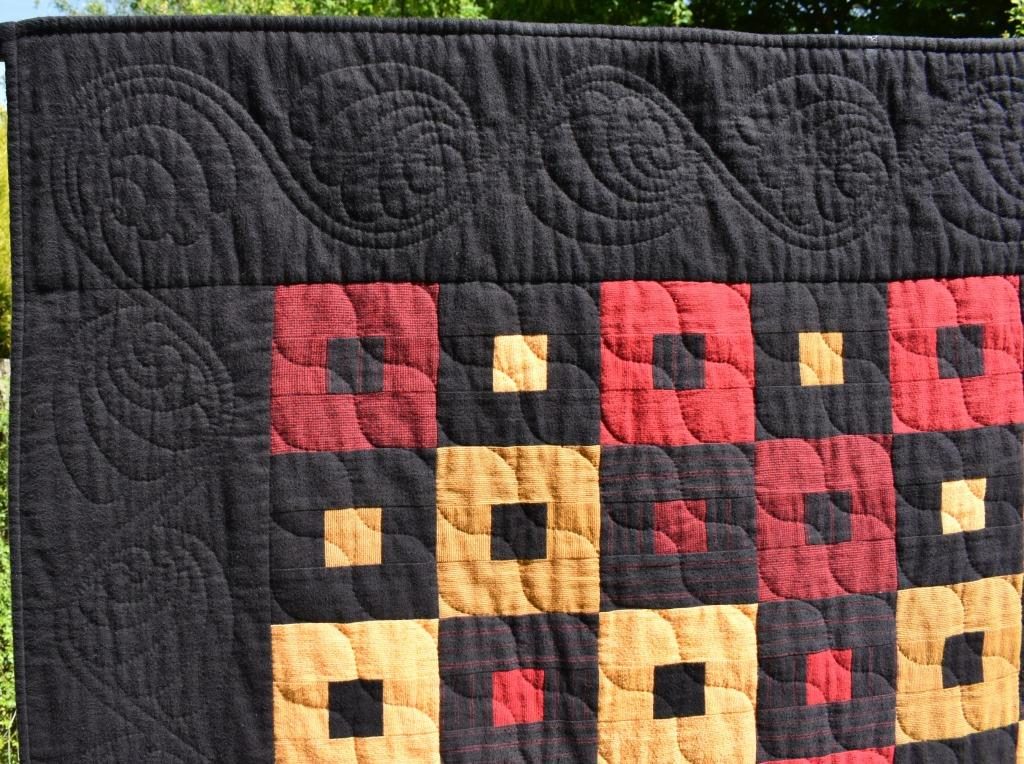
It’s impossible to tell that the top border design is slightly stretched compared to the side border, so that they both meet nicely for the corner swirl.
If your quilt geometry is nearly right to fit a particular border stencil, you can “stretch” a gently curved or straight section slightly by moving the template a little as you mark it. This may be particularly necessary on a rectangular quilt, where there are two different border lengths. This is the trick I use in the paisley swirl border of my Amish Squares pattern.
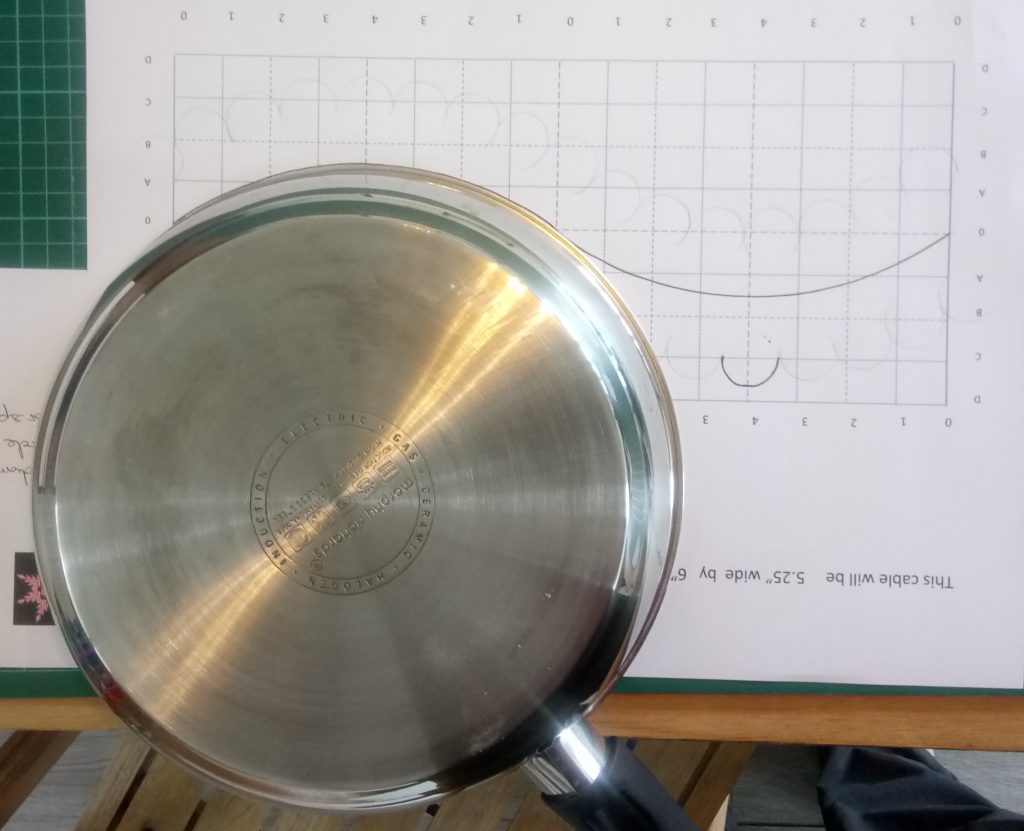
However, it’s usually best to learn how to draw a border design out to the correct size yourself, so that it fits perfectly. See the Drafting Cable Borders pack
Solid templates
In the past, this was the most common way for quilters to transfer their designs. Each would have a collection of their favorite templates made from paper, card or maybe even wood or tin if they had a handy husband.
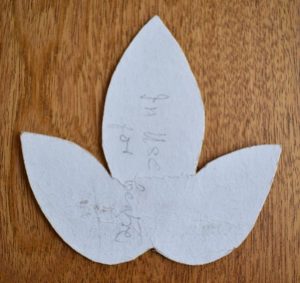
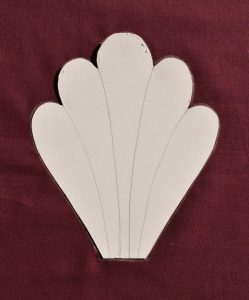
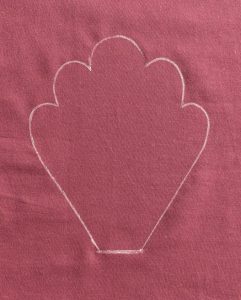
Solid Templates are easy to make. Just draw a suitable design direct onto card, or stick on a photocopy from a book, or a computer generated design such as a circle, heart or star. Then cut out carefully.
They are good for more spontaneous design, as you can lay them out on the layered quilt, and experiment with the effect before committing yourself.
However, as only the outside line can be transferred directly by drawing round the template, any internal lines need to be marked in freehand afterwards.
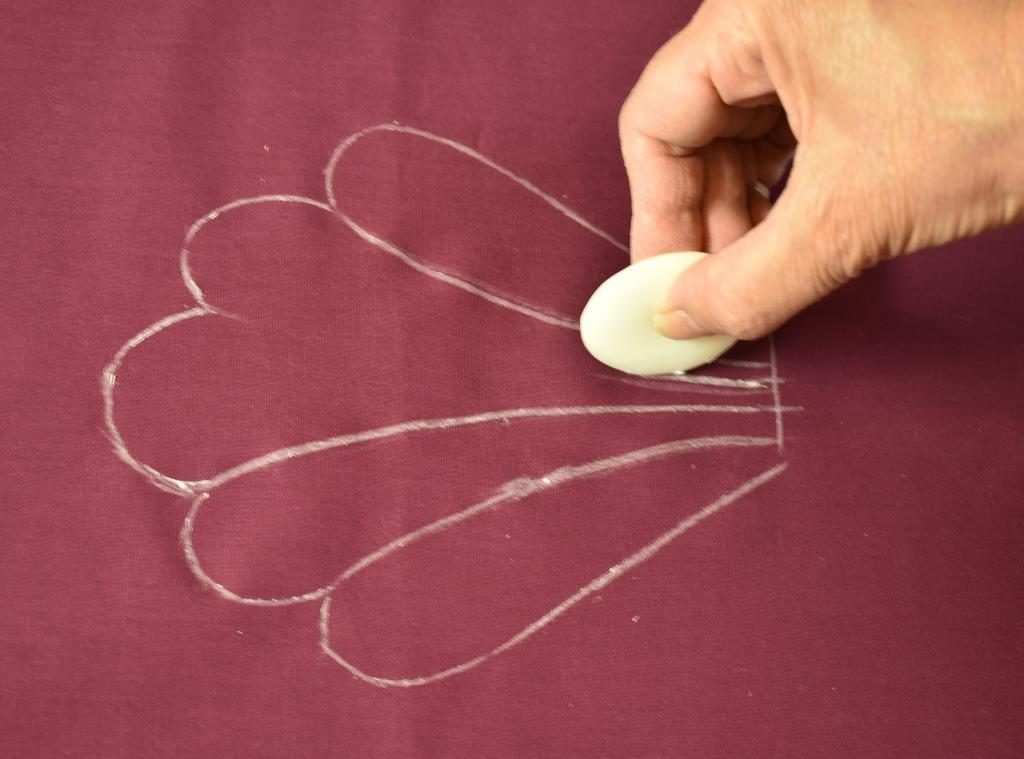
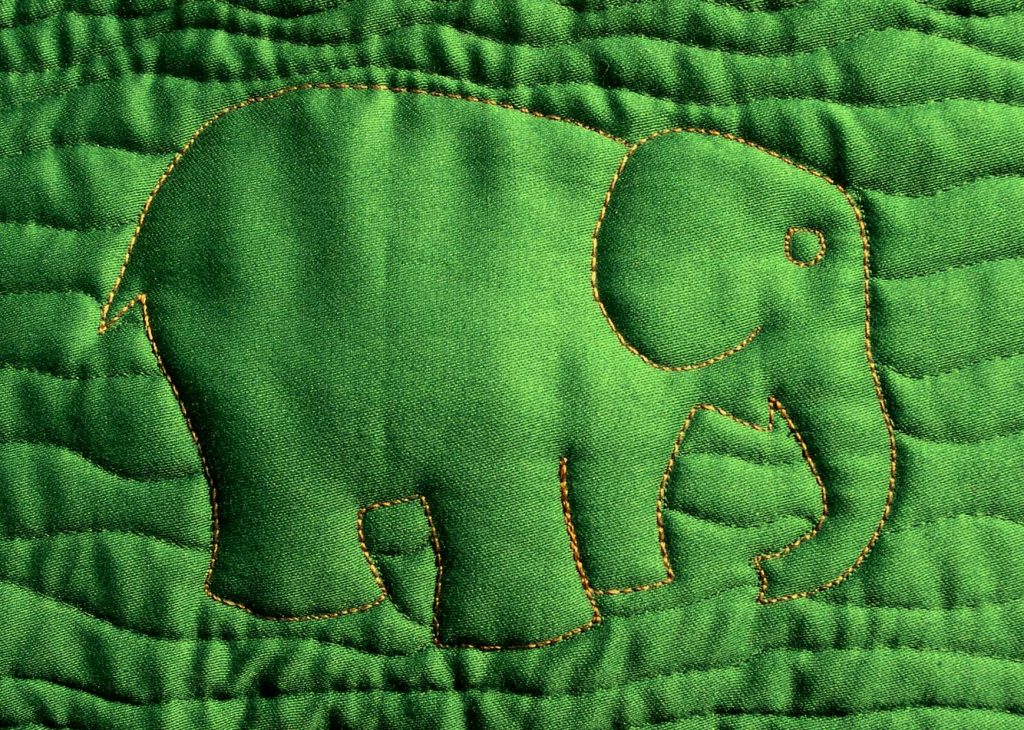
Can you see where you would need to do this for the petals on the sunflower above, or the ear, eye and leg on this purchased elephant template?
Using household items
Household objects such as plates or cups were often used for simple shapes such as circles or curves – either for drawing out templates, or used directly on the quilt.
To use without making a template, simply place your object onto the layered fabric, checking that it is correctly aligned with the centre and edges of the block or border. Then mark around it.
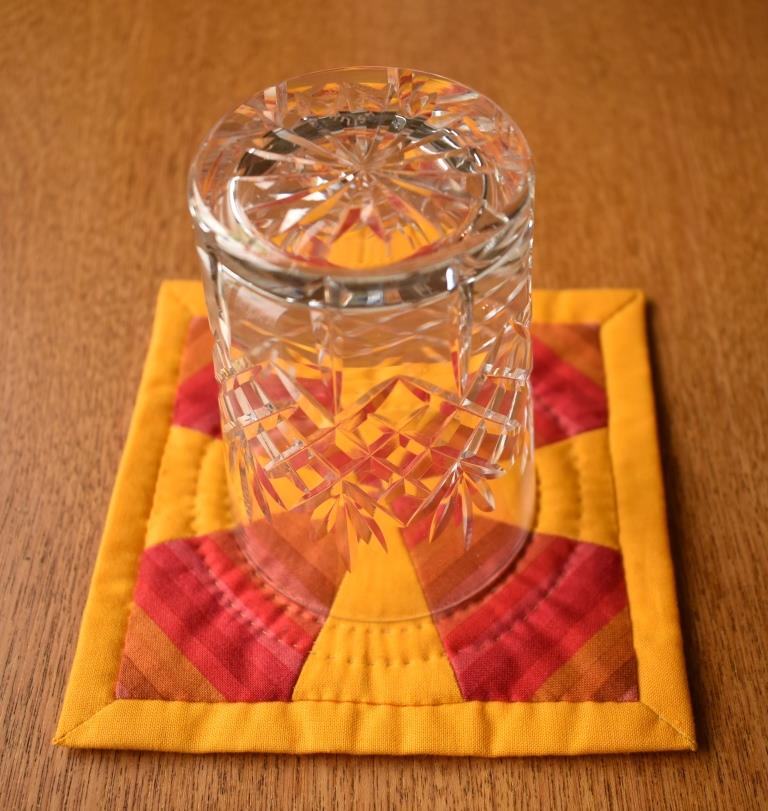
Drinking glasses were used to mark the circles on my Swirling Stripes Mug Rug
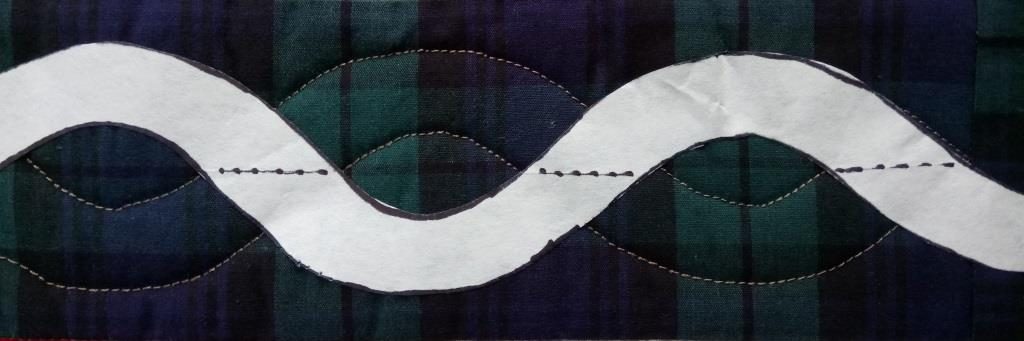
Freezer paper
Solid templates can still be used today. A useful modern equivalent is freezer paper, which has the advantage that it can be temporarily fixed in place by ironing on. I used this method to mark a simple cable on the sashing of this Cotton Reel Strips quilt:
Masking tape
Straight lines can easily be marked using masking tape. This can be stuck down into position, before stitching along the edge.
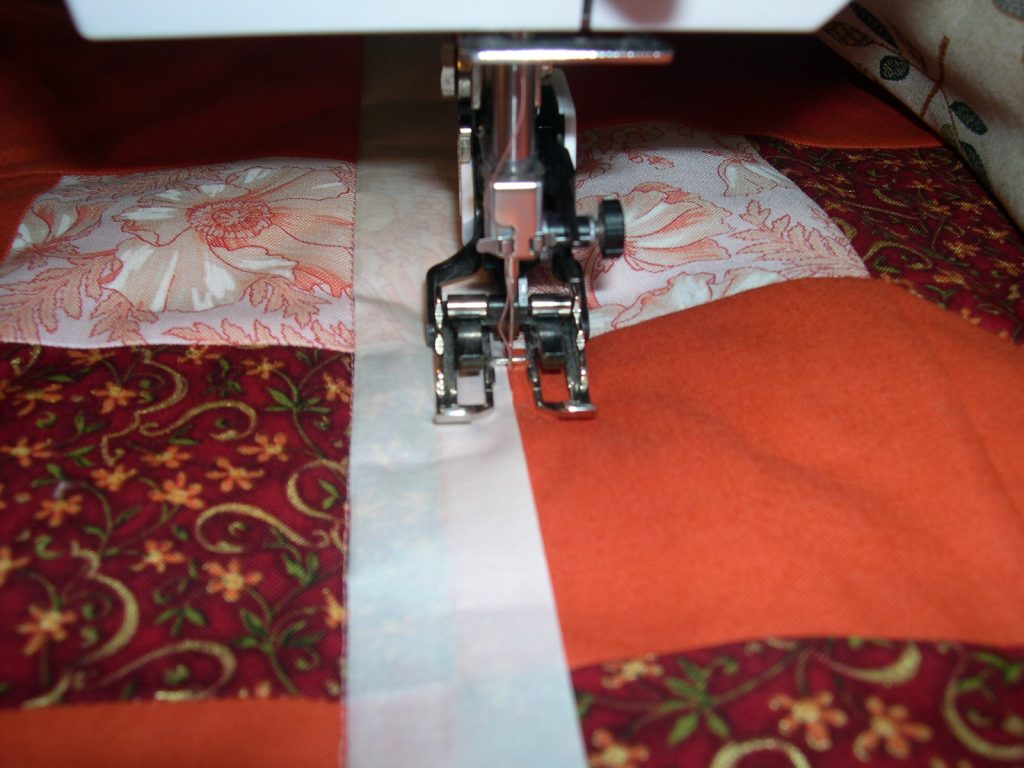
Here, masking tape is positioned centrally over the seam before machine quilting along both sides. This is a good method for marking Grid Quilting.
Note that for hand quilting, it can be quite awkward trying to stitch along the side of the masking tape. I would advise sticking it down to position the straight line, and using another marker and a ruler to draw along the edge, before removing the tape and then putting the quilt into the hoop for quilting. The same applies to freezer paper – it tends to come off during the hand quilting process as the fabric is constantly flexed.
Quilting Basics
This page is part of a set about Quilting Basics.
If you would like to try out hand quilting on a small project, the Feathered Hearts download pattern from my online Shop would be suitable.
Click on the links to discover more: