This is the fourth instalment of my Skilful Skyful series, and will share with you all the tips and tricks to make and use Square in a Square units.
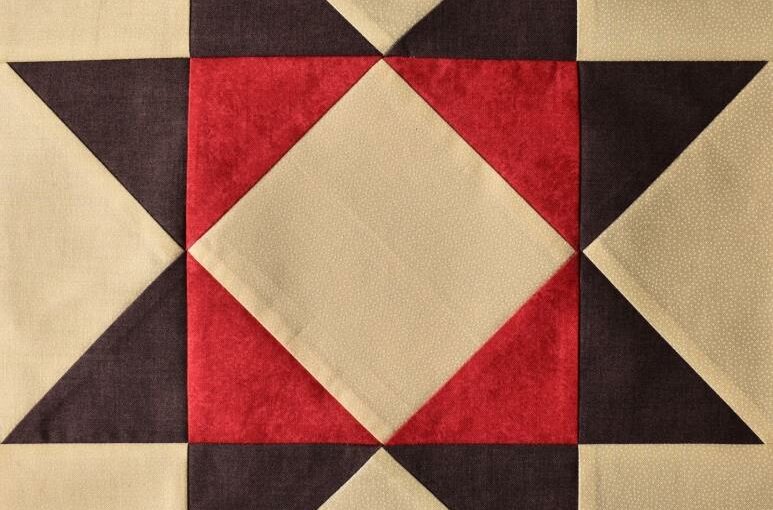
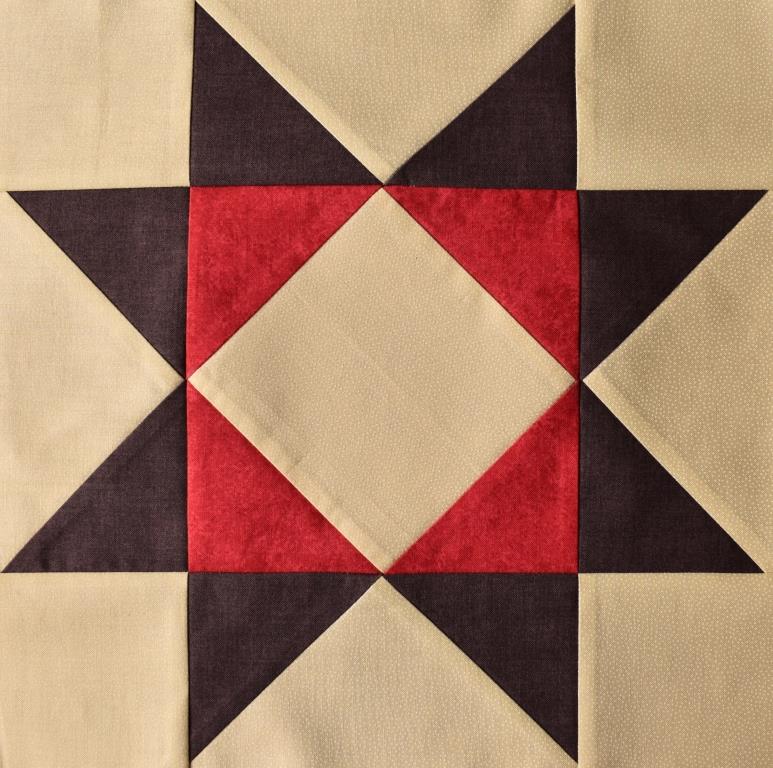
Its easy to see how these little units got the name “Square-in-a-Square” – there is a smaller square set “on-point” within a larger square made up of the four outer triangles.
They add variety to the range of blocks that you can make.
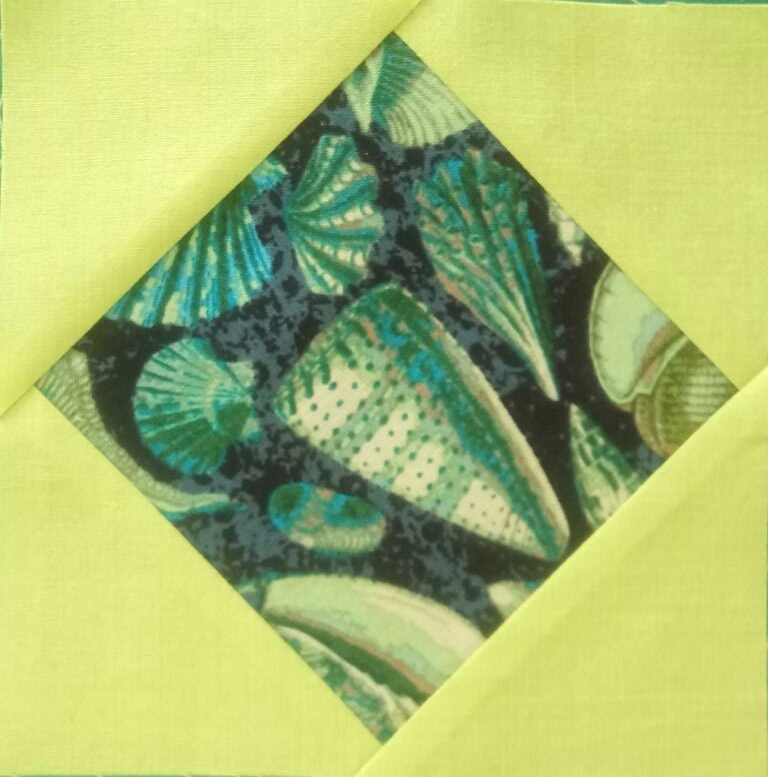
It’s important to make them so that there is a ¼” seam allowance left outside the tips of the central diamond on each side – this will be hidden when the square-in-a-square unit is combined into a block, of course, leaving perfect points for the inner square.
Cutting Sizes
There are two free block patterns provided with this instalment, so you just need to use the size it gives on the pattern.
However, you might want to calculate the size to use in a different block, so I will explain how it is done for those who want to know. Working out the size of the pieces is more complicated than some of the other units we have done in this series, so if Maths is not your strong point, feel free to skip this part! Just go on to the Cutting section.
Outer triangles
The outer triangles are relatively easy as these are half square triangles that need to finish half the size of the finished unit.
- So, to fit a 4″ finished unit, cut these to finish 2″ along the short edges; i.e. cut a 2 ⅞” square, and cut in half diagonally to make two triangles.
- To fit a 6″ finished unit, cut these to finish 3″ along the short edges; i.e. cut a 3 ⅞” square, and cut in half diagonally to make two triangles.
- To fit a 3″ finished unit, cut these to finish 1 ½” along the short edges; i.e. cut 2 ⅜” square, and cut in half diagonally to make two triangles.
Inner square
If you want to calculate the size of the inner square for a size other than the ones provided in the pattern, this can be done using Pythagoras’ Theorem. You can’t just cut it oversize and trim afterwards for this unit, as the points would be chopped off.
To calculate the size of the central square which needs to be cut for a square-in-a-square unit, then the formula needed is:
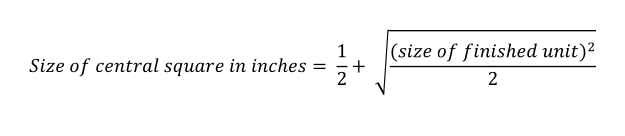
Note that the size of the finished unit is the desired measurement of the whole square-in-a-square unit after it has been sewn into the block. You may need to round up the measurement of the central square slightly to the nearest number of eighths of an inch.
- So, to fit a 4″ finished unit, cut the inner square 3 ⅜ “.
- To fit a 6″ finished unit, cut the inner square 4 ¾ “
- To fit a 3″ finished unit, cut the inner square 2 ⅝ ”
Cutting
Does cutting these strange sizes sound difficult?
Its not really any different to cutting any other size – you just need to know which small line to look out for on your ruler, and cut as usual (ignore the lines on the cutting mat, which are less accurate).
Quilters Ruler have solid lines every inch, and then big markings (the yellow lines here) for the quarter, half and three quarters of an inch.
There are also small tick marks regularly across the inch lines. These mark eighths of an inch, so you need to line up the edge of your fabric against the third little mark after the main inch mark.

Method
Step by Step instructions for assembling a square-in-a-square unit are given below; or you can watch this short video:
Take two of the squares which will make the outer triangles.
Cut each along the diagonal, to make four half square triangles.
Fold in half (wrong sides together) to find the middle of the long edge.
Pinch to make a crease mark.
Take the centre square, and similarly mark the mid-point of the edge, by folding in half and pinching the fold at the edges. Unfold.
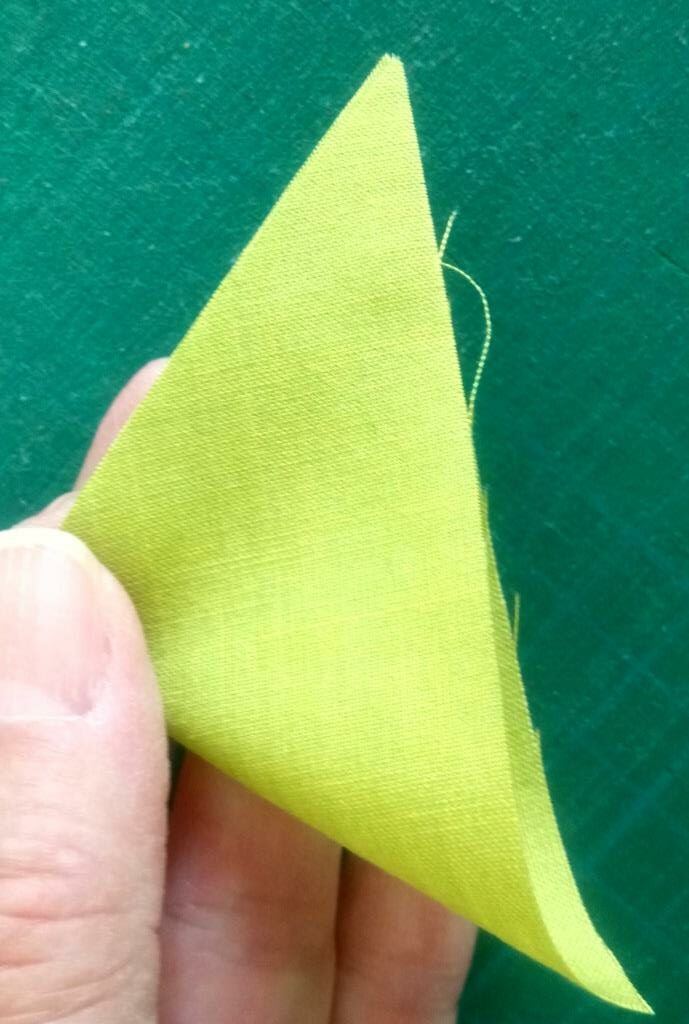
Now lay the opened-up central square right side up on the table, and lay one of the half-square triangles face down upon it, lined up against one of the edges of the square.
The triangle’s edge is longer than the square’s edge, so match the pressed marks to line it up centrally, with the two points sticking out equally at the sides.
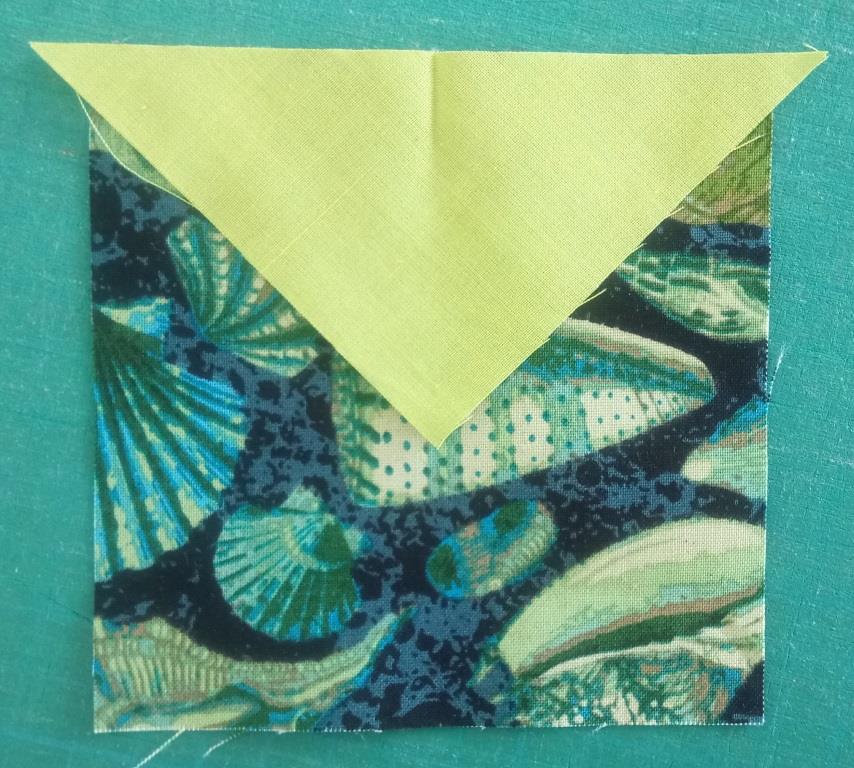
Stitch with a ¼” seam
Flip the triangle out, and press as directed in the pattern.
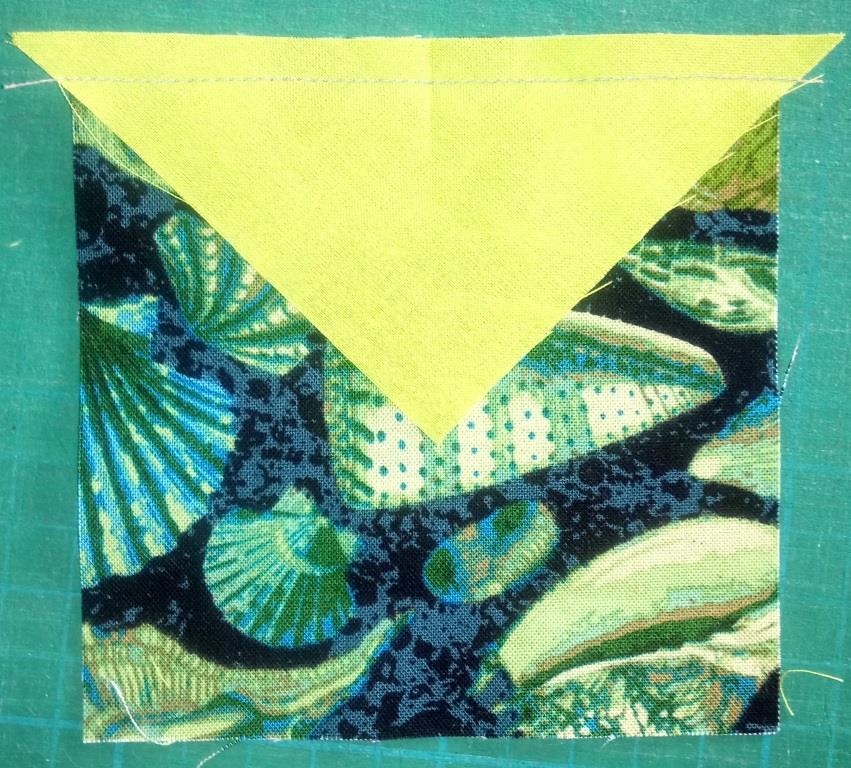

Stitch another triangle onto the opposite side in the same manner.
Fold to mark the centres with a pressed crease again, and add two more triangles onto the remaining sides.
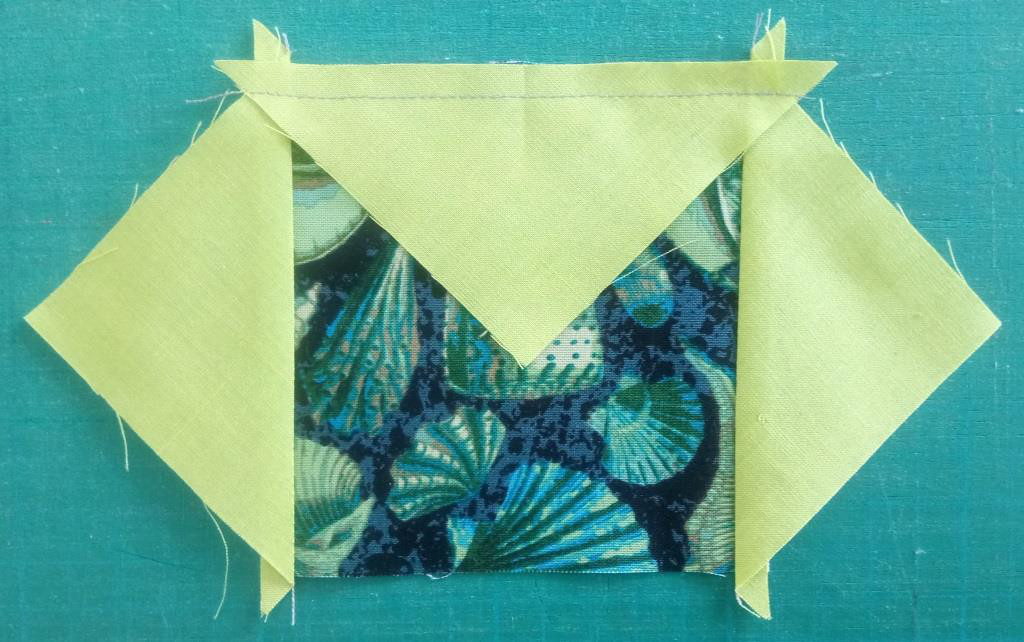

If you press two of the seams towards the centre, and two towards the outer triangles, this reduces the bulk at the points.
Mrs Brown’s Choice block
This block has quite a few pieces in it, but as it has four square-in-a-square blocks, its a good one to practice with. As the points on the square-in-a-square don’t meet other points, it’s not actually difficult.
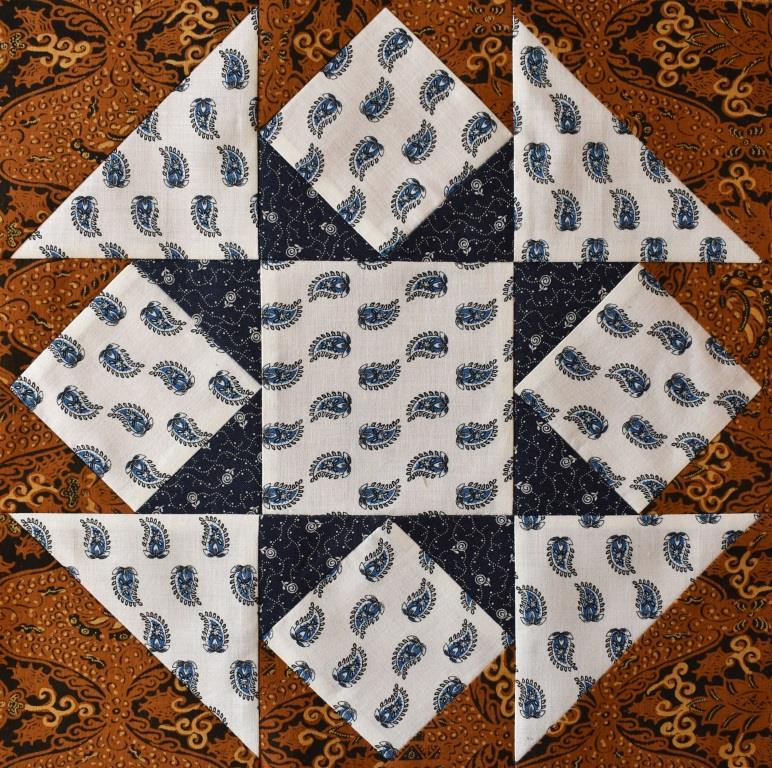
Of course, this block also has half-square triangle units in. This was the focus of Skilful Skyful Part 1, so go back and have a look at that again if you need to.
A variation of this block can be made if the half square triangles are turned round to have the Medium corner towards the centre instead of the Light corner.
I actually made it like this by mistake – but I have decided I like it, so have kept it this way.
You might have spotted that the four triangles around each central square are not all the same colour – there are two of each. So that is why you need to start off with these in both Dark and Medium, as shown in the video below:
This video shows some additional tips for making Mrs Brown’s Choice, and also Ribbon Star
Full instructions are provided in the free download patterns.
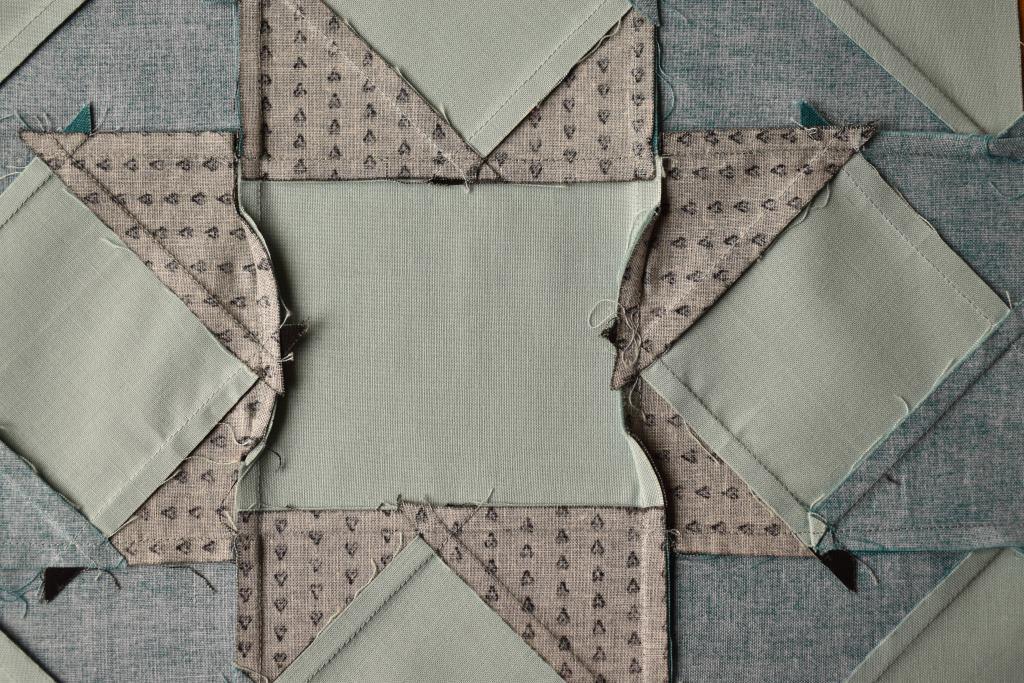
Pressing direction
Remember to follow the pressing instructions in the free download pattern. I have planned these to try to minimise bulk, which helps to get a good line-up and perfect points.
I press two of the seams in the square-in-a-square unit in towards the centre square, and two out towards the triangles to reduce bulk.
This photo shows it from the back (it looks odd, doesn’t it? But it works!)
Even with this precaution, the tips of the inner square are still quite bulky places. So its best not to turn them back on themselves if possible when joining to the next unit.
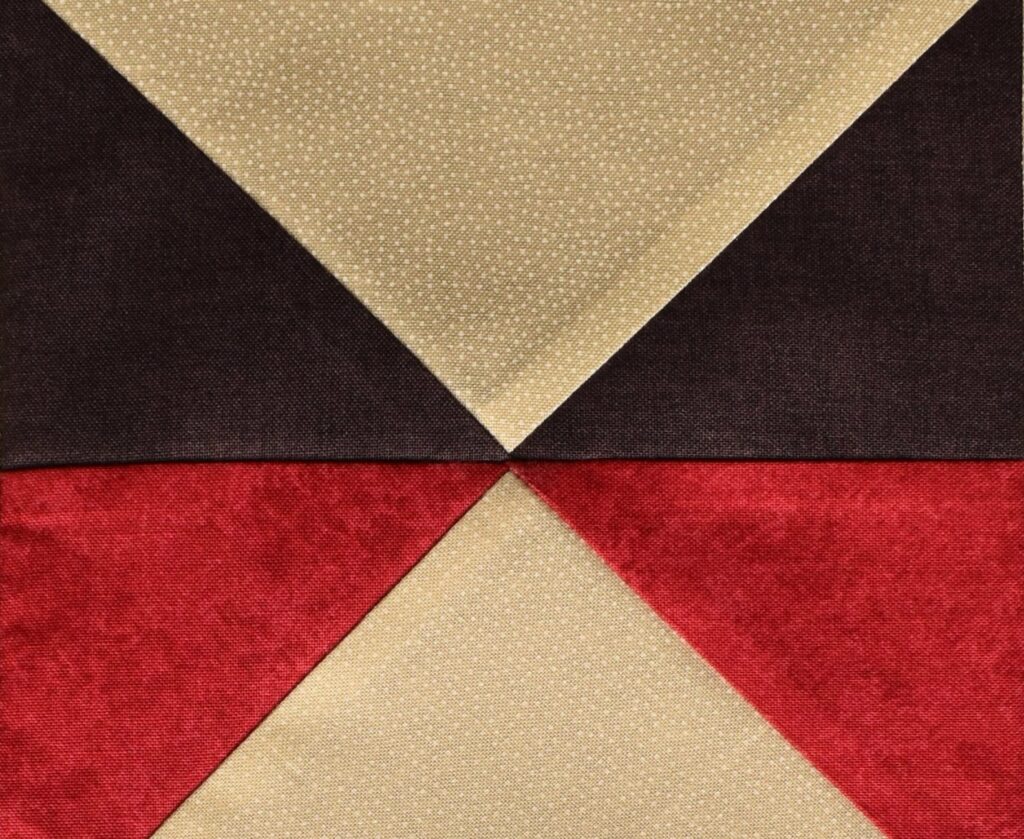
That is why the top and bottom rows are pressed with the column seam allowances away from the square-in-a-square units, and the middle row is pressed with the seam allowances towards the plain centre. On this block, that works in perfectly with the requirement for the seams to meet each other pressed in opposite directions so that they nest nicely, giving a good line-up when stitching the row seams next.

However, the long row seams can’t easily be pressed in a way which works as perfectly. I pressed them out towards the edge of the block, as this was best for the two square-in-a-square units on the outside of the middle row. But this means that the square-in-a-square units at the centre of the top and bottom rows are turned back at the bulky points where they are stitched onto the central square. This is what the block looks like on the back – can you see how lumpy it is at those two places?

Pressing the row seams the other way wouldn’t solve the problem, would it, as that would affect the other two square-in-a-square units! Pressing the seams open wouldn’t help either.
In the end I decided to repress the centre of the row seams so that they flipped in the other direction. This is not something I do very often, but it worked well here to reduce the bulk.
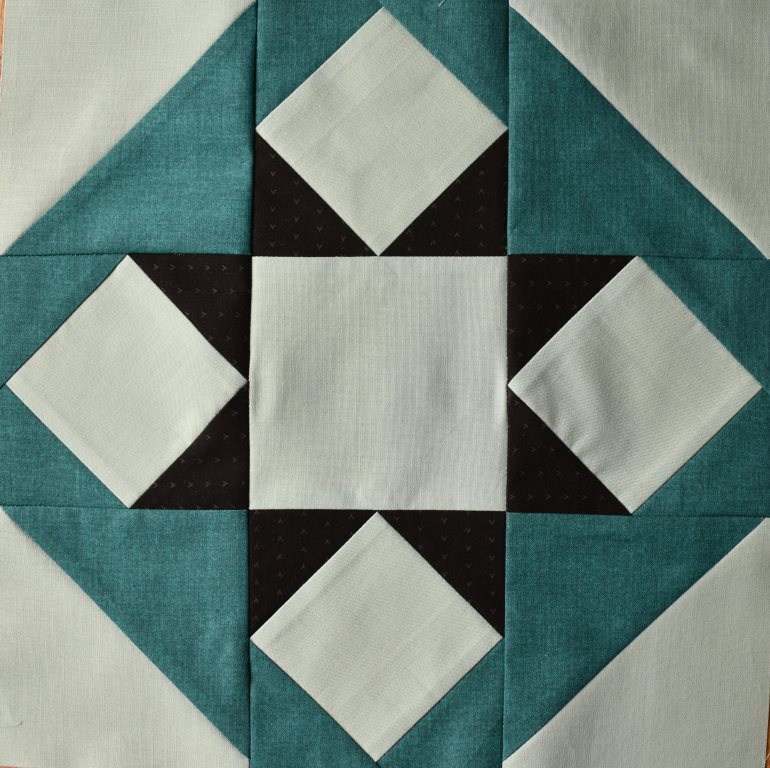
Ribbon Star
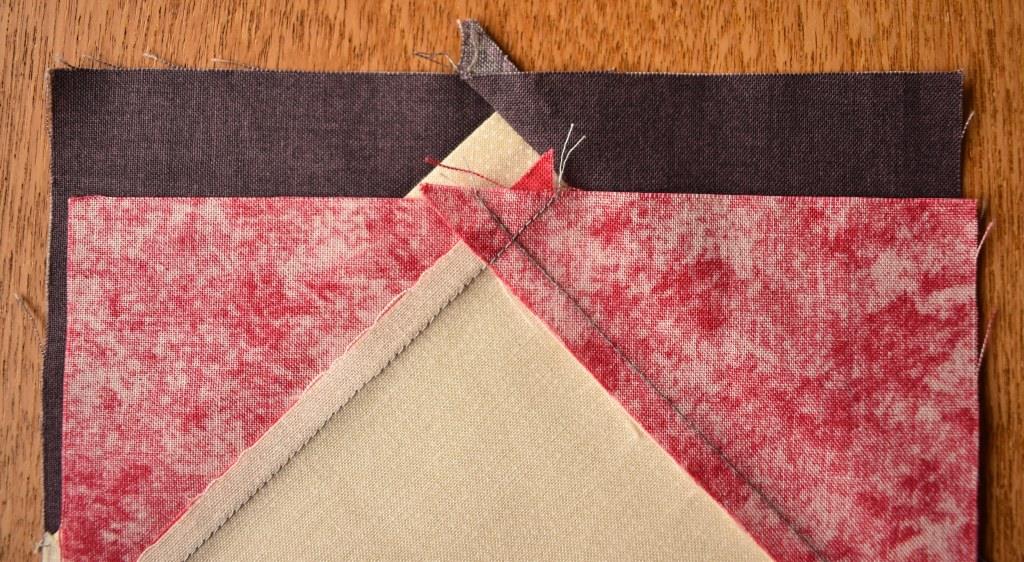
This is a more advanced block using a square-in-a-square unit. It looks deceptively simple, but because the points on the outer Flying Geese units meet the square-in-a-square points, the bulk problem is doubled.
I have planned the pressing, so that the diagonal seams all meet one pressed in the opposite direction. A good way to check for this is to make sure that they all spiral round the join in the same direction, as shown by the green arrows here:

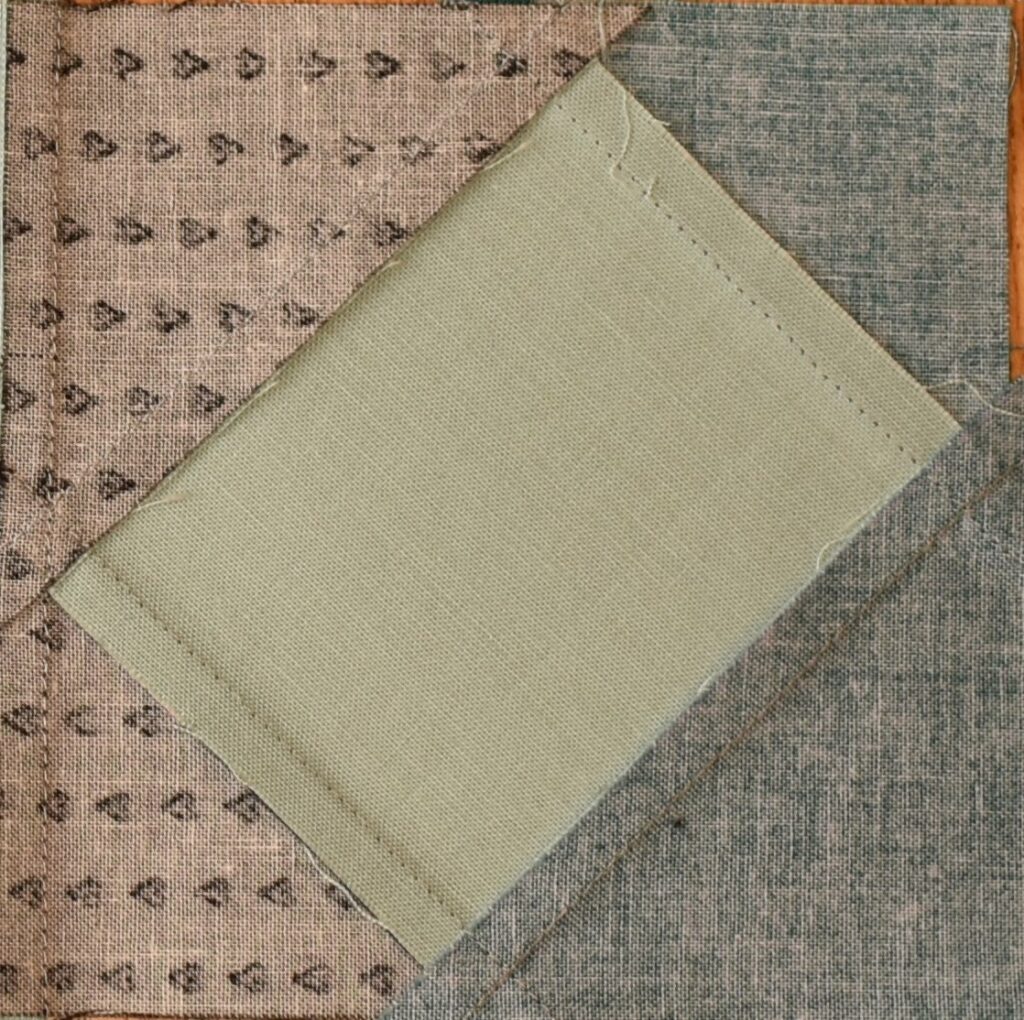
Now, when you are preparing to pin the seam, you should find that they meet pressed in opposite directions:
Shuffle them between your fingers so that both pairs of seams nest (this is demonstrated in the second video above)
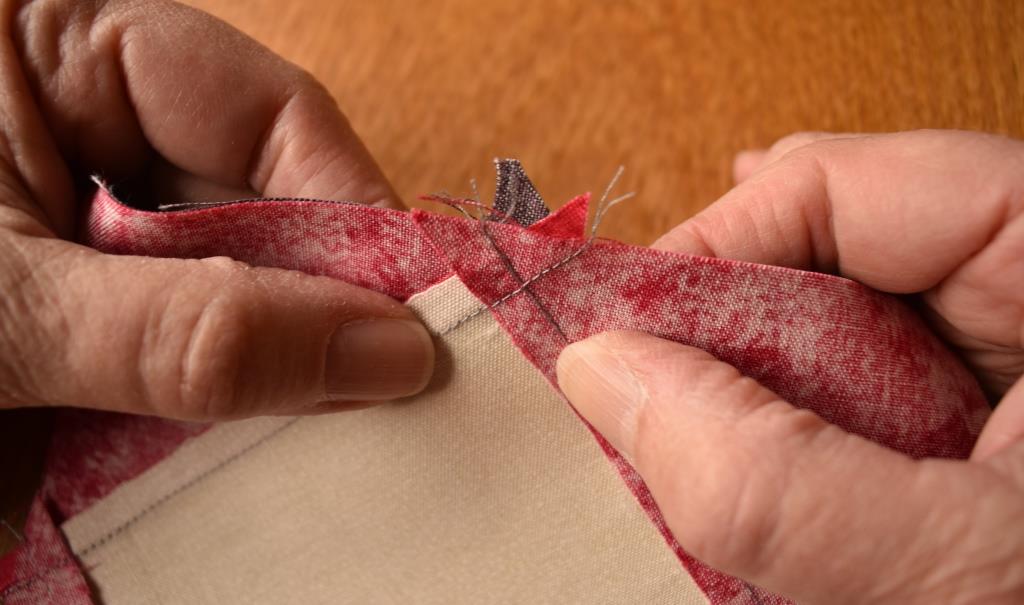
Then, pin together before stitching.
You can see the crossover of the two seams – this is where the point is.

Aim to stitch your seam just a fraction away from this; slightly in the seam allowance. If you stitch exactly though the crossover, the meeting of the points will actually be hidden at the bottom of the “ditch” – and because there is still considerable bulk, you can’t press this seam as flat as usual to expose this. Stitching just a little away will leave a bit of fresh air between the points – but actually it will look perfect.
Full instructions for piecing this block, including lots of extra tips to get those perfect points, can be found in the free download pattern.
This is the fourth instalment of the Skilful Skyful series. By working through these tutorials, you can build up your skills in machine-stitched block patchwork, making a set of 12″ blocks which could be combined if you wished into a Sampler Quilt.
- Part 1: Half-square triangles
- Part 2: Quarter-square triangles
- Part 3: Flying Geese
- Part 4: Square-in-a-Square
- Part 5: Four-Square
- Part 6: Half/Quarter Square triangle
- Part 7: True Eight Point Star
- Part8: Half-Rectangle Triangles.
Other pages about machine-stitched patchwork can be found in the Techniques section