Mitred corners look so classy on a quilt, but they need a bit of care to look good.
How to stitch mitred corners
Stitch each border onto your quilt starting and stopping at a point 1/4″ in from the end of the centre panel. Secure your stitching here with a fix stitch or by going backwards for a few stitches.The seams should meet at the place which will become the corner of the centre panel.
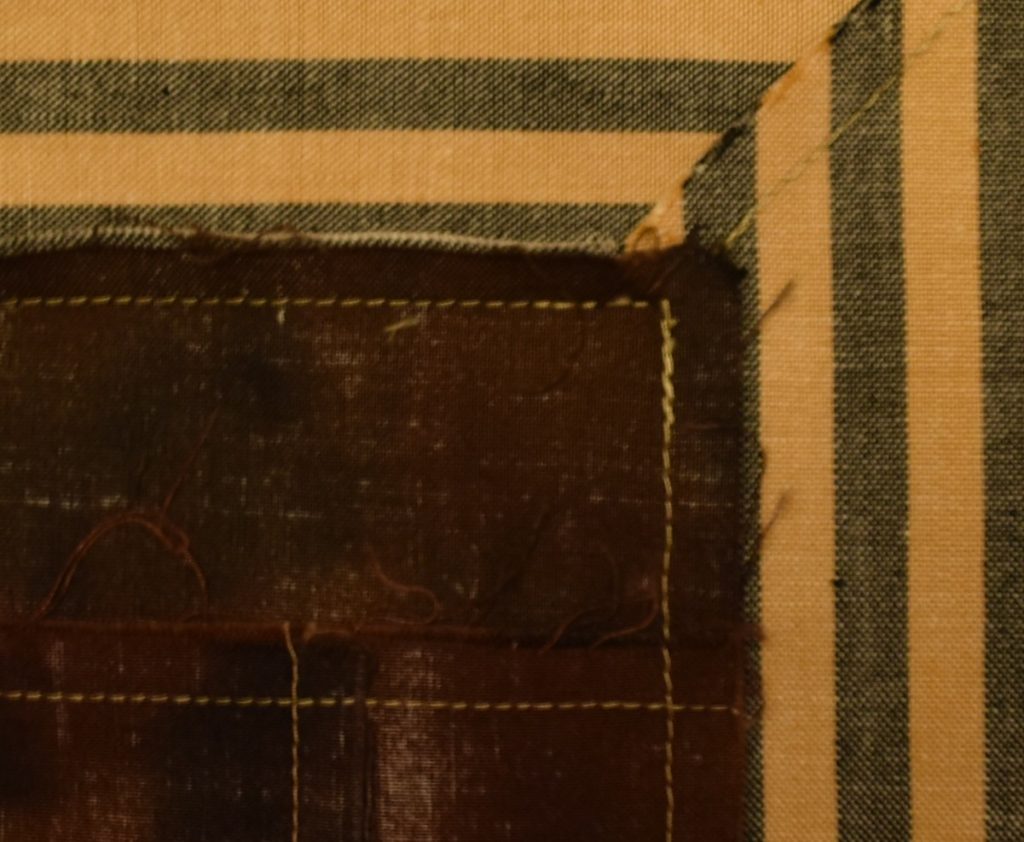
You can see this shown on the back of this finished corner– look at the two lines of stitching which meet on the dark fabric.
Tip: When you stitch the border seams, don’t cut the thread off immediately. If you haven’t quite managed to make them meet at the corner, a couple of stitches by hand with the thread tails will fix this.
Fold the centre block along the diagonal right sides together, so that two adjacent border pieces lie on top of one another, lining up the border seams on top of one another from the corner.
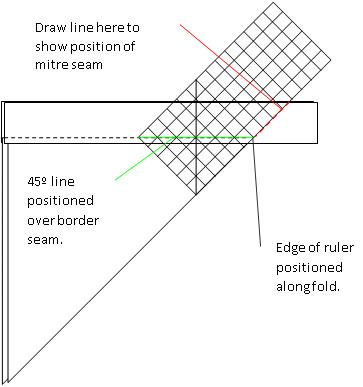
Lay the 45º line of your ruler along the border seam line, positioned so that the diagonal fold of the central block is directly underneath the edge of your ruler.
Draw a line along the edge of the ruler diagonally across the border. Make sure that you start exactly at that inner corner point. Lift the ruler away, and carefully pin the border layers together without disturbing their position.
Stitch the mitre seam, along the drawn line, again stopping and finishing with a fix stitch at the inner corner point. (You can’t see this point on the photo below, as its tucked in behind the seam – make sure that you move these seam allowances out of the way before you stitch, so that you can get right in the corner)
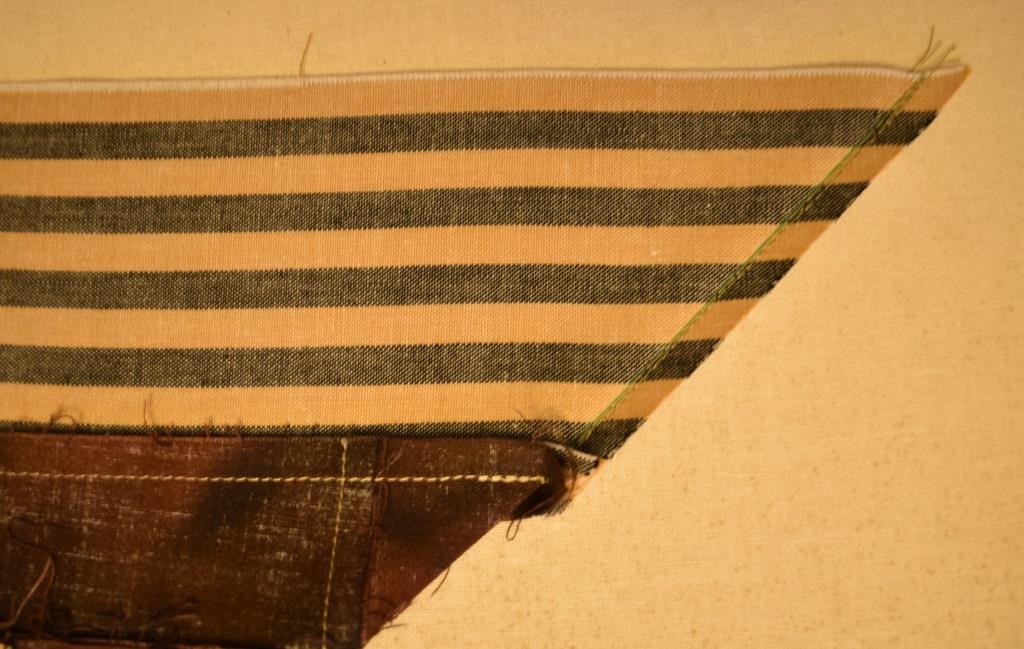
Trim the excess border fabric away by positioning the ruler with its ¼” line along the mitre seam, and rotary cutting along the edge. Check that you are cutting on the side of the line with the spare triangles of fabric!
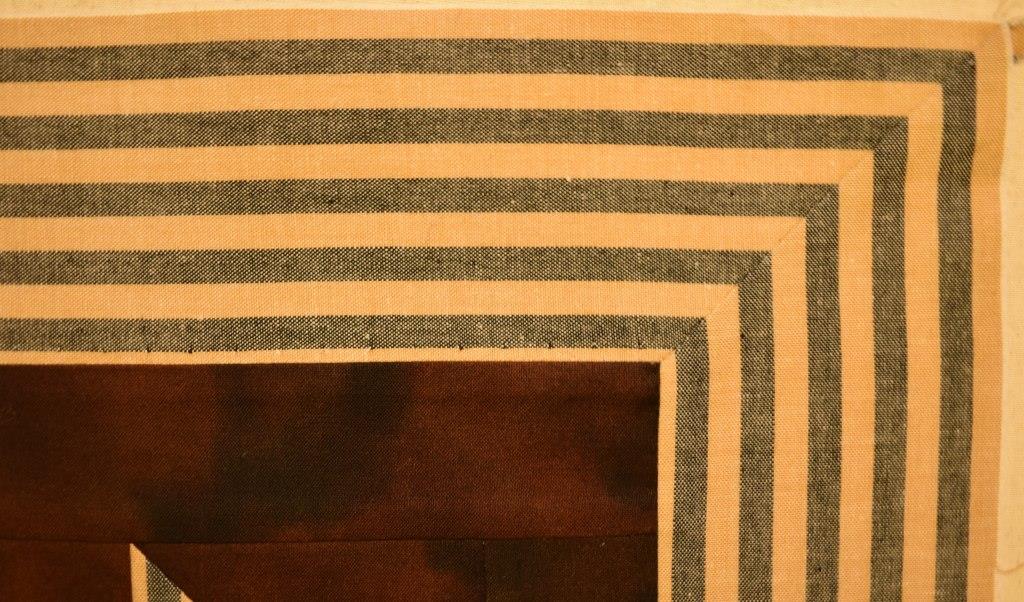
Open out and press carefully – you should have a perfect mitred corner.
If this is the first time that you have attempted this, machine tack the seam with a long stitch as a trial first, and open out to check it before trimming – its easier to unpick if its not quite right.
Repeat this mitring process for all four corners to give a lovely finished effect.
Using striped fabrics
I love using striped fabrics – and they are particularly effective used as borders.
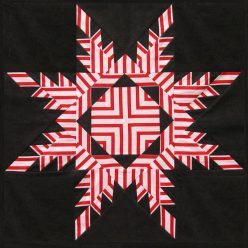
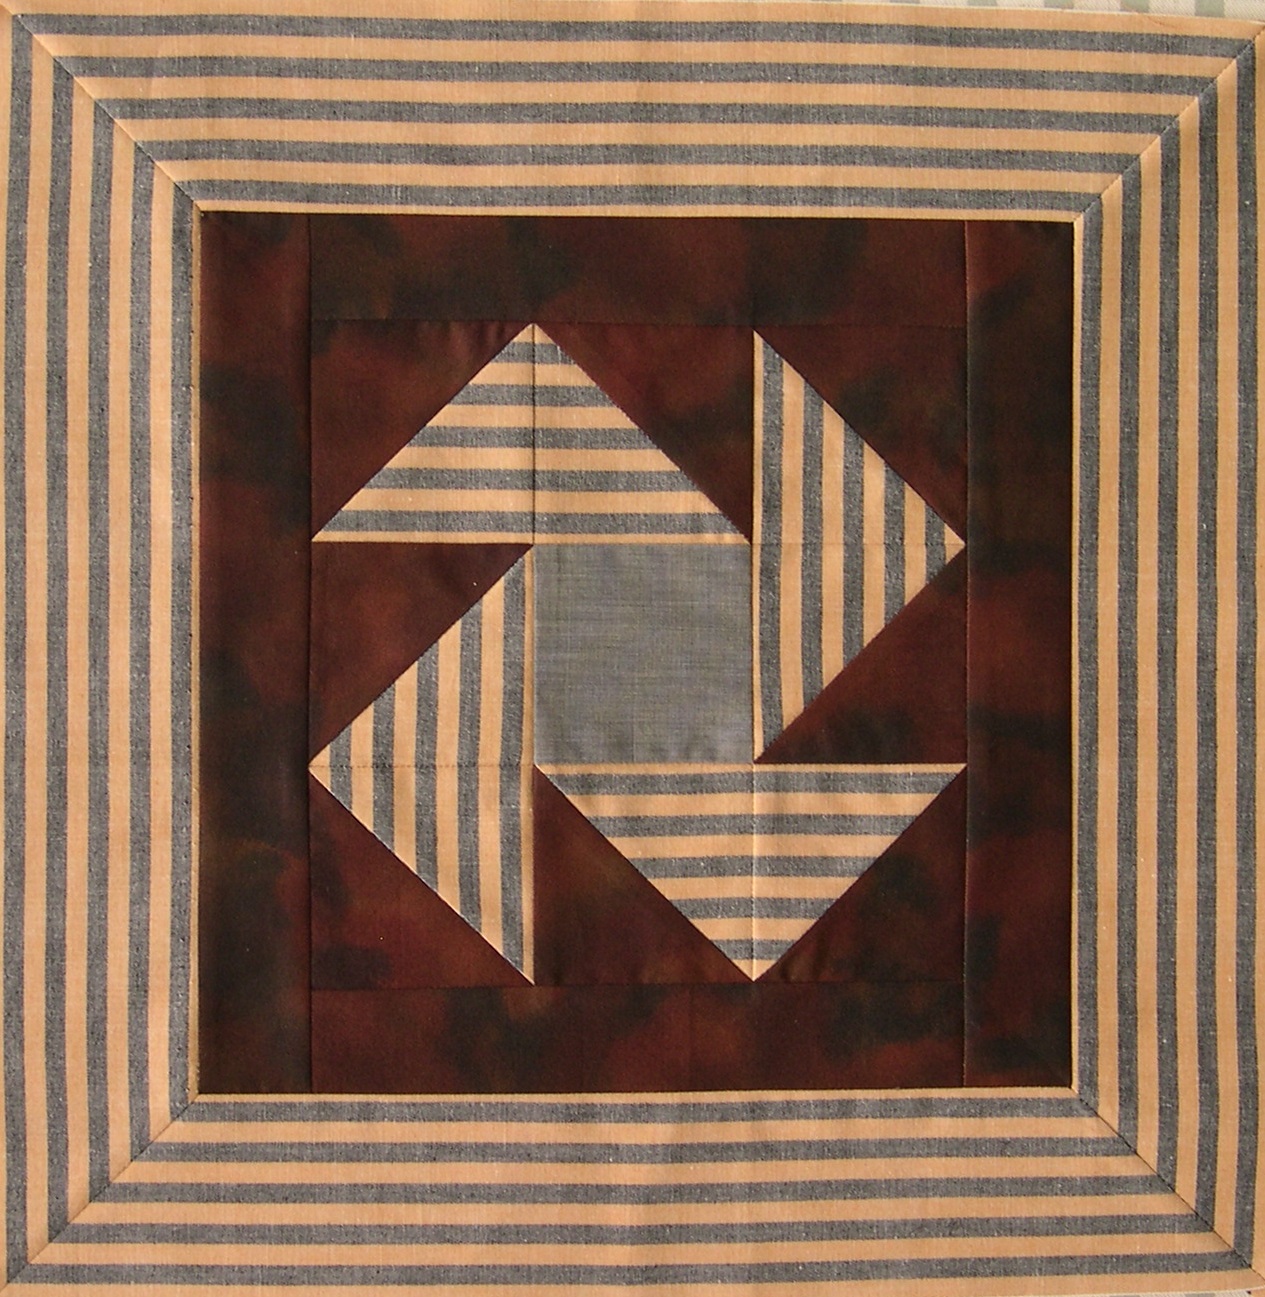
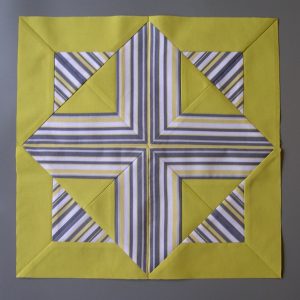
The effect is surprisingly different if the stripe direction radiates out from the centre – see the effect here, which looks livelier in comparison to the calmer effect when the stripes run parallel to the border.
Matching stripes
If you want to match the stripes as I have done, it’s not as difficult as you might think – the key is to cut all four border pieces with the stripes in exactly the same place. They should then meet correctly.
Its easier to cut this without making mistakes if you cut a block of fabric the desired length of the border, and four times the border width.
Then cut all four border pieces from it, so that all four pieces have the same distribution of stripes.
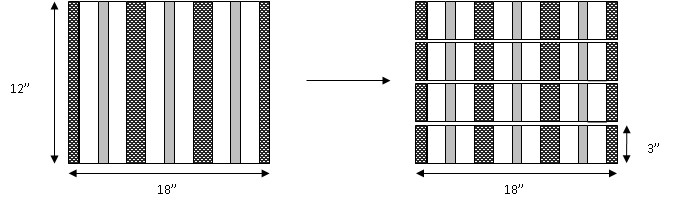
If you are using a regular stripe, cut your border pieces with the centre of a stripe at the centre of the border as shown above – this will ensure that the corners are all the same.
Non-symmetrical stripes
If you have a complex or non-symmetrical stripe, then at a first attempt, the stripes at the mitred corners are unlikely to match properly
This is because it is impossible to have the same sequence of stripes at both ends.
The corners can still be made to mitre with a perfect match, but the border pieces have to be cut and placed in a particular way.
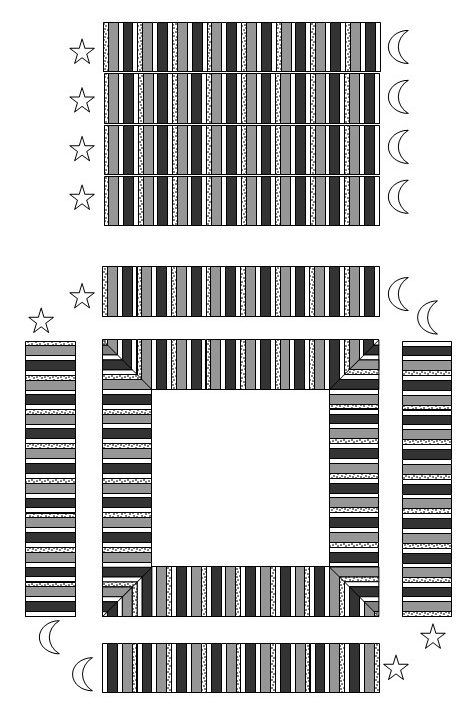
Identify the most suitable section of your stripe repeat.
If your fabric has a particularly strong colour for one of the stripes, try to cut this rectangle from the fabric in such a way that this strong feature is equally distributed either in the centre or at the corners, to avoid an unbalanced appearance.
Cut a rectangular block of fabric and then cut all four border pieces from it as before, so that all four pieces have the same distribution of stripes.
Now mark the ends with two colours of tailor’s tacks, so that all the ends that have identical stripes have the same colour tack – I have used star and moon markings to show this.
When stitching the borders on, you need to be very careful to have exactly the same part of the stripe at the corner point for both of the borders.
When laying out the borders later, turn the border pieces round as necessary, so that an end will always meet one that is exactly the same– on my diagram, a star always meets a star, and a moon will always meet a moon. This will, in fact, give you two slightly different types of corner – but as the stripes will match exactly, it will look perfect, and no-one will notice.
Look carefully at the striped border on this little quilt to see what I mean:
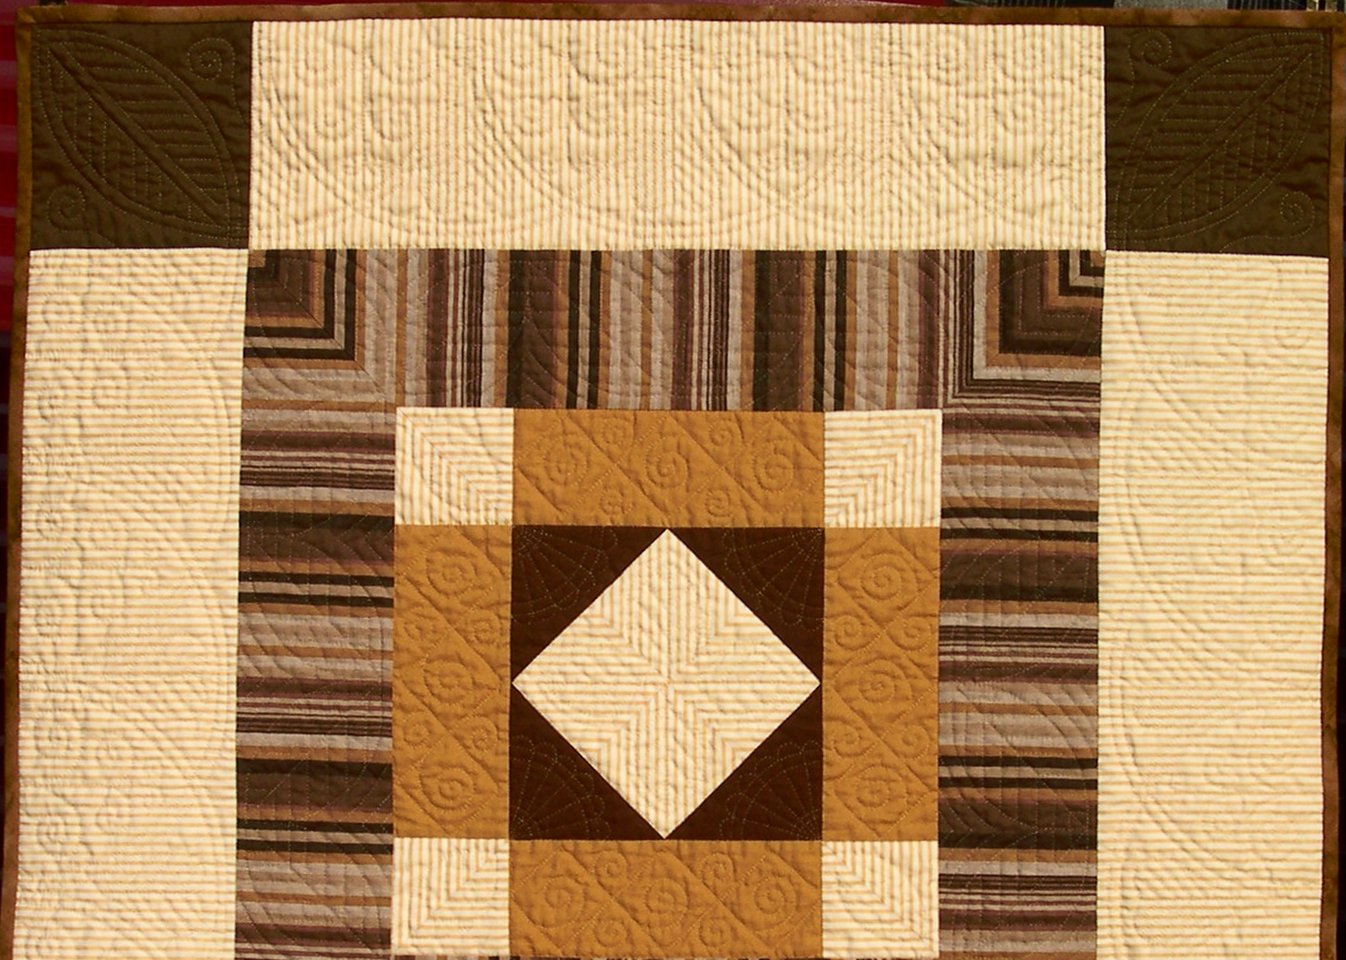
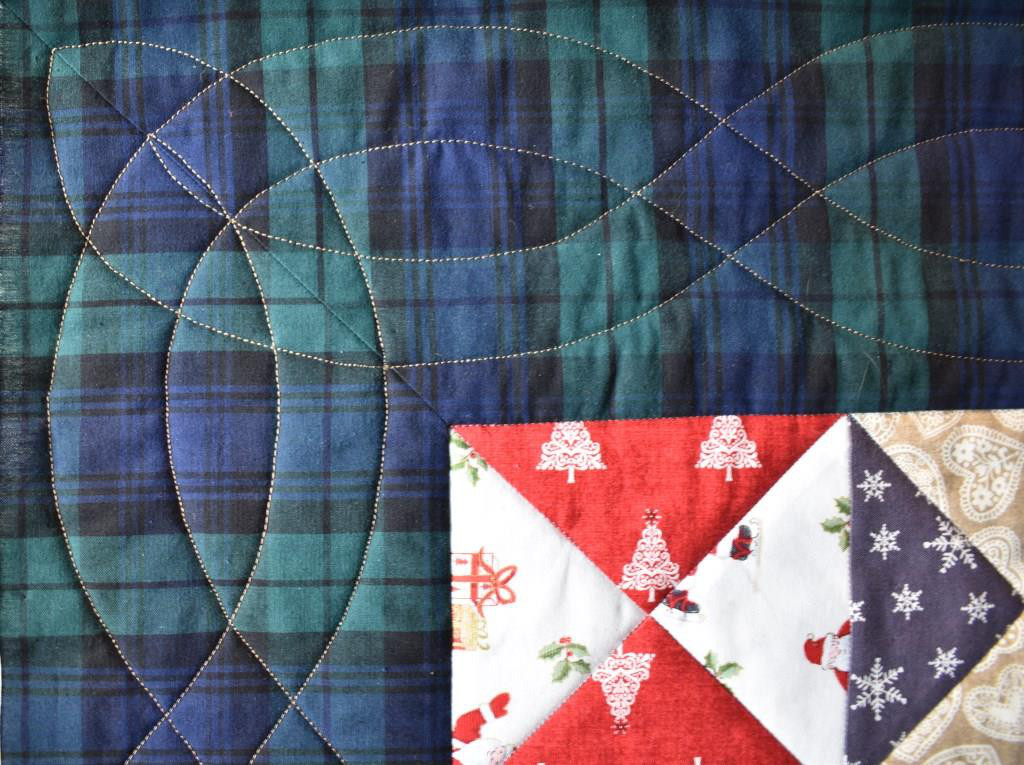
Stitching the mitre with perfect matching of the stripes
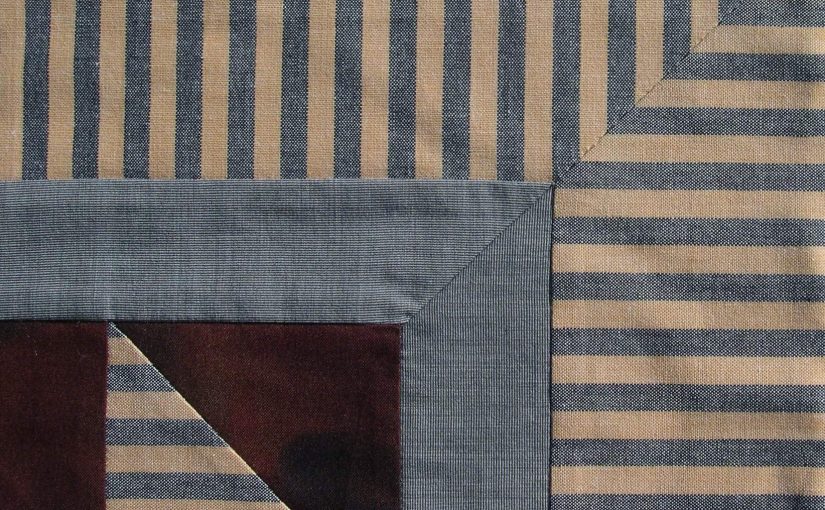
Look at how I pinned this tartan fabric in place before stitching the border seams, checking that the lines on the top fabric matched exactly with the same lines underneath:

After stitching the border seams, I then pinned the two layers together matching many of the pattern lines on both the upper and lower layers, before drawing the mitre line on.

The finished corner looks so perfect that you need to look twice to see that it is not all the same piece of tartan!!
There are more projects featuring mitred corners (including some with stripes) on the Wall hangings page.
I will be adding more tips for using striped fabrics successfully over the coming months – but if you would like to try an advanced project now, the download pattern for this stunning Easter Morning block is available in my online Shop, with nine pages of detailed step-by-step instructions with coloured photographs