I’m going to share all the tips and tricks for making and using Flying Geese units in this, the third instalment of my Skilful Skyful series.
These little units crop up in lots of blocks, and also in borders.
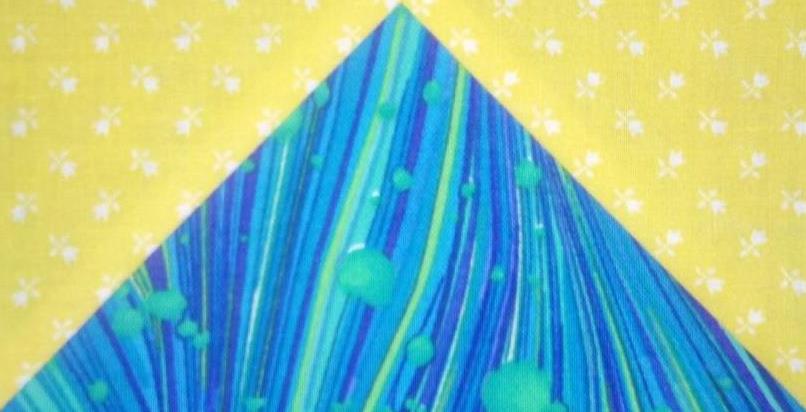
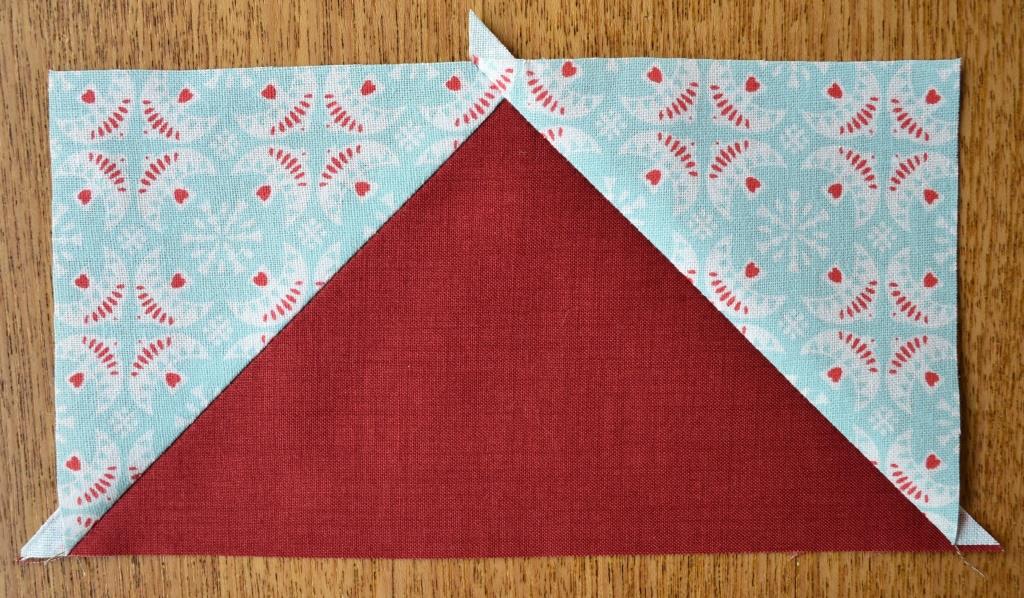
They have a large triangle flanked by two smaller triangles, and always finish as a rectangle which is twice as wide as it is high e.g. 6″ x 3″ or 7″ x 3 ½”
Remember that the finished size will need a quarter inch seam allowance adding all round.
Don’t worry about that extra part at the top; it is correct, and you need it – the extra will be hidden in the seam allowance to leave the point of the triangle on the seamline.
So to finish 3″ x 6″ the completed unit needs to be 3 ½” x 6 ½”.
To finish 1 ½” x 3″ the completed unit needs to be 2″ x 3½”.
Cutting sizes
The size and shape of the pieces that you need to cut to make the Flying Geese partly depends on which method you are going to use. You could cut out the triangles separately, but as they have bias edges, these will easily stretch and distort as they are sewn. It is much better to “quick piece” them, by stitching squares, which are then cut apart to make multiple units.
I will tell you in the free block patterns which sizes to cut, but you might be interested to know how to work it out yourself for other blocks, so here goes;
(Note that one other popular method of making Flying Geese is the “flip corners” method. I don’t use this, as you throw away a lot of triangles that are trimmed off, which I think is wasteful)
Now, in order to work out the size of pieces to cut to make a Flying Geese unit, it helps to be able to identify the nature of these three triangles.
Do this by comparing them to the two types you learnt to make in parts 1 & 2.
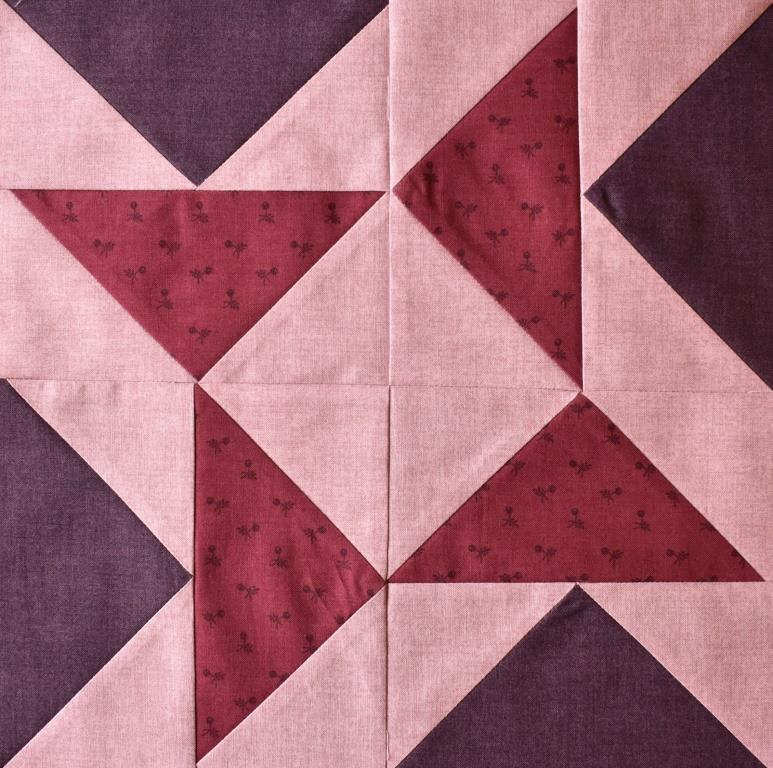
A half square triangle unit contains two triangles which each have two shorter edges on the straight grain of the fabric, and one longer edge on the bias.
Can you identify any single triangles like these on this photo?
The two smaller triangles on the outside of a Flying Geese unit are also like this, so they are half-square triangles.
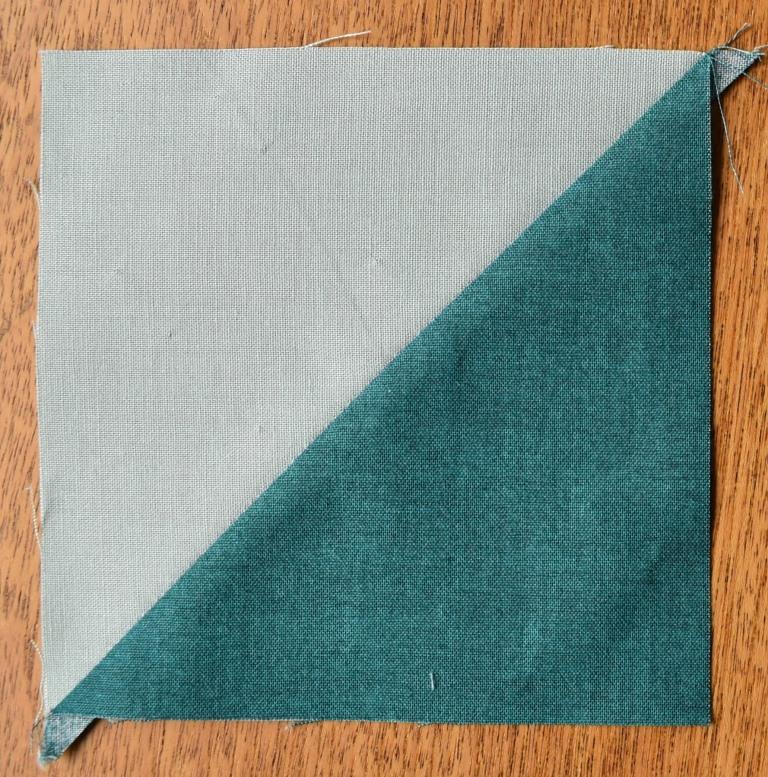
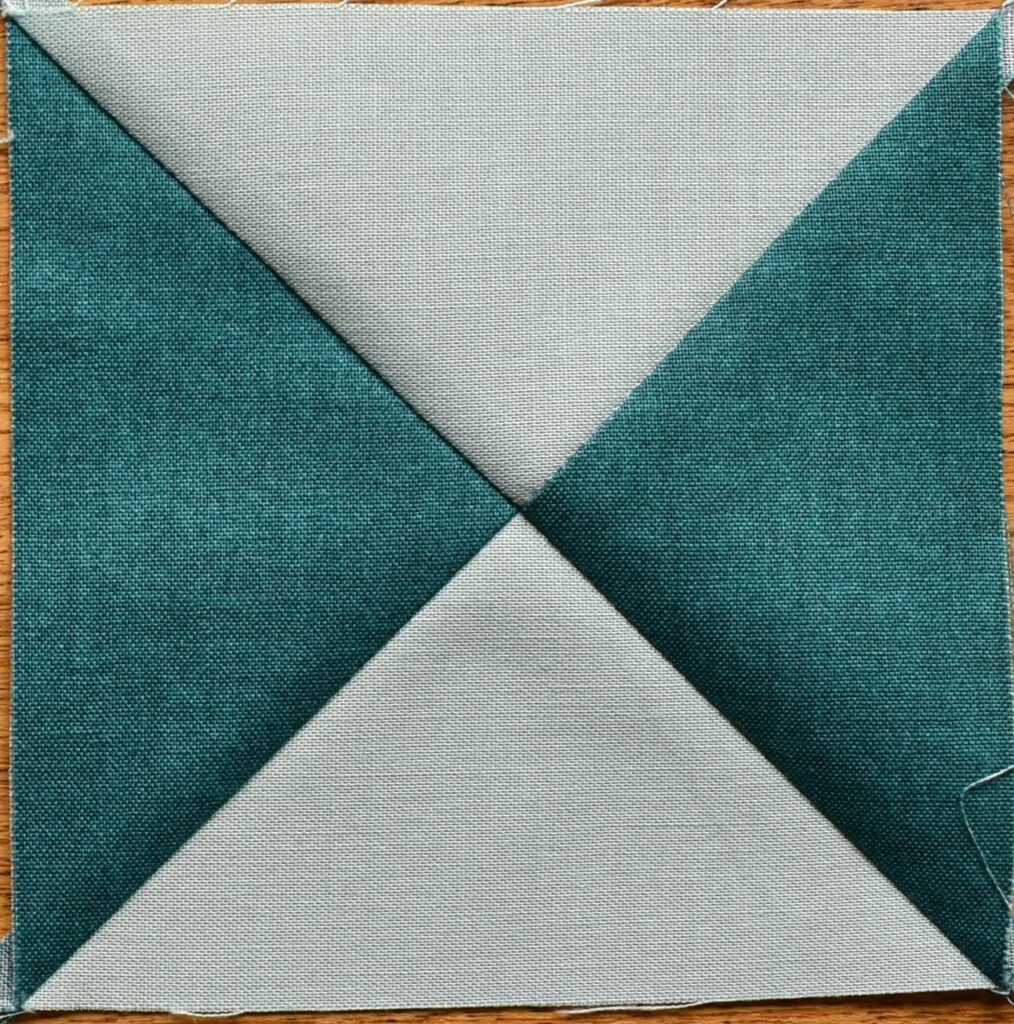
A quarter square triangle unit contains four triangles which are still right angled triangles, but are oriented differently.
These each have one long edge on the straight grain, and two shorter edges on the bias.
This is like the larger triangle in the middle of the Flying Geese unit, so that is also a quarter-square triangle.
In Skilful Skyful instalment 1, you learnt that to cut a square of the correct size to make a half square triangle unit, you need to add ⅞” to the finished size.
In Skilful Skyful instalment 2, you learnt that to cut a square of the correct size to make a quarter square triangle unit, you need to add 1 ¼” to the finished size.
So, by looking at this diagram, you can work out what size of square to cut to make your Flying Geese unit:
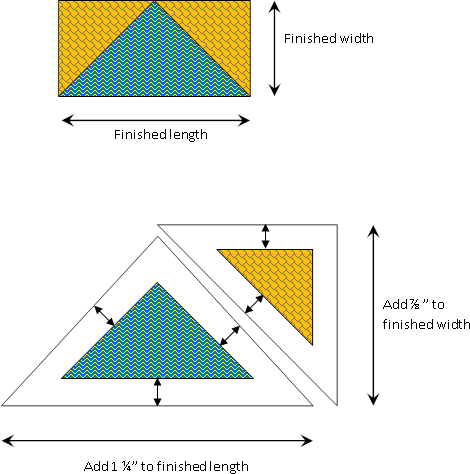
e.g.
- To finish with a Flying Geese which is 3″ x 6″, you need to cut small squares which are 3 ⅞” and large squares which are 7 ¼”
- To finish with a Flying Geese which is 1 ½ x 3″, you need to cut small squares which are 2 ⅜” and large squares which are 4 ¼”
How many do you need to cut?
Remember that the smaller squares will end up being cut along one diagonal, so will make two small triangles.
The larger squares will end up being cut along both diagonals, so will make four larger triangles.
Sizes for trimming
Now I know that some of you don’t like cutting these strange sizes, and prefer to cut larger and then trim down afterwards. That’s OK – but it doesn’t usually work with the quick-piecing methods. If you just round up to the nearest inch or half inch, you wouldn’t necessarily end up with a good Flying Geese point in a place that can be trimmed to a quarter inch seam. You would need to add twice as much to the small units as to the bigger ones. I will give you a couple of examples here of overlarge sizes that can be trimmed down; any other sizes, please ask!
- To finish with a Flying Geese which is 3″ x 6″, you could cut small squares which are 4″ and large squares which are 7 ½” and then trim down the units afterwards to 3 ½” x 6 ½”.
- To finish with a Flying Geese which is 1 ½ x 3″, you need to cut small squares which are 2 ½” and large squares which are 4 ½” and then trim down the units afterwards to 2″ x 3 ½”
Method
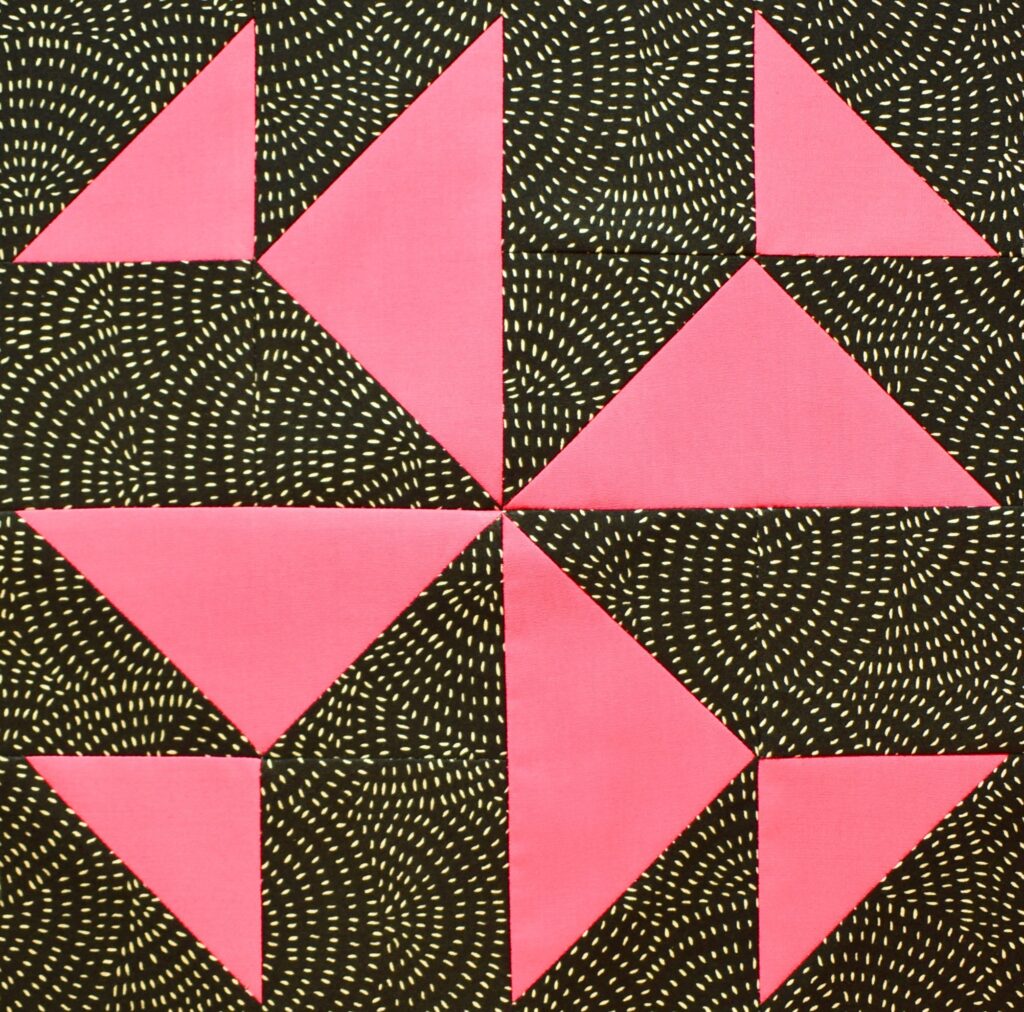
Making Four at a time
I wish I knew who had developed this method – its very clever!
If you start with one large square and four small squares, it makes four Flying Geese at a time.
Step by step instructions are below – or you can watch me demonstrate the method in this video:
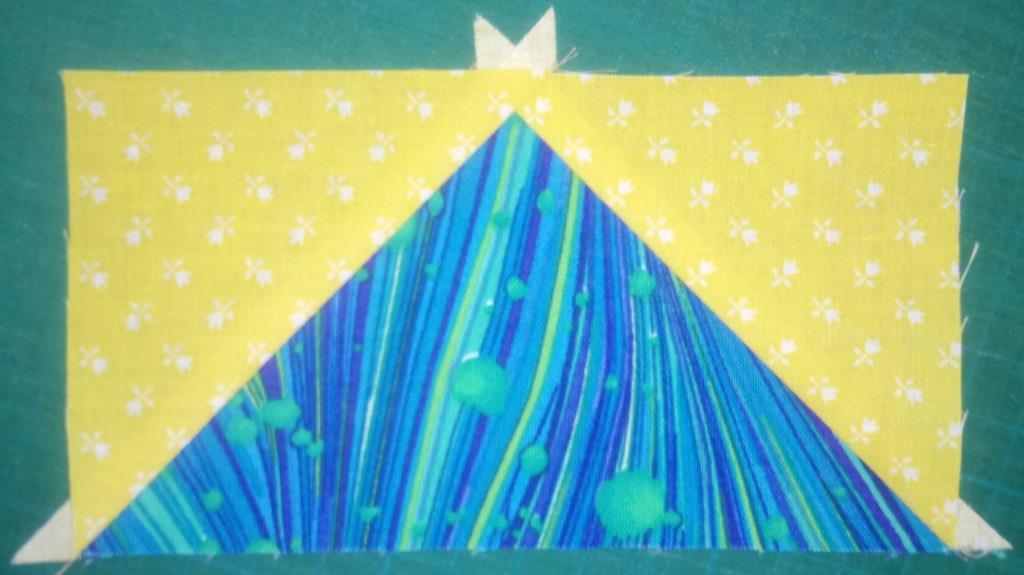
Draw a diagonal line across the wrong side of all four small squares.
Place two of the small squares right sides down onto opposite corners of the large square, lined up with the edges – they will overlap just a little at the centre. Make sure that the drawn lines run from corner to corner of the large square.
Pin like this, a little away from the lines, so that you can keep the pins in place while you stitch.
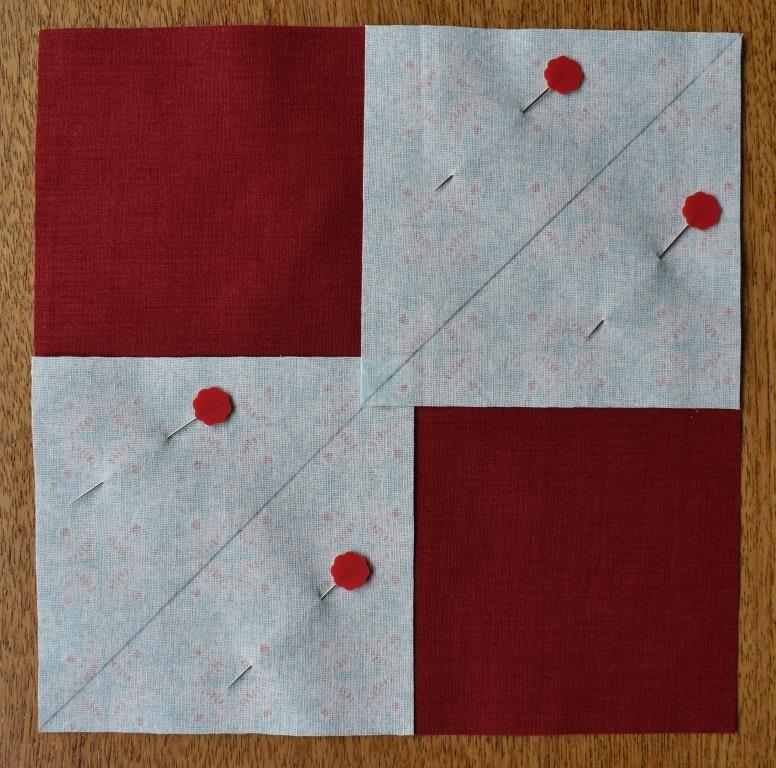
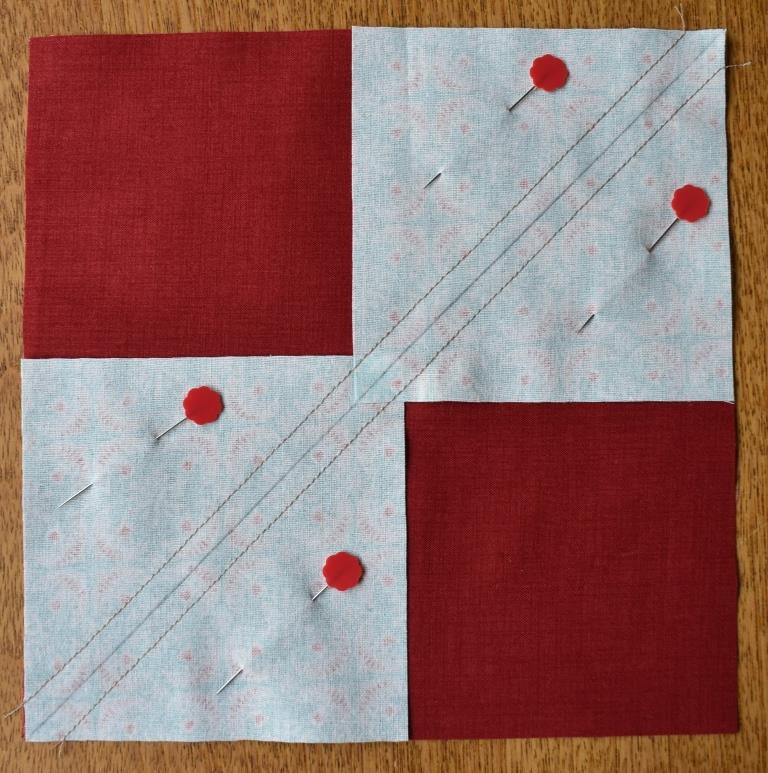
Stitch ¼” away from both sides of the lines.
Then cut along the line.
Open out the flaps, and press with the seam in the direction indicated by the pattern.
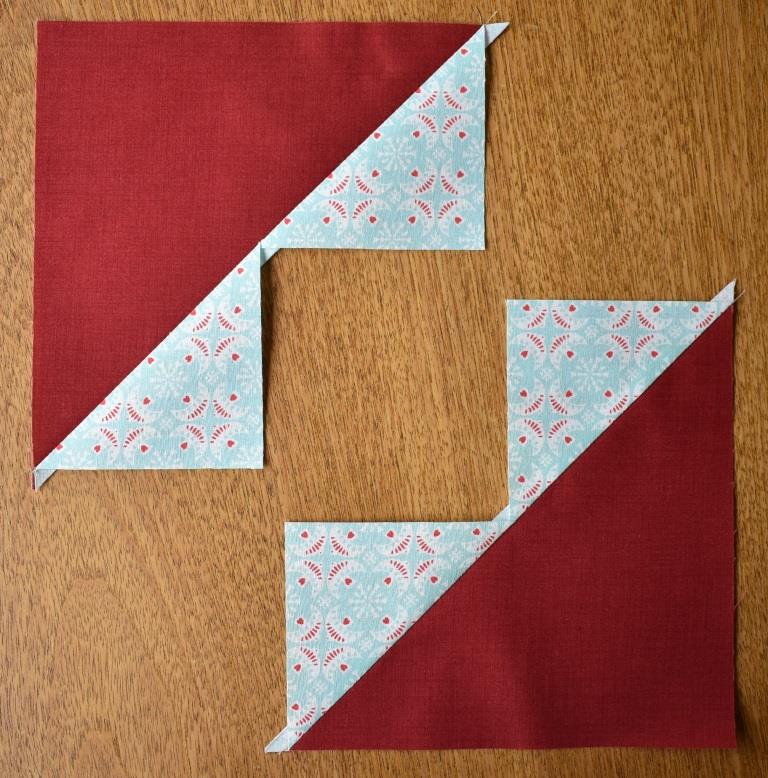
Here, it is pressed towards the small triangle, even though this is behind the lighter fabric.
You may be worried that this breaks a rule about always pressing behind the darker fabric, but it means that when this unit is combined into the block, it will meet other diagonal seams pressed in the opposite direction. This will reduce bulk, and give perfect points.
There is more about this in another page of the website; Pressing for Perfect Points if you are interested.
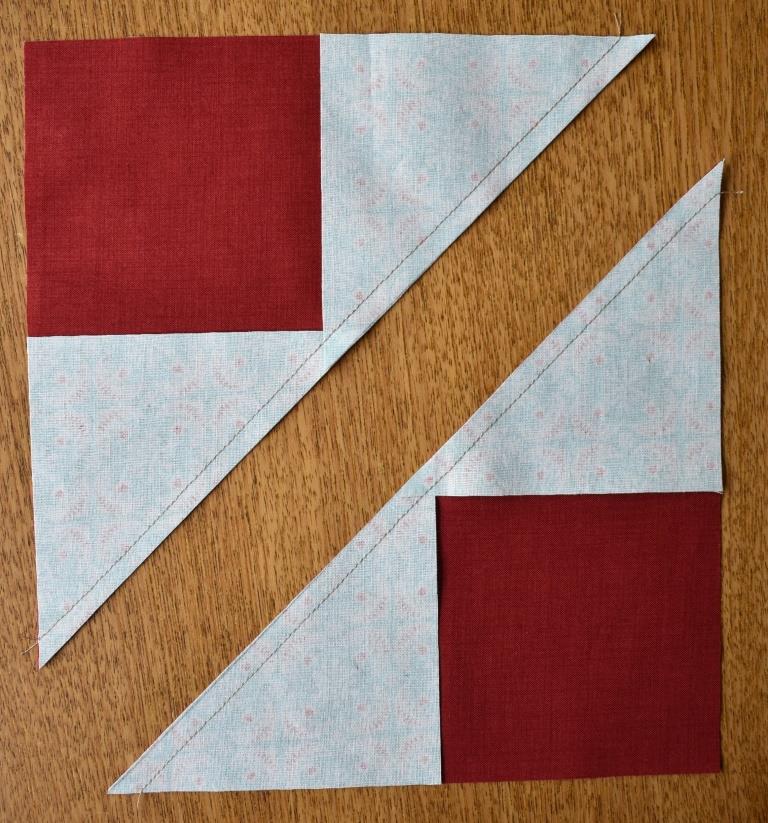
Now take the other two small squares, and place each of them right sides down onto the one of the strange shaped pieces you have.
Make sure that the diagonal line comes from the corner of the large triangle to the middle, as shown here.
Pin and stitch ¼” away from each side of the line.
Cut along the line, open out the flaps, and press the seam towards the small triangle. This pressing direction ensures that the position of the triangle point will be visible when the units are assembled later.
You have now made four Flying Geese units!
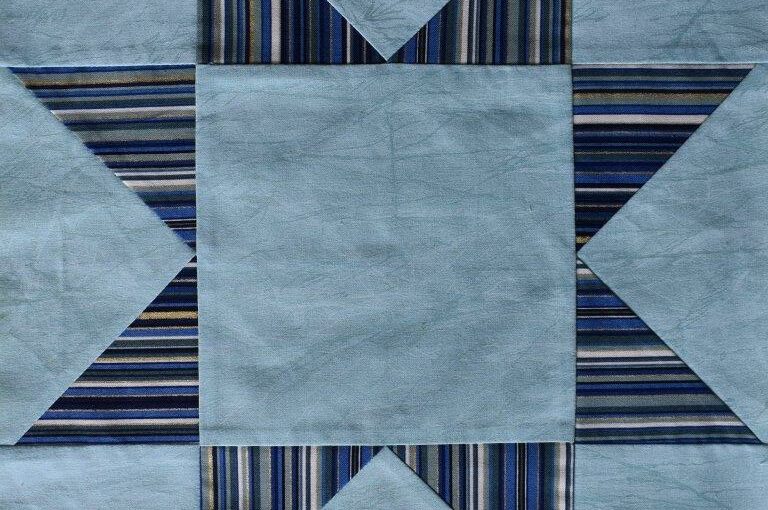
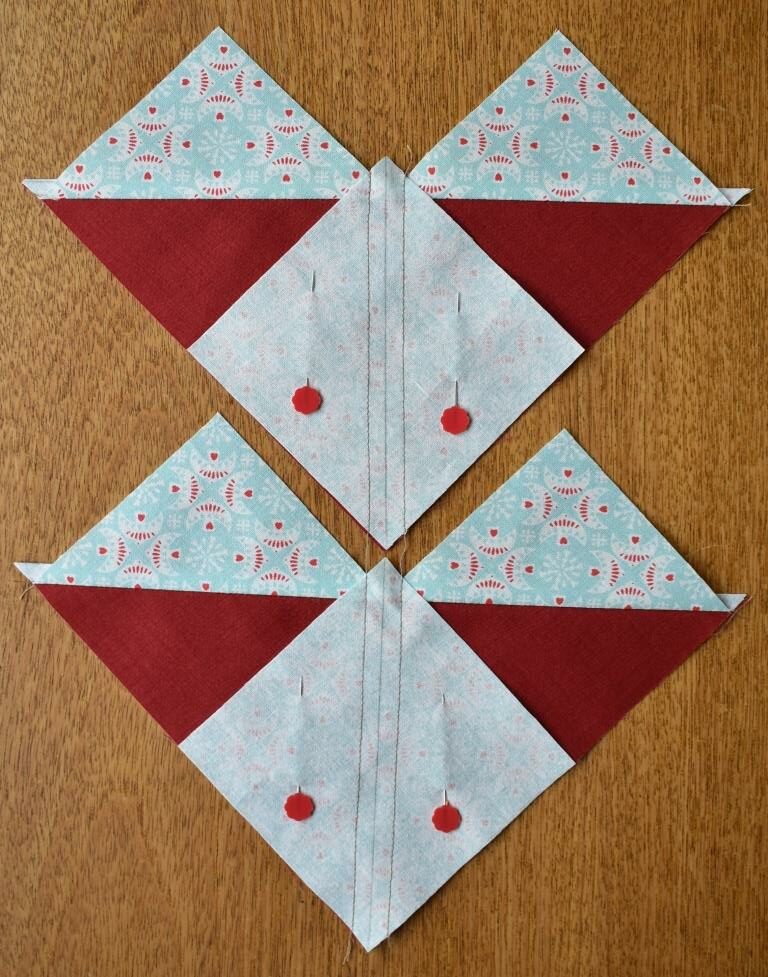
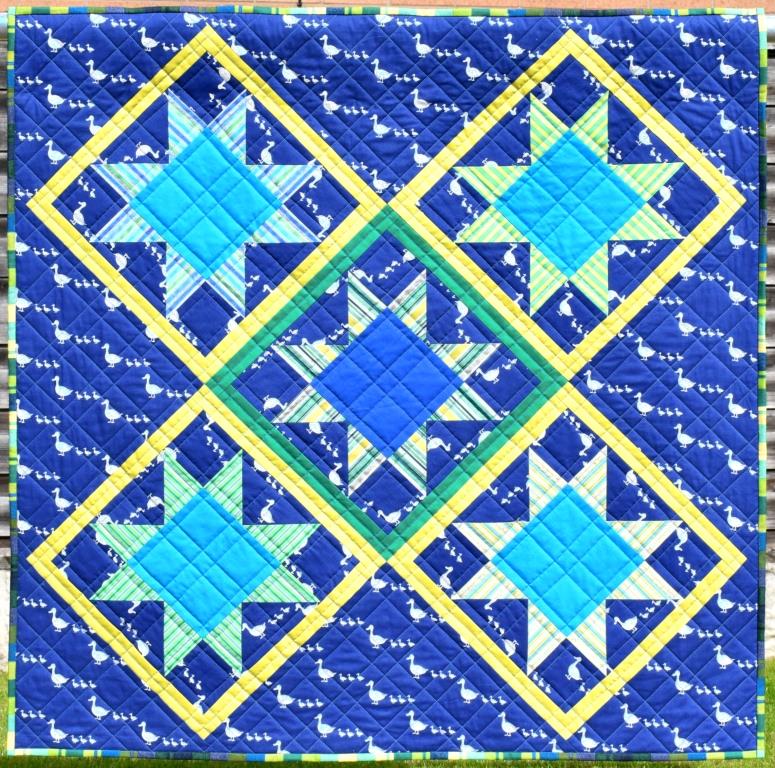
Evening Star block
Once you have made these four Flying Geese units, you have done most of the work to make the easier block provided for this instalment: Evening Star. All it needs are some small squares for the corners, and a large one for the middle.

The centre block can be made in a contrasting colour as here, or in the same colour as the star points – in which case the block name becomes Single Star.
Instructions for both are provided in the free download pattern.
If you would like to make a project using this simple block, I have designed “Baby Stars” which would be a perfect gift for a new arrival.
Pressing Direction for Flying Geese
The Evening Star pattern includes guidance telling you to press the first seams towards the large triangle, and the second seams towards the small triangles.
Why have I suggested that the seams are pressed like this? It is to avoid chopping off the points of the Flying Geese when they are stitched into a block.
To stitch the horizontal block seam correctly, it should pass through the intersection of the two diagonal seams – as shown by the black stitching in the left-hand Flying Geese units. If it is too low (like the red line), the point of the Flying Goose will be hidden in the seam allowance.
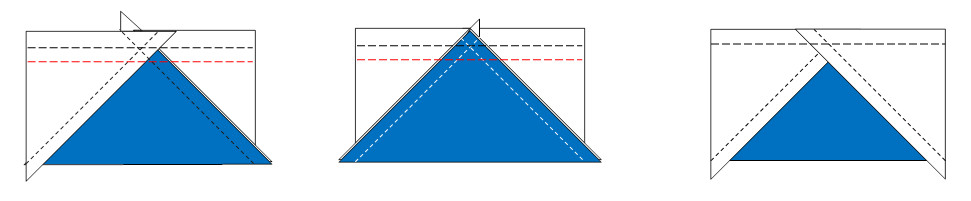
Provided the second Flying Geese seam is pressed away from the large triangle, as shown in the first diagrams, the two seams can easily be seen, and your new seam can be positioned to go exactly through the crossover (even if this is slightly more or less than the ideal ¼” seam allowance – the point is more important).
If however, you have pressed both towards the large triangle, as shown on the right hand diagram, this crossover point can’t be seen – so it is much more difficult to stitch the new seam in exactly the right place.
This video explains this in more detail:
As an aside, although you need to press “in/out” for this particular block, it actually doesn’t normally matter for the first one you stitch, but the second one must be pressed out, if the crossover is to be visible. (Don’t think of this as right and left, by the way, as you may not always stitch the same side first, particularly if you are quick-piecing)
As explained in the video, which you choose is determined by several factors; reducing bulk at the point, and/or ensuring that the diagonal seams meet the seams on the next units pressed in the opposite direction. I have worked out the best pressing directions for you in all the patterns I provide, so just follow the instructions, and you should achieve perfect points.
Dutchman’s Puzzle
The first block, Evening Star, is easy, as it had quite a lot of squares, and you only had to worry about getting the point at the middle of the Flying Geese correct.
Once you have mastered this, you can move onto a more challenging block: Dutchman’s Puzzle. Can you see that it is entirely made from Flying Geese, arranged in pairs?
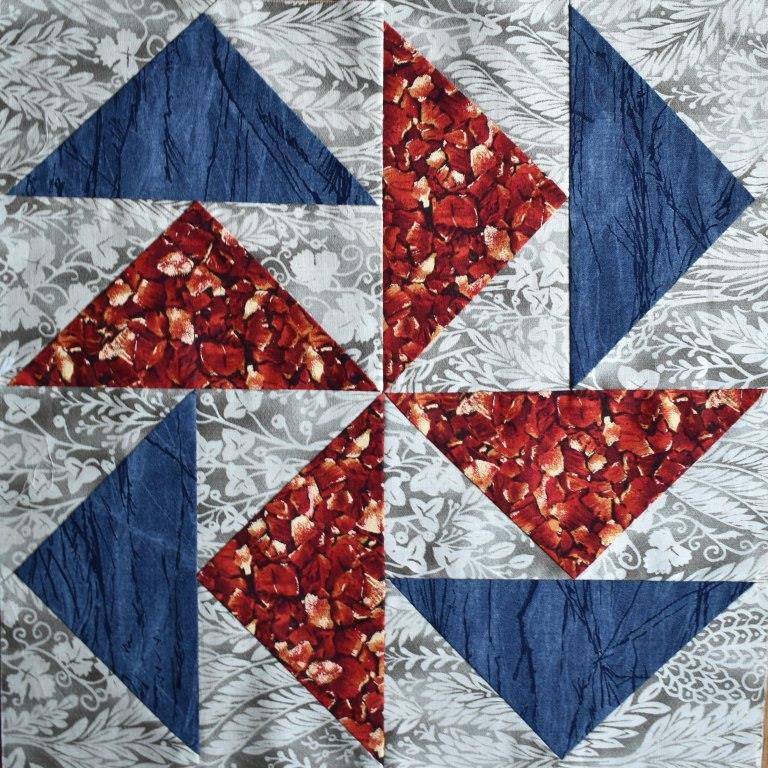
For this one, you need to be careful about the points at the sides of the Flying Geese as well, in addition to the pinwheel at the centre.
As with Evening Star, the key to keeping the points is to pin and stitch with the point of the Flying Geese units on top so that you can see the triangle point and aim to stitch exactly through it (even if this means a slight deviation from your ¼” seam – the point is more important!)
The free pattern includes full directions advising which way the seam allowances should be pressed to achieve the best results (and why!).
Mosaic
The same units can be rearranged to make another block: Mosaic.
Although the centre now does not have the tricky pinwheel found in Flying Dutchman, more care needs to be given to ensuring that the points meet properly at the sides.
Consideration of the pressing direction will help ensure that the diagonal seams meet pressed in opposite directions – but as the quick piecing method is used, you need to be more careful than usual. Instructions for this are included on the same pattern as Dutchman’s Puzzle.
Many other blocks use Flying Geese units too; why not try Rising Star or Festival Star? Each of these patterns is only £2.
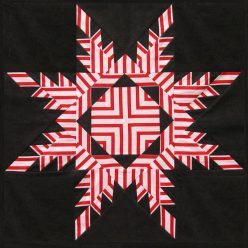
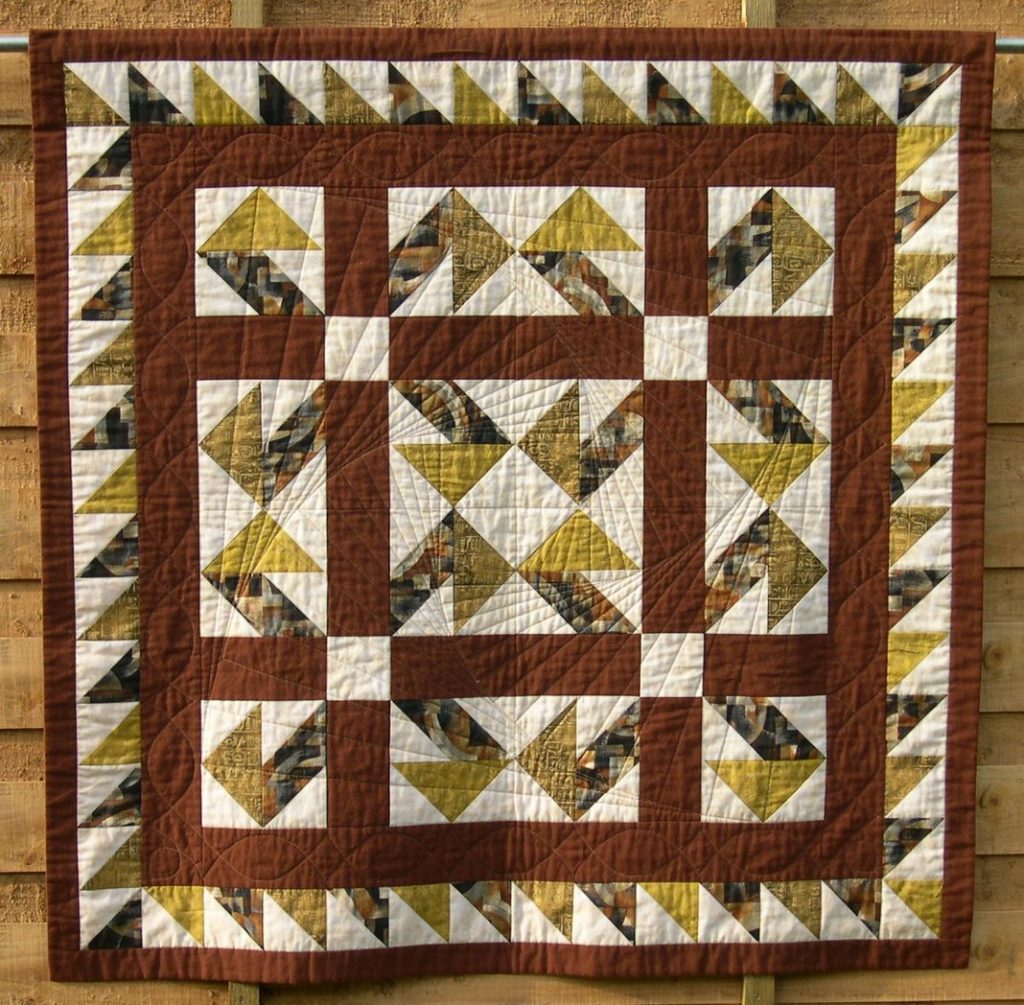
This was a quilt I made many years ago, which included an enormous number of Flying Geese units. (pattern not available)
Notice the Hanging Diamonds quilting pattern – an effective use of an overall grid.
If you are a slightly more experienced quilter, and would like to make a larger project which includes Flying Geese units, consider making this lap quilt: Jack-in-a-Box. This uses a different method to construct the Flying Geese units, which produces half-square triangle units at the same time – so they are all ready when you need to make the border.
This is the third instalment of the Skilful Skyful series. By working through these tutorials, you can build up your skills in machine-stitched block patchwork, making a set of 12″ blocks which could be combined if you wished into a Sampler Quilt.
- Part 1: Half-square triangles
- Part 2: Quarter-square triangles
- Part 3: Flying Geese
- Part 4: Square-in-a-Square
- Part 5: Four-Square
- Part 6: Half/Quarter Square triangle
- Part 7: True Eight Point Star
- Part8: Half-Rectangle Triangles.
Other pages about machine-stitched patchwork can be found in the Techniques section